Get started
On this page
Data Source Integration
Fyrefuse enables seamless integration with a variety of data sources, offering both internal and external storage solutions. This guide provides an overview of these integration options and step-by-step instructions for connecting your own data repositories.
Data Storage & Integration Options
Fyrefuse provides flexible storage and integration options to accommodate diverse data needs. Whether you're working with structured databases, unstructured files, or real-time streaming data, Fyrefuse ensures smooth connectivity and accessibility.
Self-managed Storage
Fyrefuse leverages leading Open Table Formats (OTFs) like Apache Iceberg and Delta Lake to implement a data lakehouse architecture on top of a S3-compatible object storage. This design optimizes storage for analytical workloads, delivering high performance and efficiency without requiring additional infrastructure.
External Data Sources
Fyrefuse allows you to connect external data repositories, making it easy to integrate various data sources into your workflows. External connections are categorized as follows:
- SQL Databases: Whether you use MySQL, PostgreSQL, Microsoft SQL Server, Trino, Teradata, or Snowflake, Fyrefuse lets you run queries seamlessly across multiple database engines.
- NoSQL Databases: Fyrefuse also supports integration with NoSQL solutions like MongoDB, Cassandra, and DynamoDB, offering flexibility for non-relational data structures.
- Filesystem Storage: Need to connect to distributed file storage? Fyrefuse integrates with NFS, SFTP, and HDFS, allowing direct access to file-based data.
- Streaming: Streaming and real-time data processing are covered with support for RabbitMQ, Pravega, Amazon SQS, and Apache Kafka.
Additionally, new connectors are continuously being developed, and custom integrations can be implemented upon request.
Create a Repository
Integrating an external data source into Fyrefuse is simple and intuitive. Here’s how you can do it:
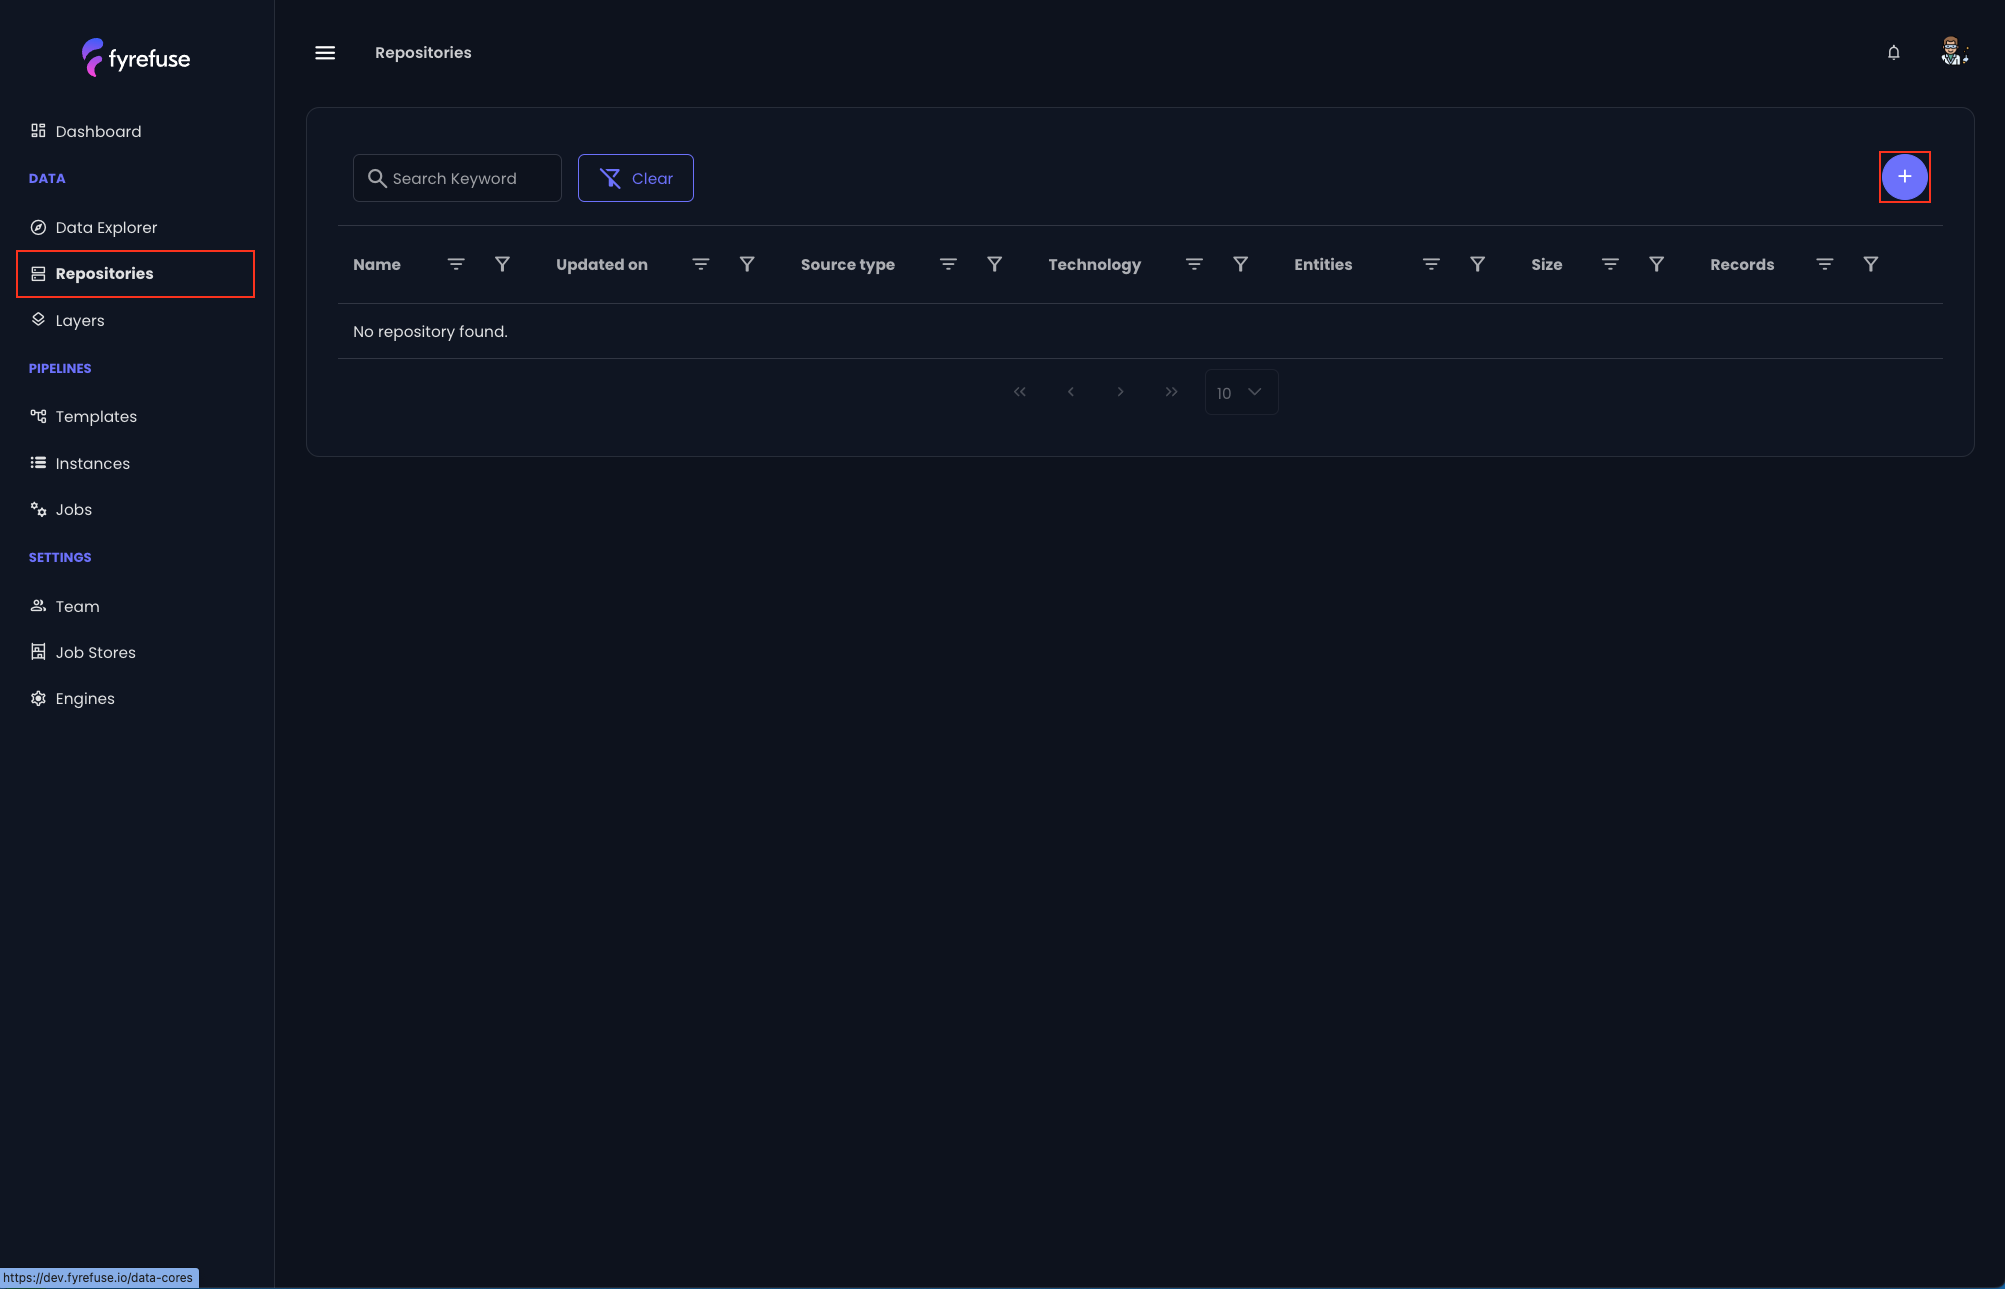
To begin, navigate to the Repositories section in the left-hand menu. Here, you'll find an option to add a new data source by clicking on the ‘+’ button in the top-right corner. This will open a new configuration panel where you'll need to provide some basic information.

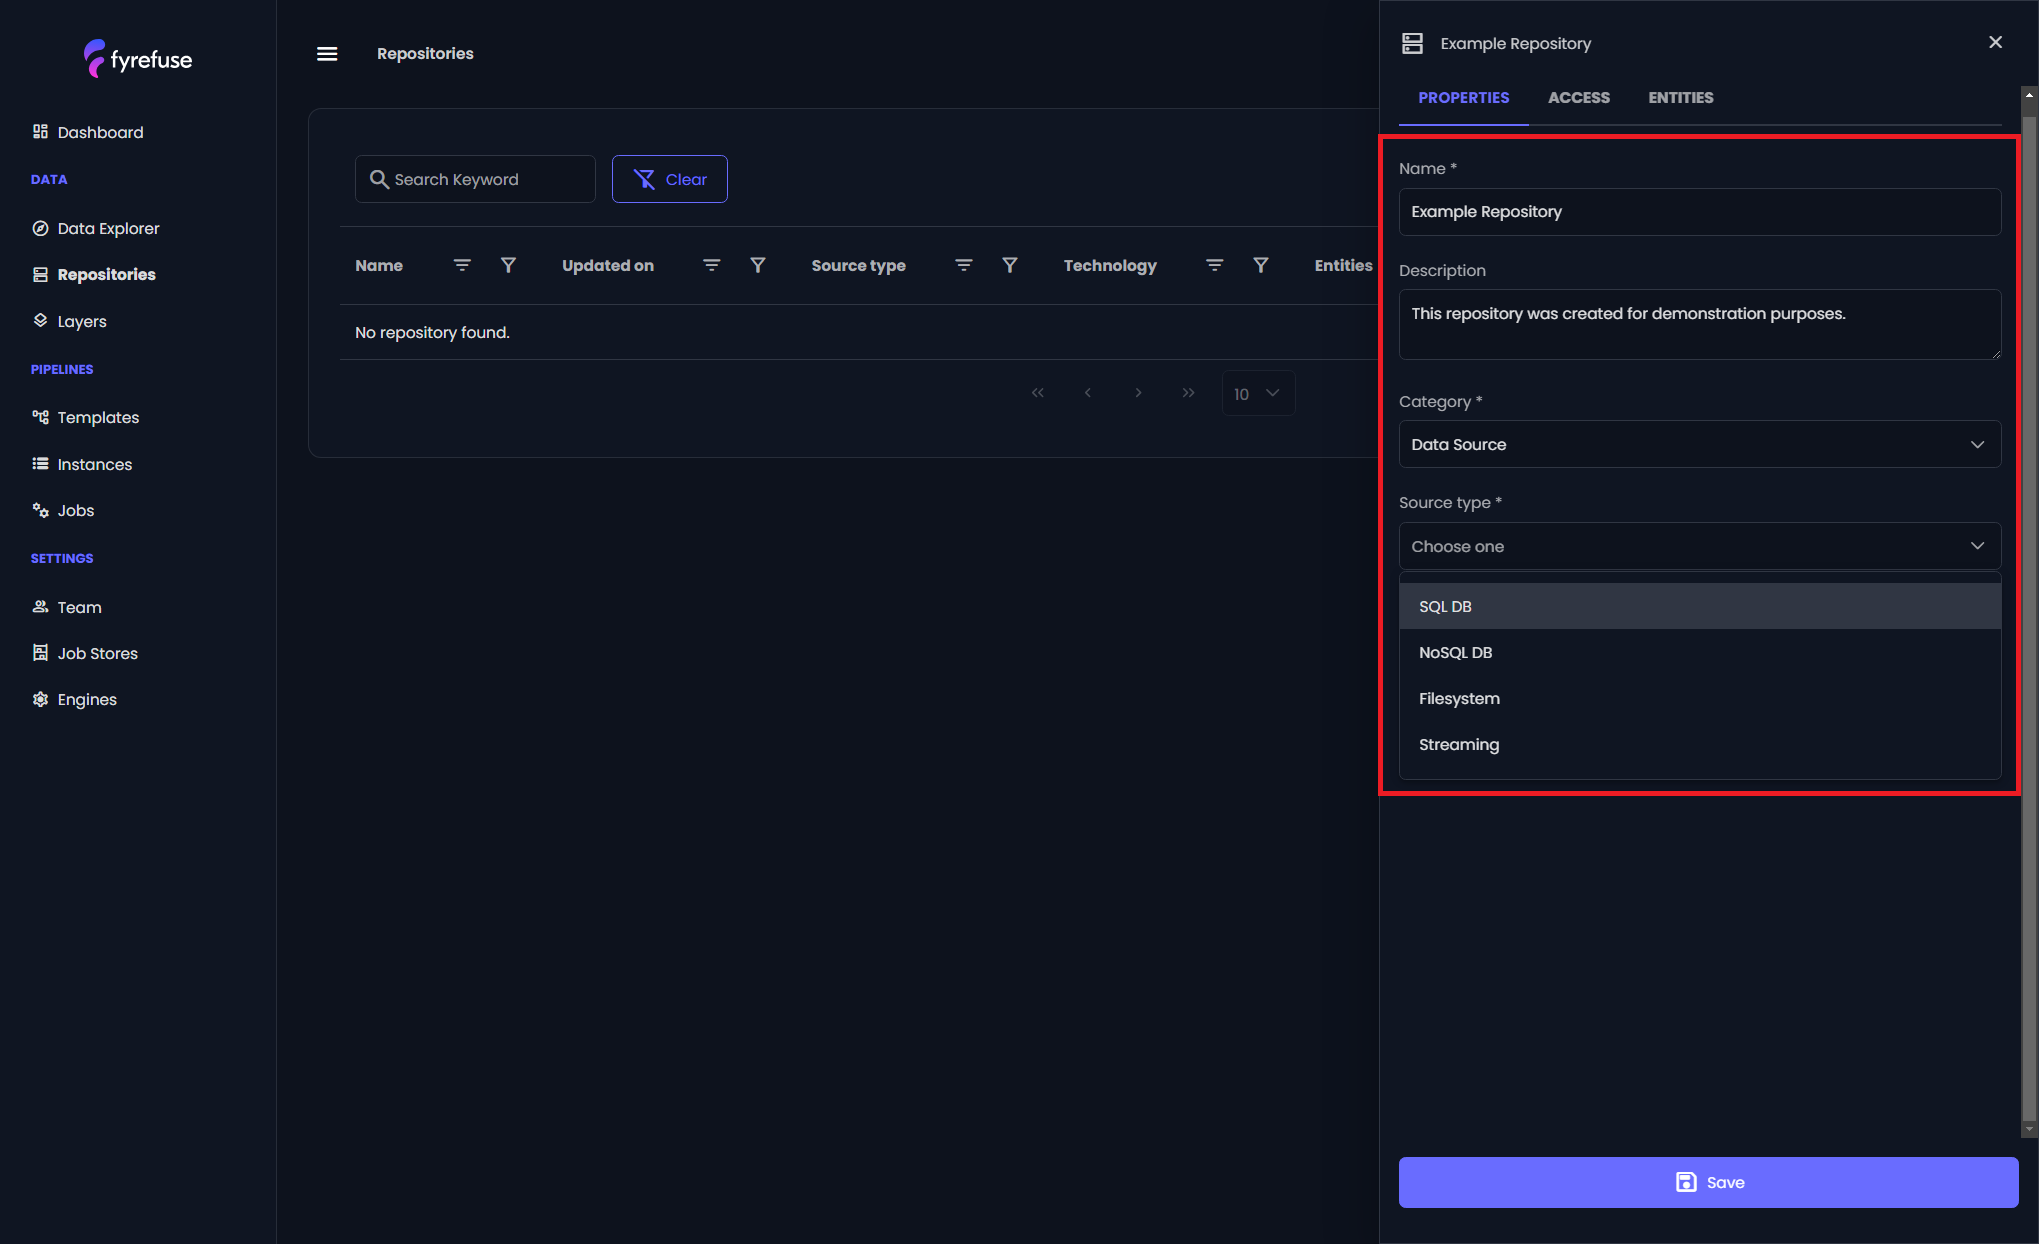
Start by entering a name and description for your data source. These details will help you identify the source later on. After that, you’ll choose the type of data source you wish to connect to: whether it’s a SQL database, a NoSQL database, a Filesystem, or a Streaming (such as message queues).

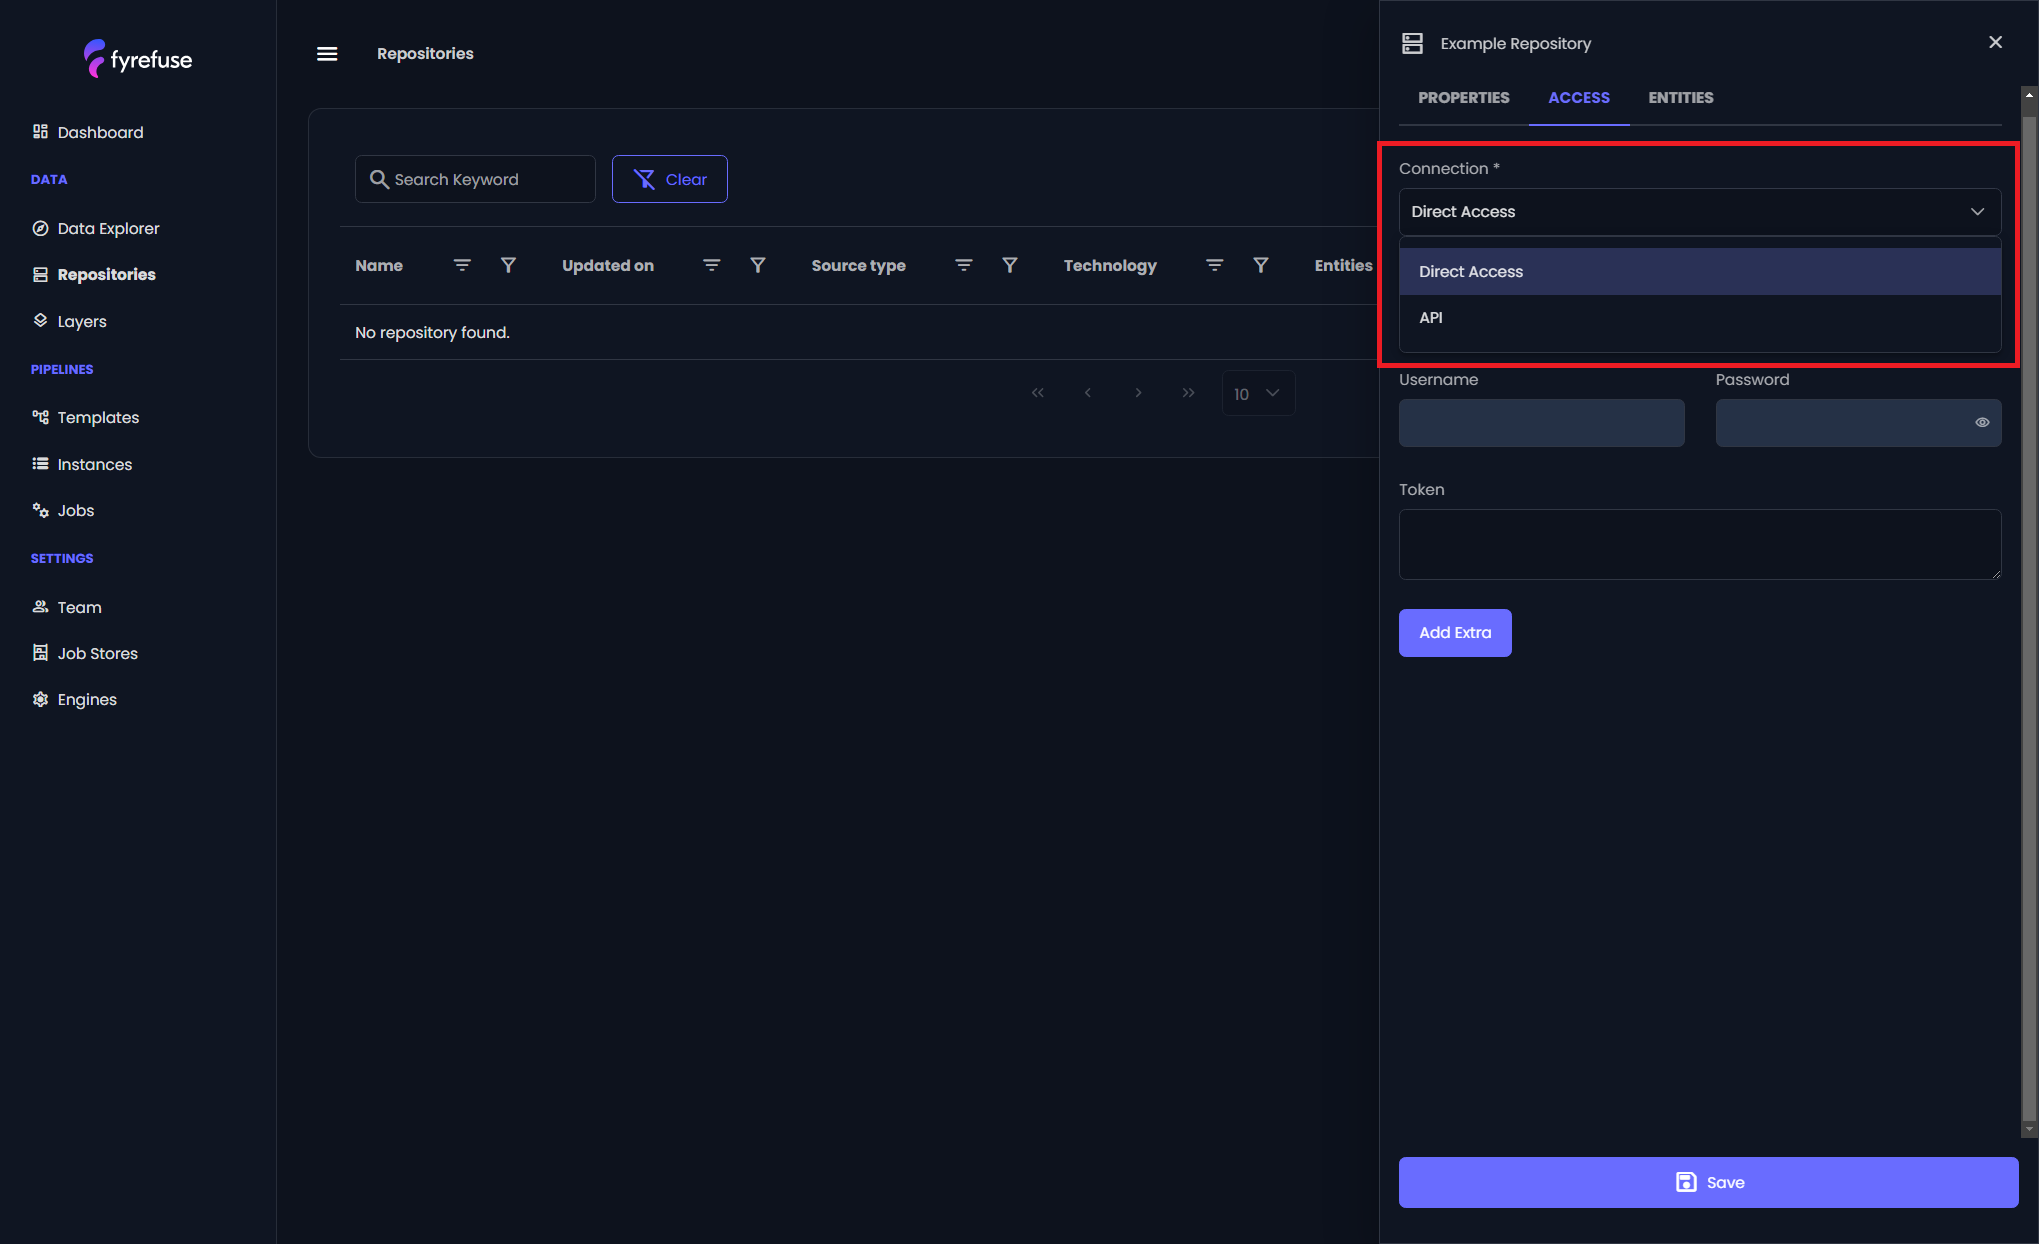
Once you’ve selected the appropriate category, you’ll choose the specific technology or service you’re integrating with (e.g., MySQL, MongoDB, HDFS, RabbitMQ, etc.). Once done, navigate to the Access subpanel to configure the connection parameters. Fyrefuse offers two connection methods:
- Direct Access – Specify the host and port to establish a direct database connection.
- API Connection URL – Provide a connection URL that encapsulates all necessary parameters.

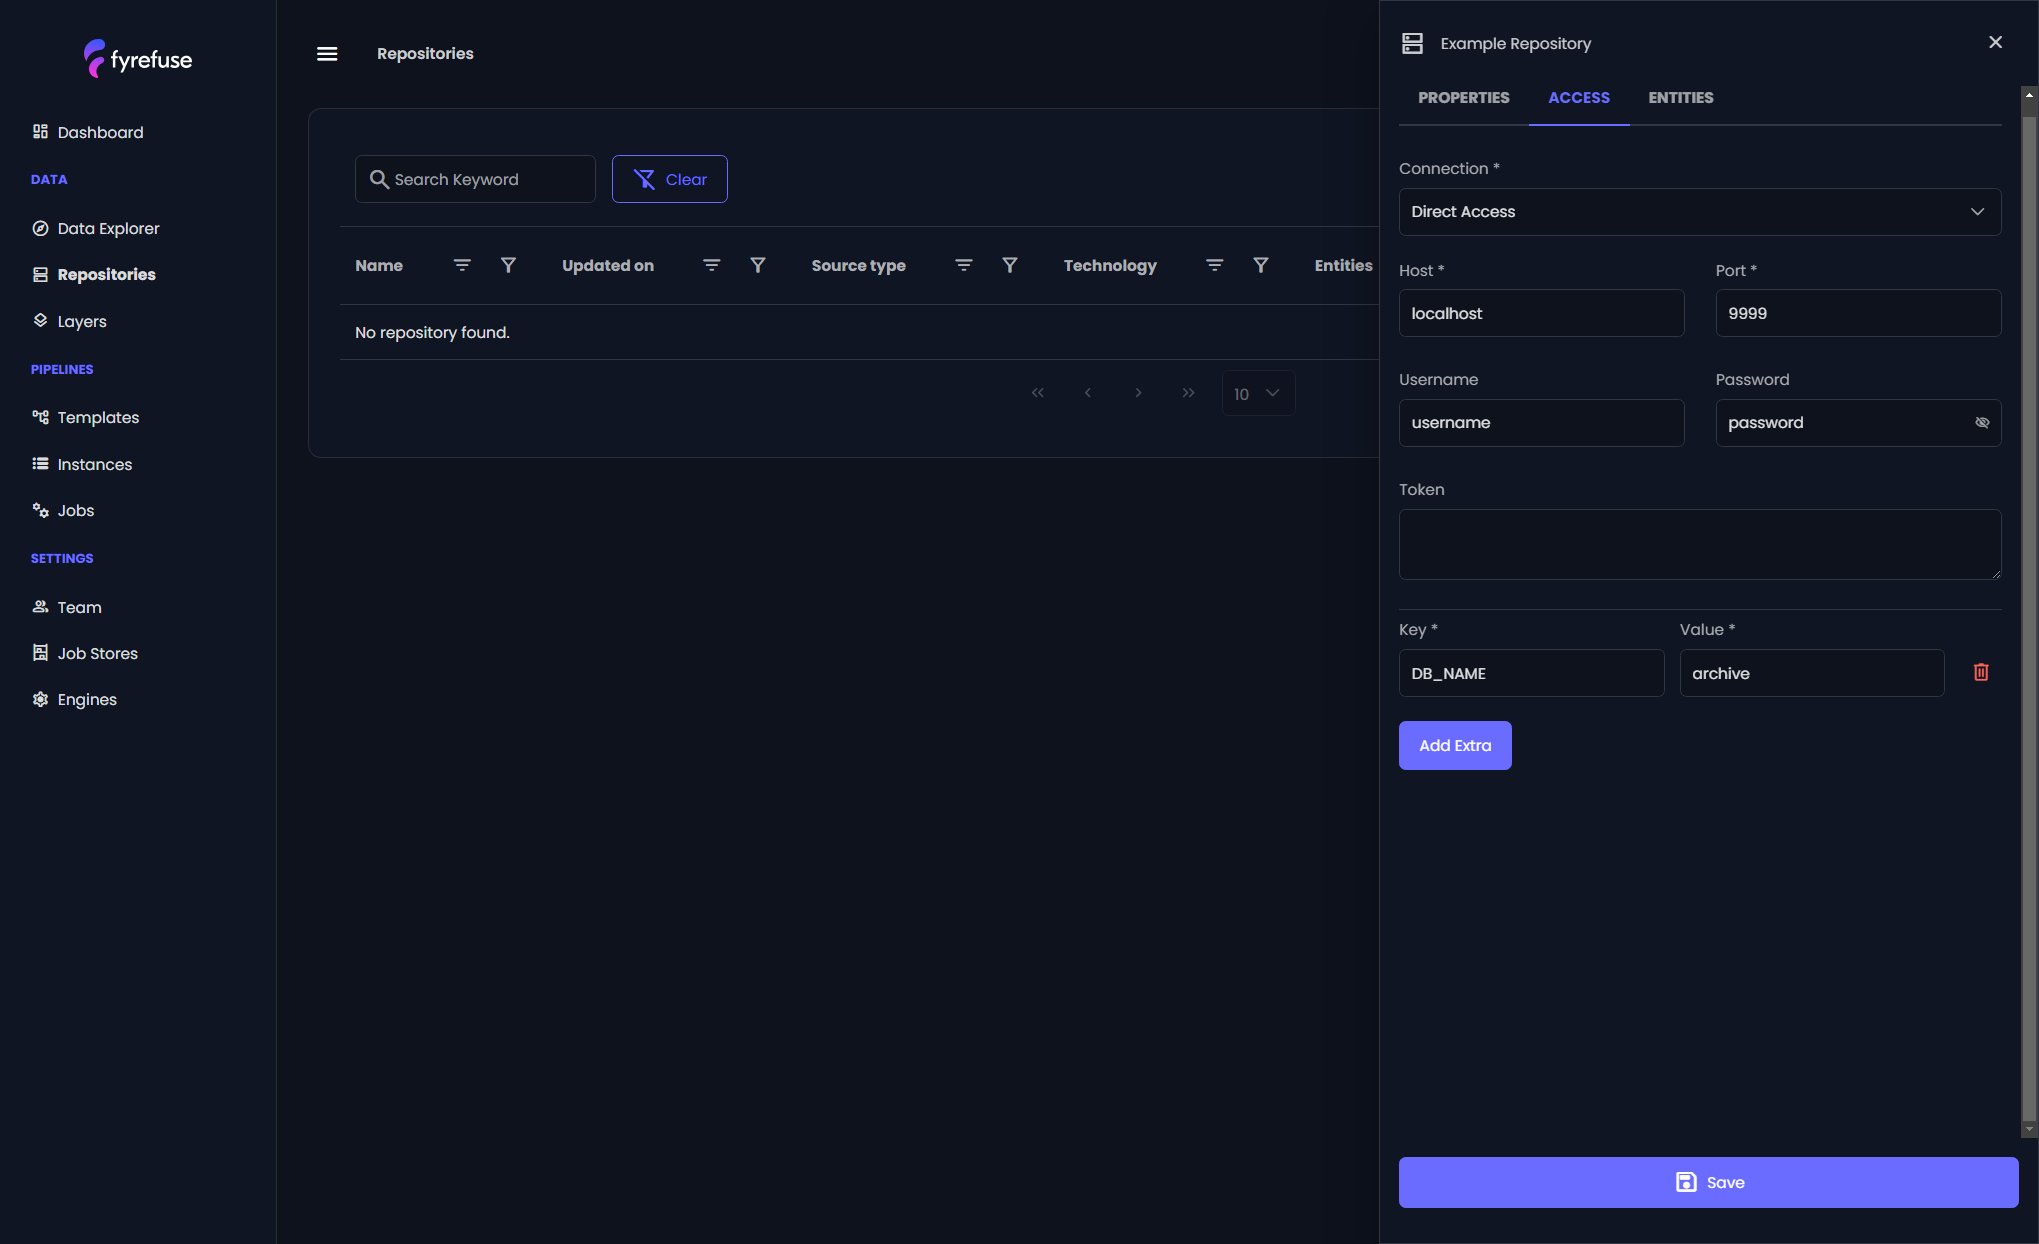
The connection configuration will vary depending on the type of source, so Fyrefuse will guide you through the necessary parameters.These parameters typically include authentication credentials like usernames and passwords, along with connection strings, URLs, and port numbers. You’ll also find technology-specific settings that you can configure to ensure smooth connectivity.

Once everything is set, click Save, and Fyrefuse will establish the connection. It’s a good idea to test the connection to make sure everything is set up correctly before you start querying your data.