Integrate external code
On this page
Integrate external code
Job Store
The Job store in Fyrefuse represents the bidirectional connection towards a git repository that is used for storing and managing Fyrefuse custom Jobs.
Connect to a Job Store
The procedure for registering a Job store is very simple:
- Click the "+" icon in the top-right corner.
- Fill out the form:
- Enter a job store name
- Select the provider from the list
- Specify the host url (for Gitlab Cloud it is https://gitlab.com)
- Provide the Project id (Git repository id)
- Provide the private access token (or username and password if supported by the provider)
- Click Save to finalize the process.
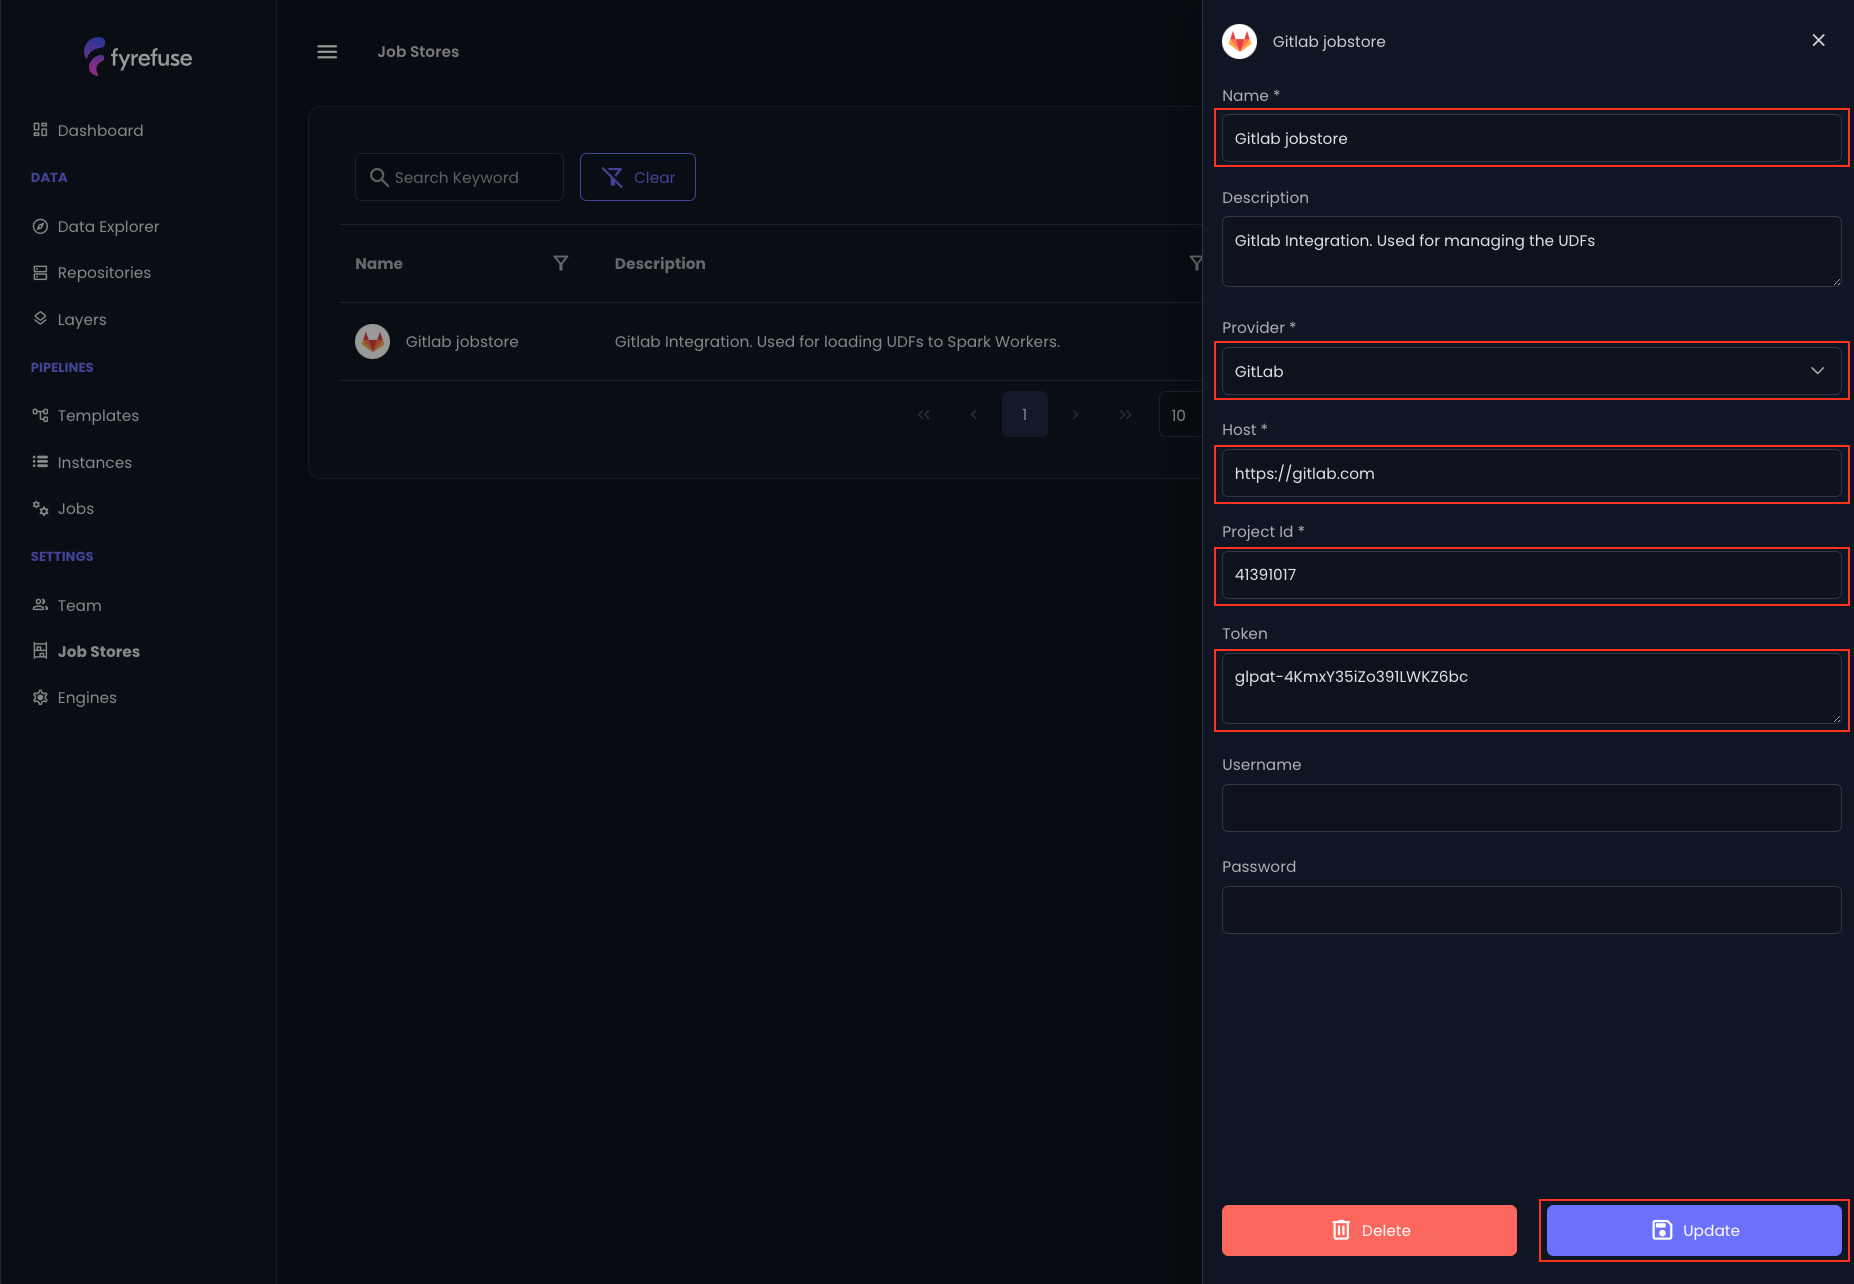
If the connection is successful, the new job store will appear in the list.
Fyrefuse at this point will execute an auto sync with the remote in order to discover and import existing jobs (available in the Jobs section).
Define external jobs
While Spark SQL’s built-in functions cover many use cases, there are times when they are not enough and there is the need to use external custom functions. In such cases, it is possible to extend the pipelines with custom User-Defined Functions (UDFs). This guide outlines the key constraints and best practices for creating UDFs from scratch.
Understanding UDFs
UDFs allow you to extend Spark’s functionality by creating custom python functions that can be registered in the pipelines’ workspace and used across multiple DataFrames and SQL expressions.
Before writing a UDF, always check whether a similar function already exists in Spark SQL’s built-in functions. Spark continuously adds new functions with each release, so it's best to avoid reinventing the wheel whenever possible.
UDFs should be carefully designed to prevent performance bottlenecks and optimization issues. Poorly implemented UDFs can negatively impact execution speed, so always consider using Spark’s native functions first.
UDF Types in Fyrefuse
- Single-File UDF – A standalone .py file containing the UDF.
- Bundle UDF – A .zip archive that includes a single .py file along with any additional resources required by the function.
General Requirements (for both Single-File and Bundle UDFs)
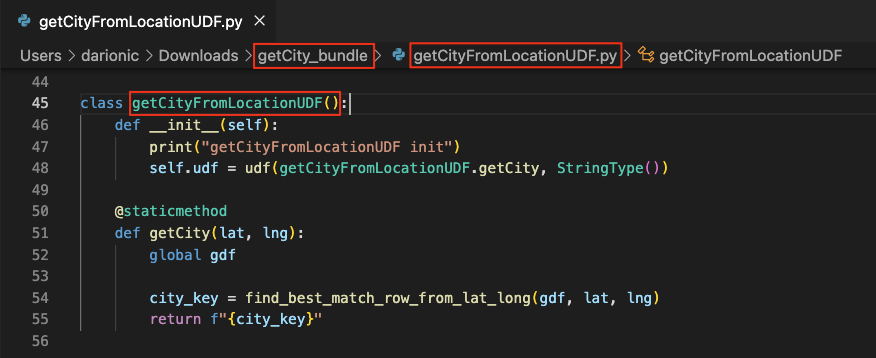
The name of the .py file must match the UDF’s class name inside it.
Bundle-Specific Requirements
- The bundle name must end with _bundle (e.g., getCity_bundle.zip).
- The bundle must contain only one .py file.
The UDF main class
The most critical part of creating a UDF is defining its main class correctly.
This class follows a standard format because the Fyrefuse Execution Manager (FEM) expects UDFs to be structured in a specific way. To ensure compatibility, it's essential to adhere to the required naming conventions and implement all necessary methods.
Key Requirements:
- The class name (e.g., getCityFromLocationUDF) must match the .py file name.
- The constructor (__init__) initializes the custom method (e.g., getCity) as a callable UDF within the pipeline execution.
- The UDF method must be defined inside the main class and can have an arbitrary name and number of parameters.
- (UDF parameters are passed when the function is invoked in the SQL step.)
- The UDF must return a single element.
Packages and external files import
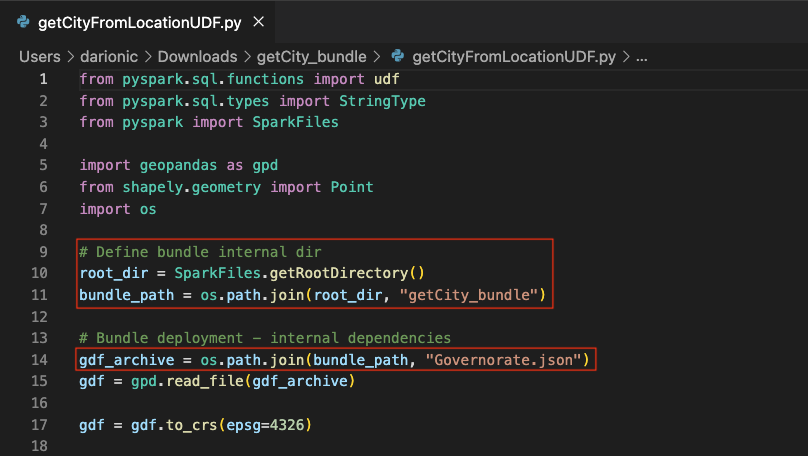
At the heading of the file, you need to import the required packages and any external files included in the bundle.
One crucial step is defining bundle_path, which should be the result of joining Spark’s root directory with the bundle’s directory name (which matches the .zip file name).
This is necessary because, during spark-submit, all required pipeline files are copied into a temporary directory created alongside the Spark session. The only way to retrieve this directory is through the getRootDirectory function.
Now that the UDF is correctly defined, you are ready to import the bundle on Fyrefuse!
Import a new Job
Once everything is set up correctly, the Job Store has been added and the UDF has been defined, you’re ready to add it to your Fyrefuse project under the "Jobs" section.
Steps to Add Your UDF:
- Click the "+" icon in the top-right corner.
- Fill out the form
- Enter a job name (no restrictions).
- Select a Job Store from the available options. (Ensure that at least one Job Store exists in the project.)
- Upload your UDF file:
- Select the file from your local system or drag and drop it into the upload area.
- Click Save to finalize the process.
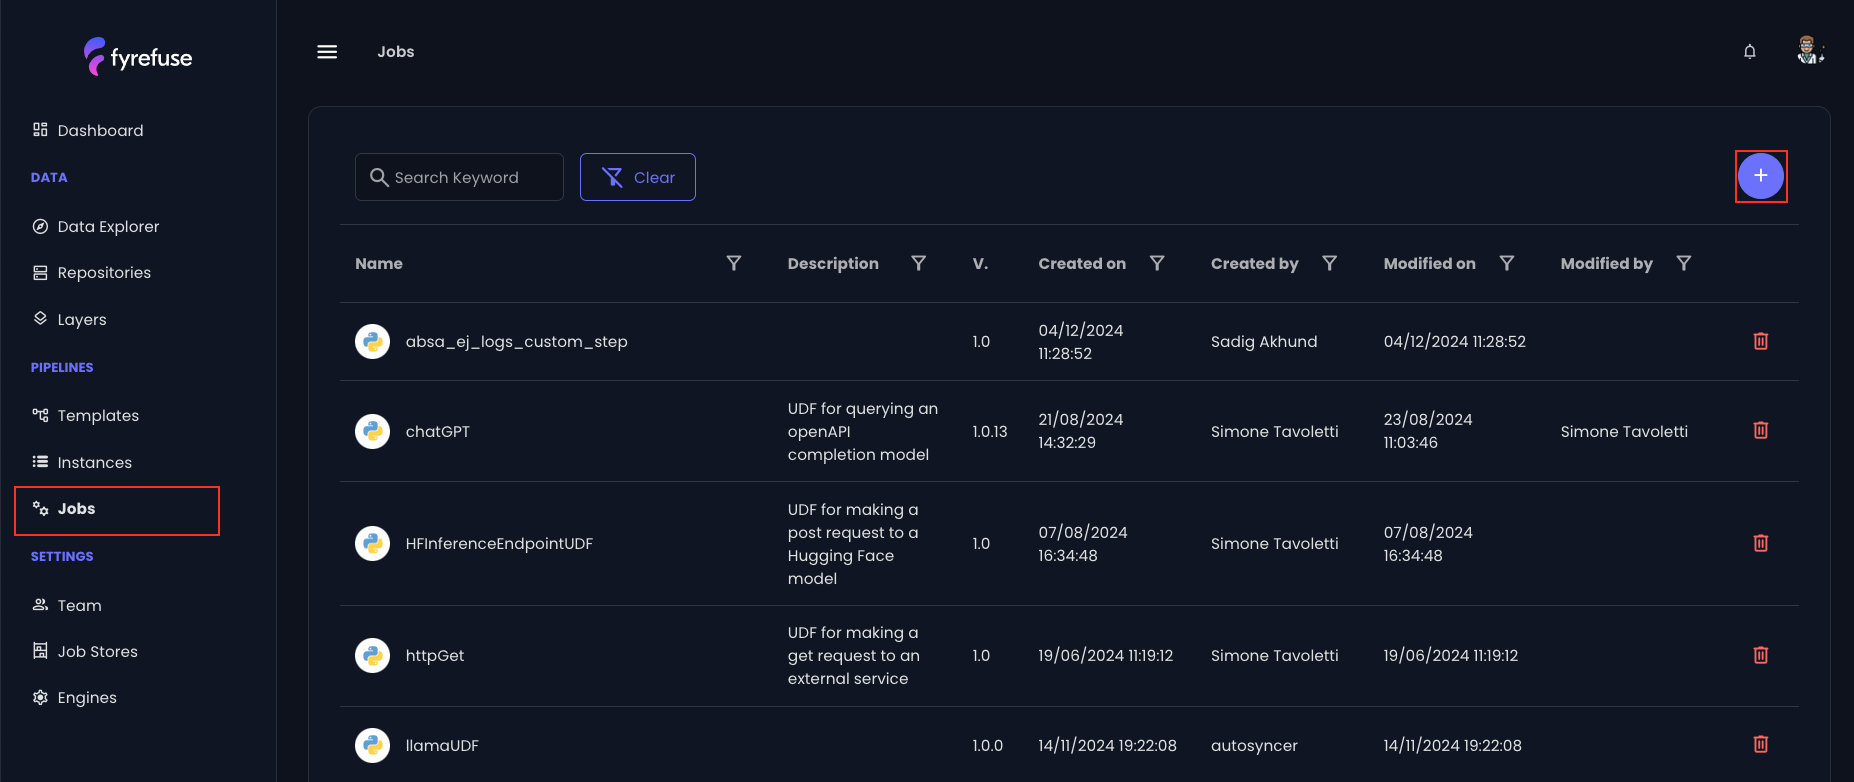
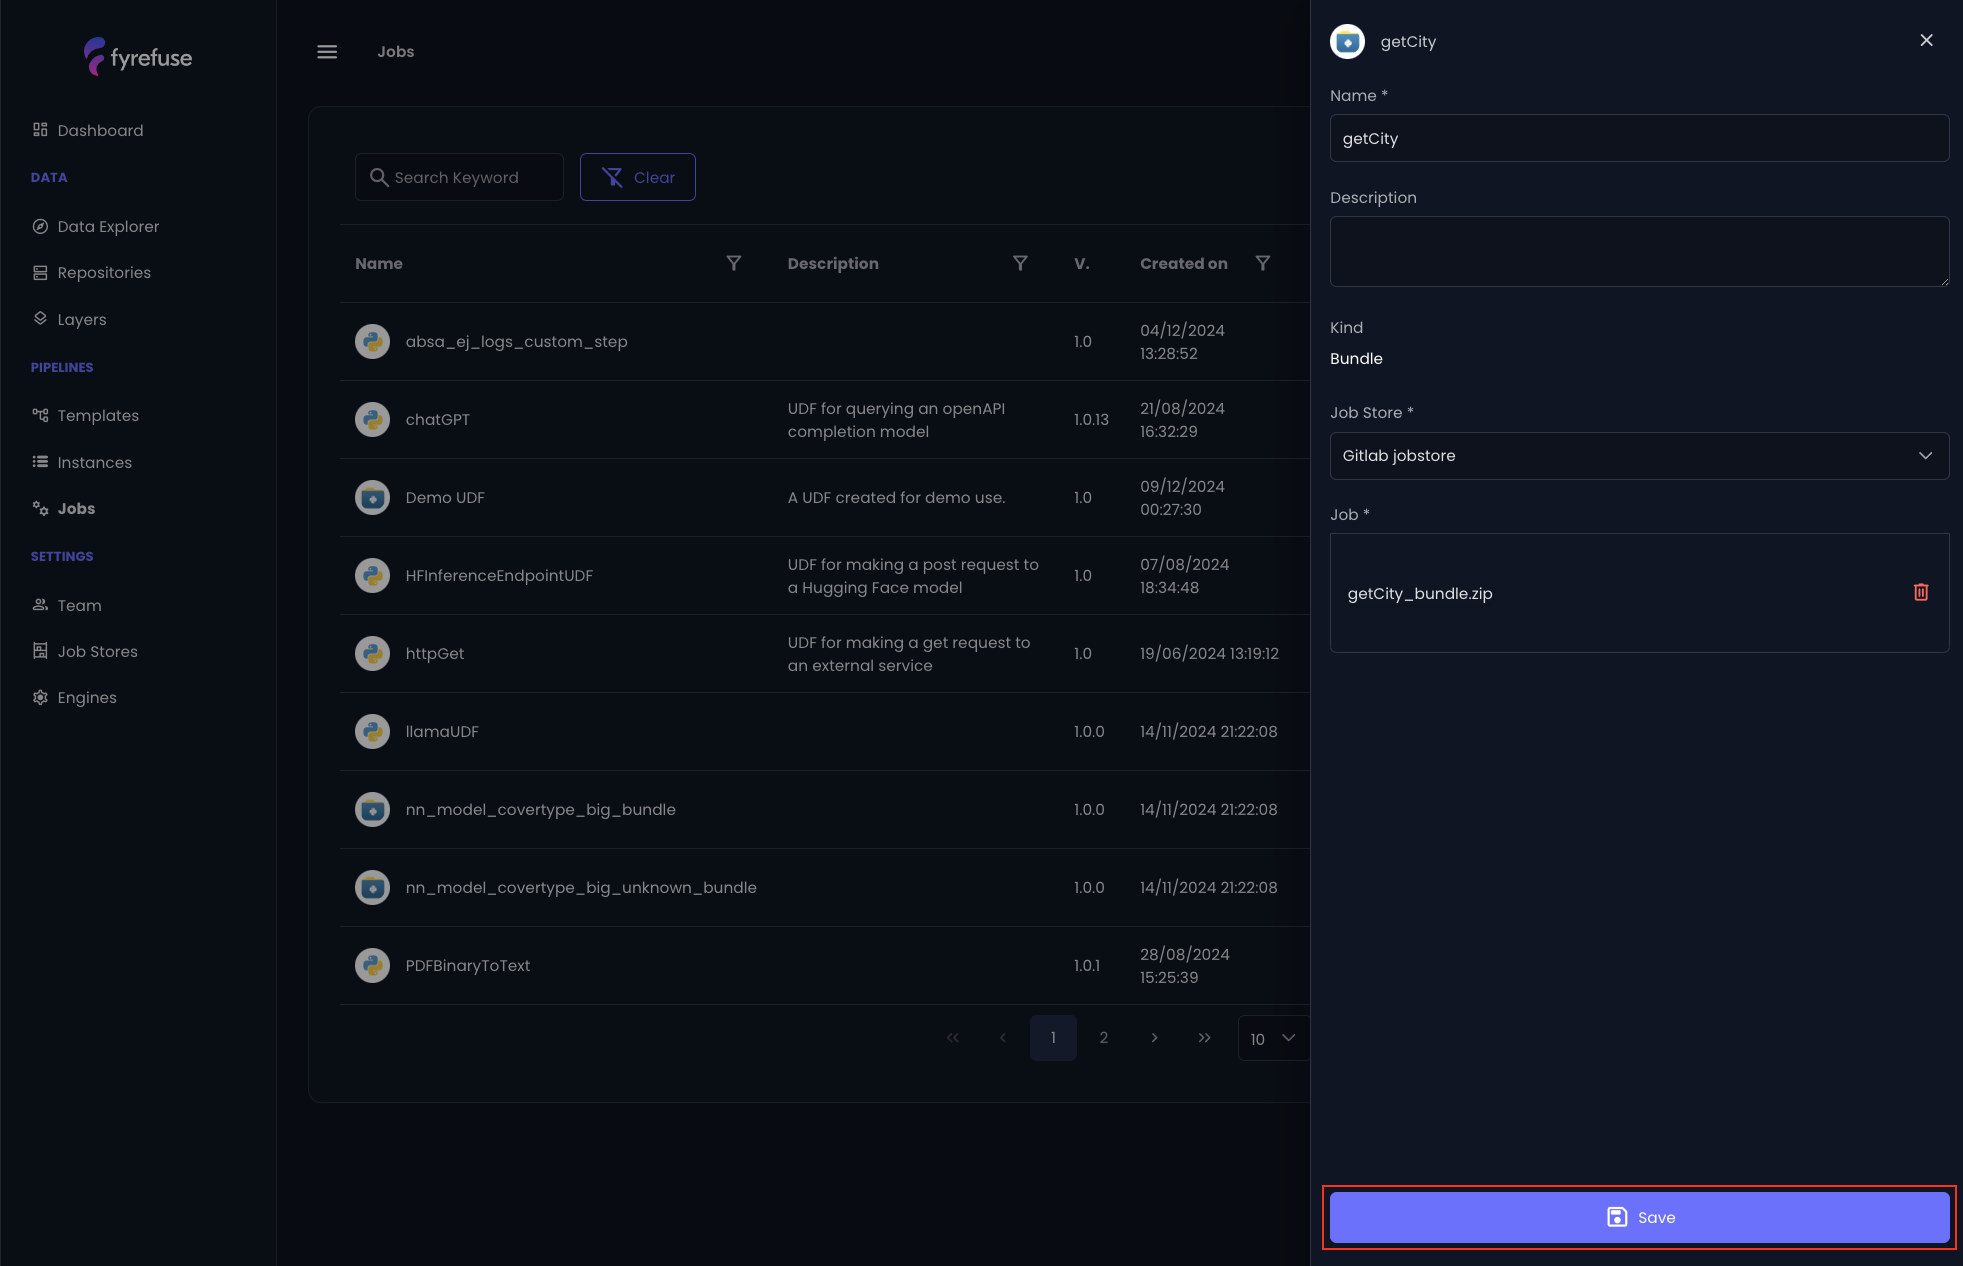
Fyrefuse will be responsible for registering the new job to the job stores and make it available to be used within the pipelines. If the operation ends correctly the new entry will be visible in the jobs list.
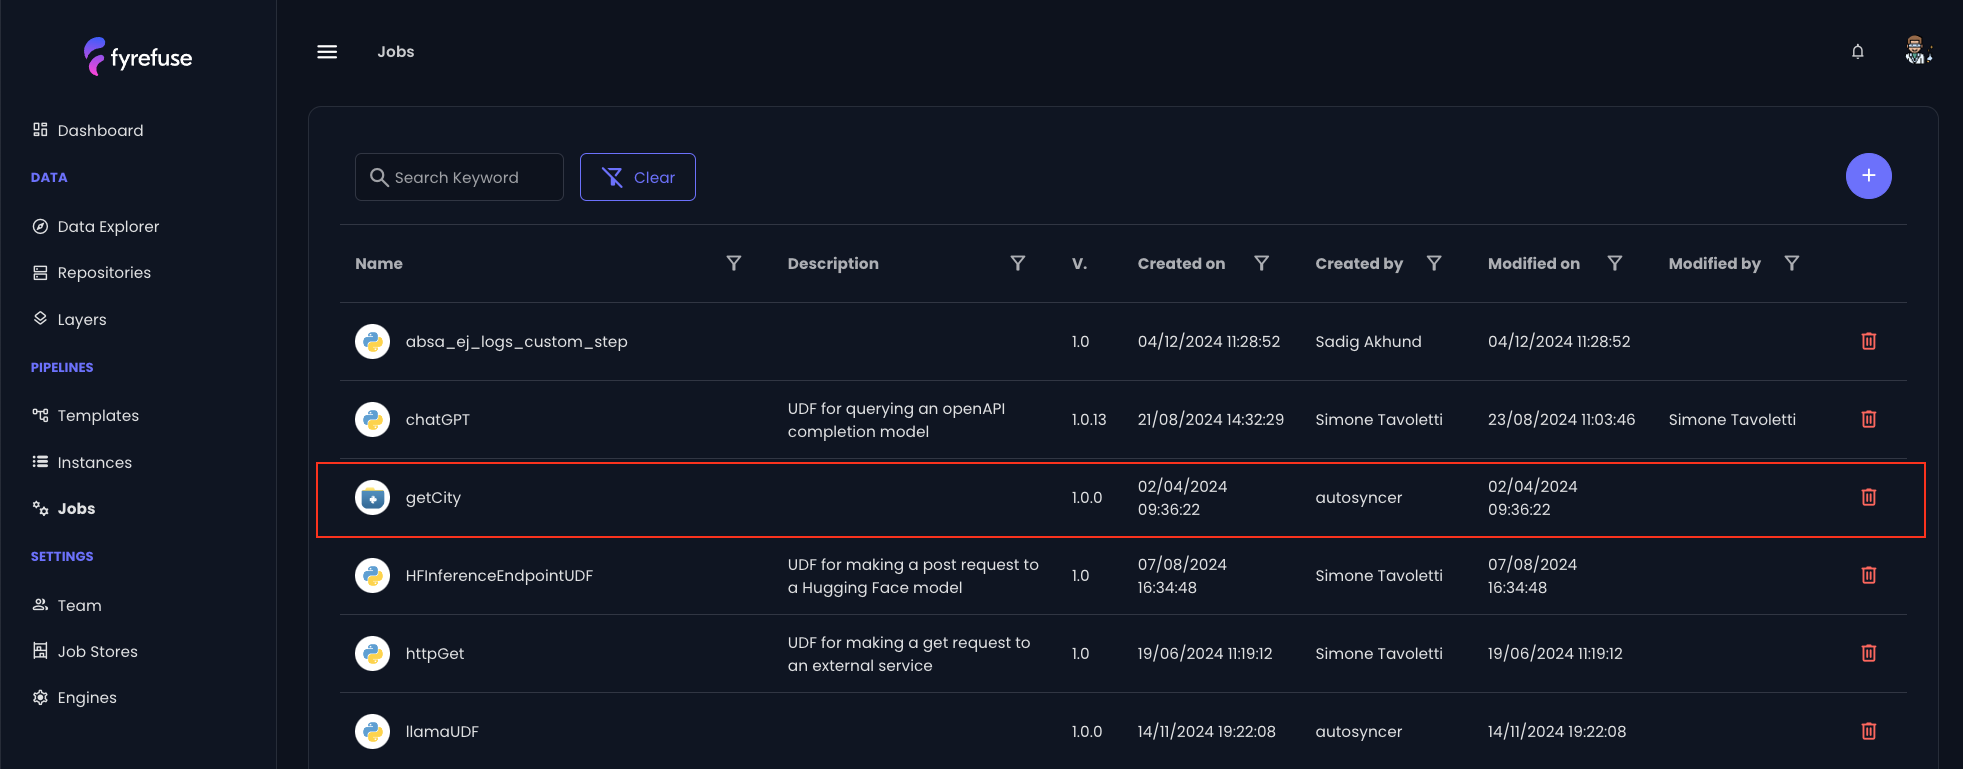
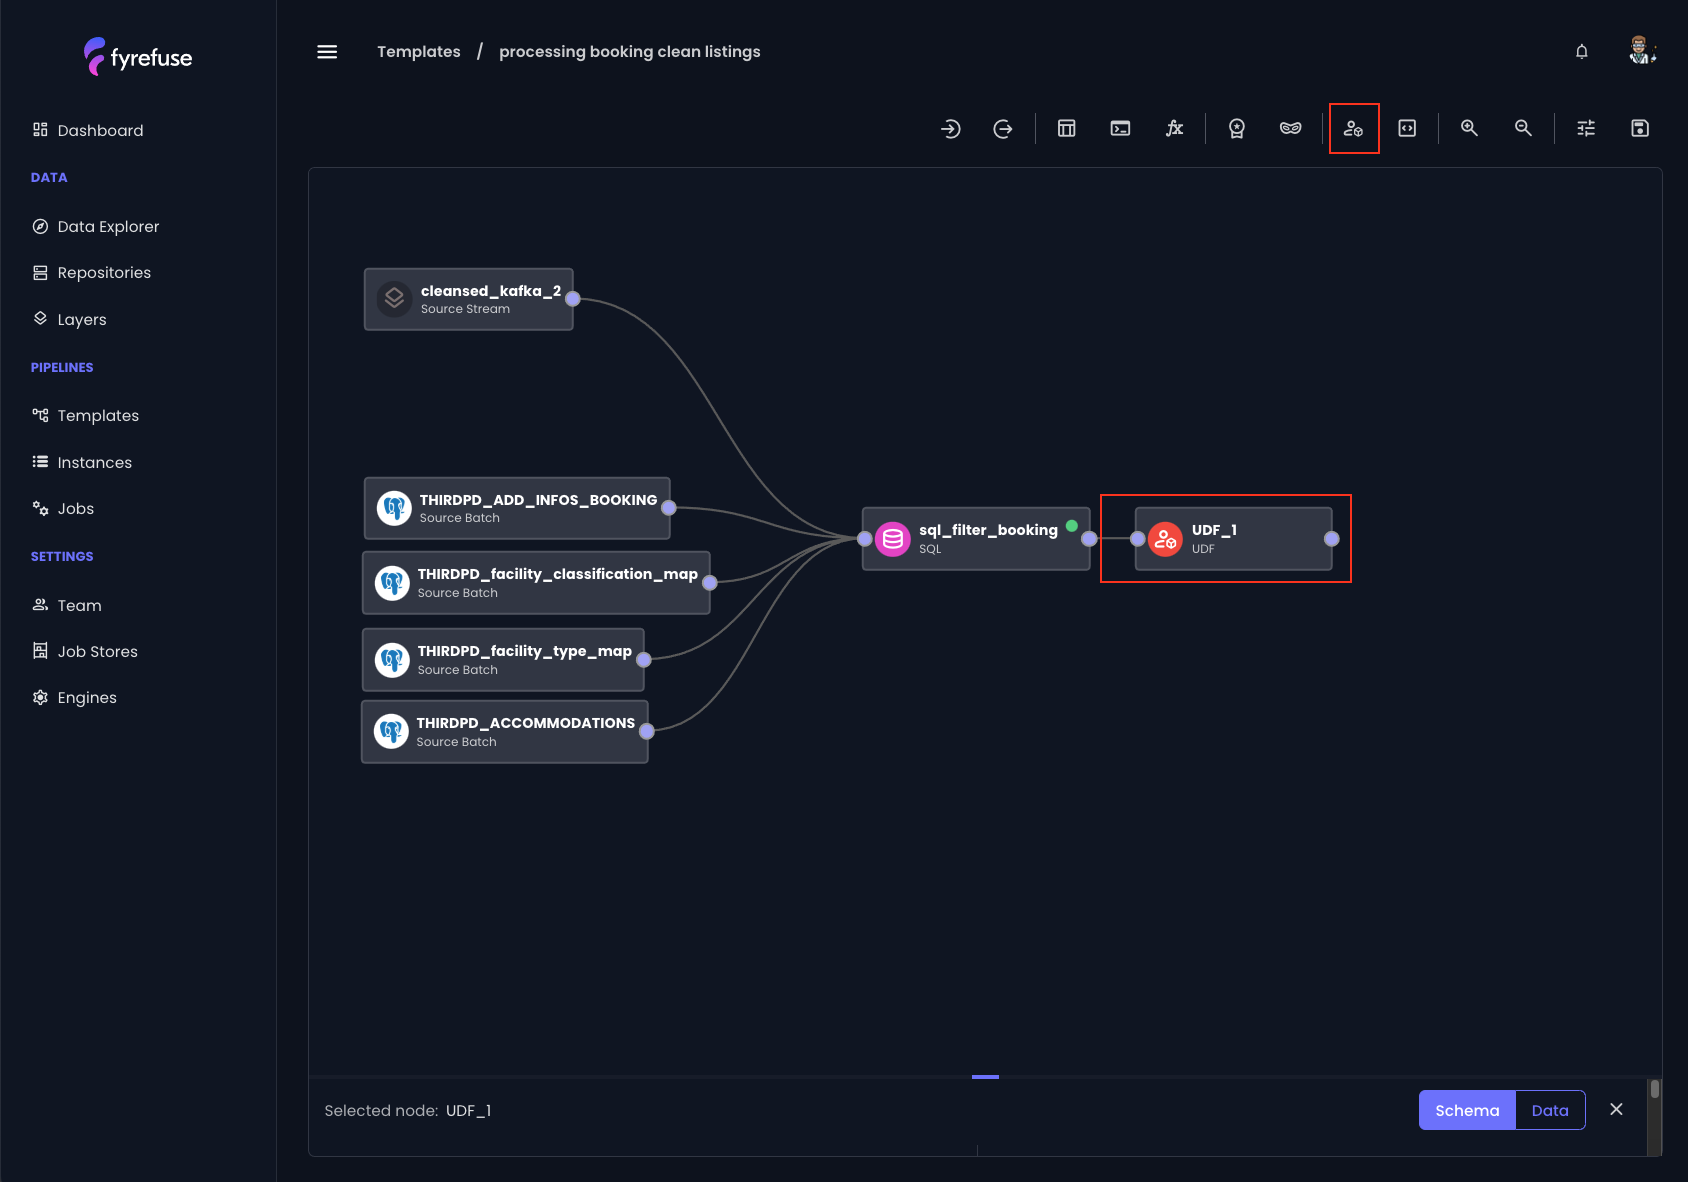
Import a job from a Pipeline
Select the UDF step from the toolbar and connect the new node to the pipeline. There are no strict rules on where to place the node, what matters is that it is connected before the SQL step that calls the UDF.
In order to bind an existing job (UDF) to the node, just open the edit panel and click on “select from UDF list” (1).
Then choose the desired job from the list (2) and update the node (3) for persisting the changes.
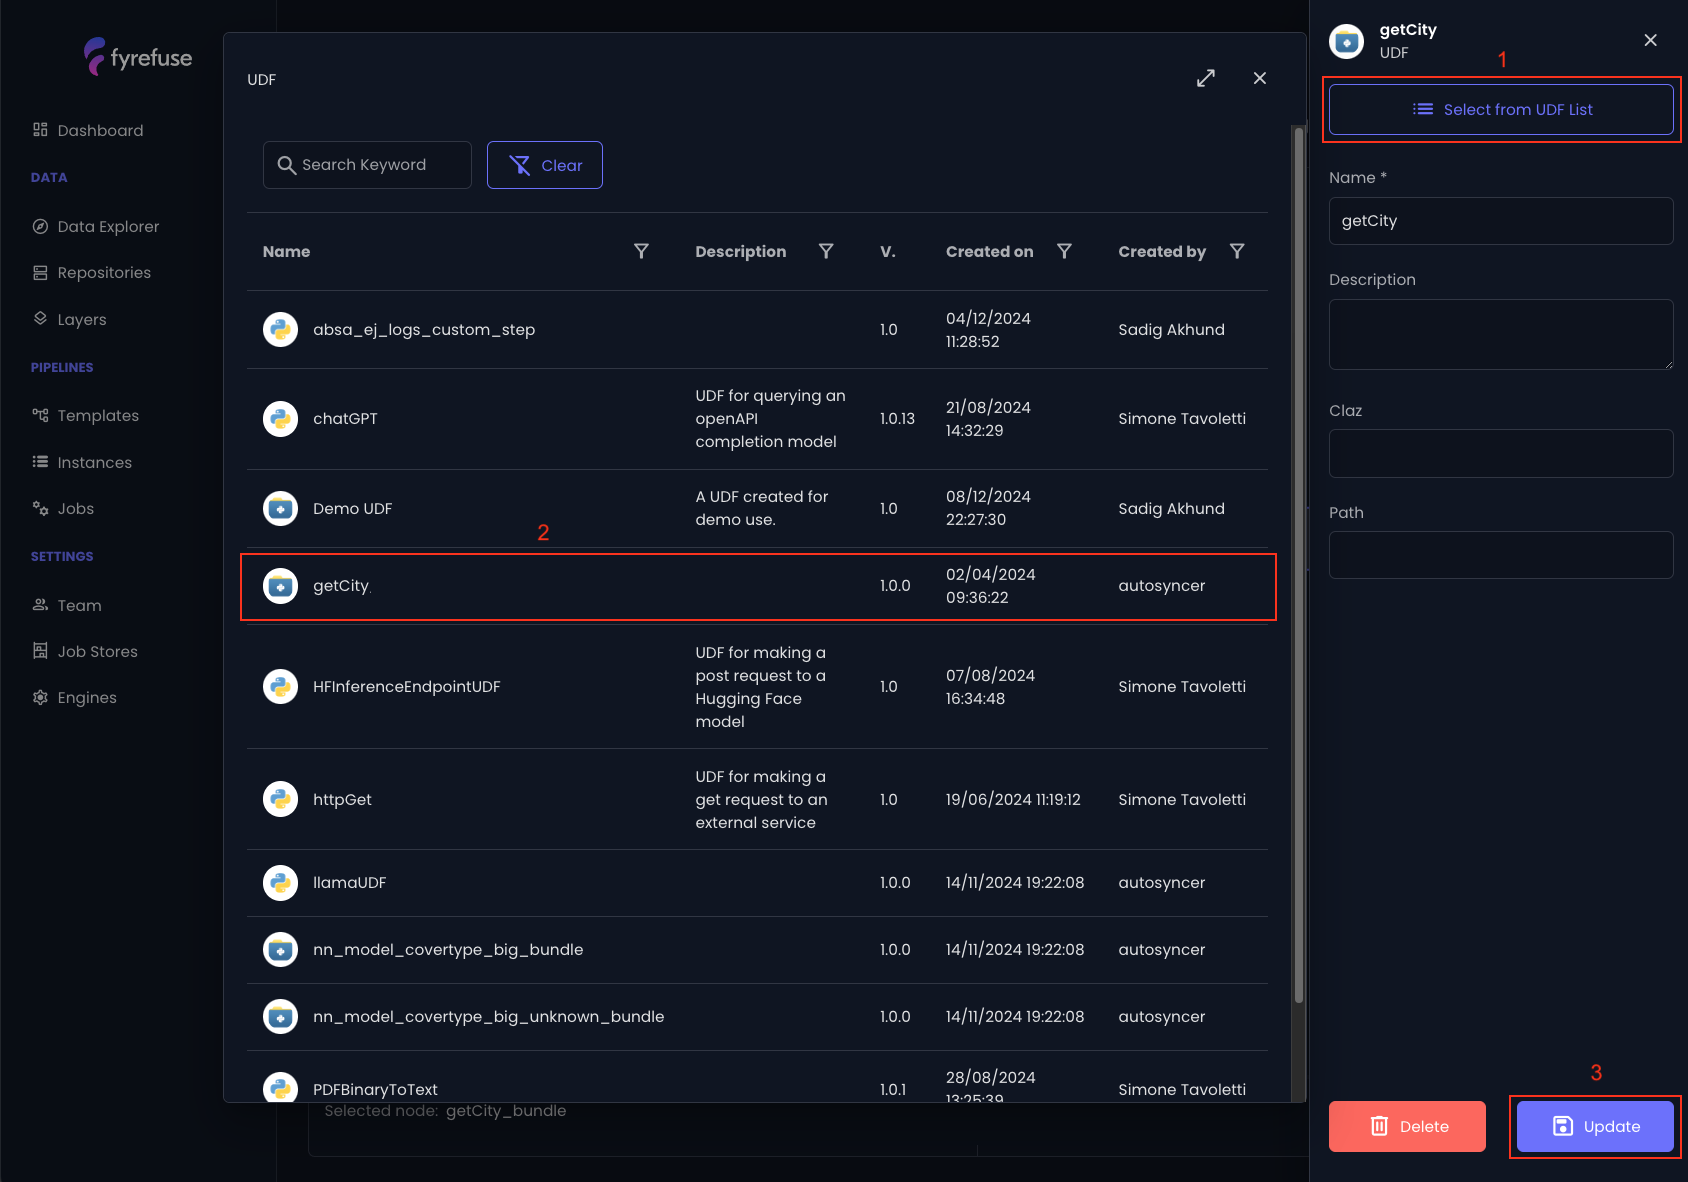
At this point the UDF is bound to the node and registered in the pipeline workspace. It is now ready to be called by the next sql steps like in the example below.
Calling a UDF is extremely simple. Just use the UDF’s node name as function prototype and add the required parameters within rounded parenthesis.
i.e. getCity(lat, lng) as CITY_KEY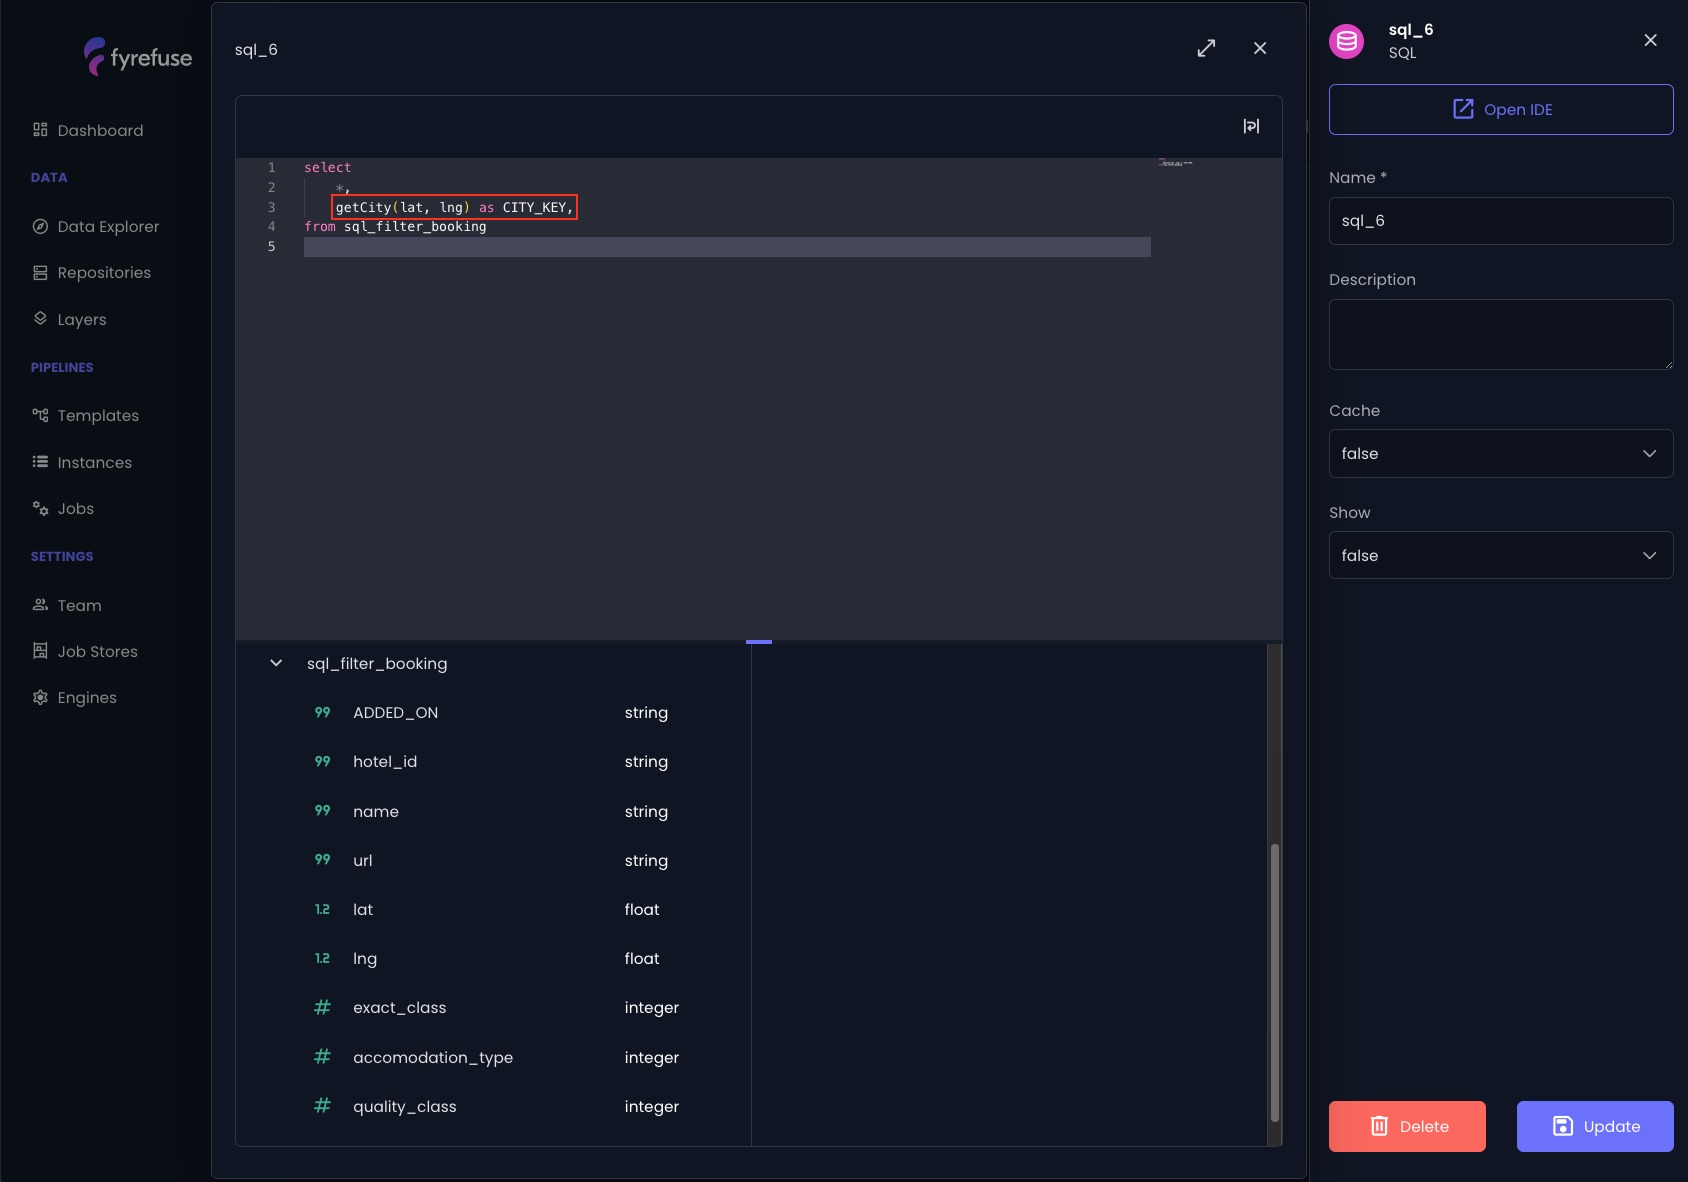
At runtime, the UDF is executed for each processed record, generating a new column in the DataFrame with the computed result.