Get started
On this page
Scope of the pipeline
This guide will walk you through building a complete data pipeline, designed to process and cleanse customer and transaction data, ultimately storing the refined results in a Datalayer table.
The pipeline will simulate a real-world ETL (Extract, Transform, Load) process, where data is extracted from raw sources, transformed according to business rules, and then loaded into a structured data store for further analysis.
More specifically the pipeline will take two separate datasets in .csv format “customers” and “transactions” from a NFS shared volume, it will join them with respect to the attribute “customer_id”, clean and anonymize sensitive information and finally export the curated results in a new table into the Data Layer.
For all the other cases you can find the sample data at the bottom of the page but you will need to set up the repository by yourself.
Alright, let’s get started!
Configure a new Repository
The first thing to do is configure a new repository that contains the raw source datasets to be used in the pipeline.
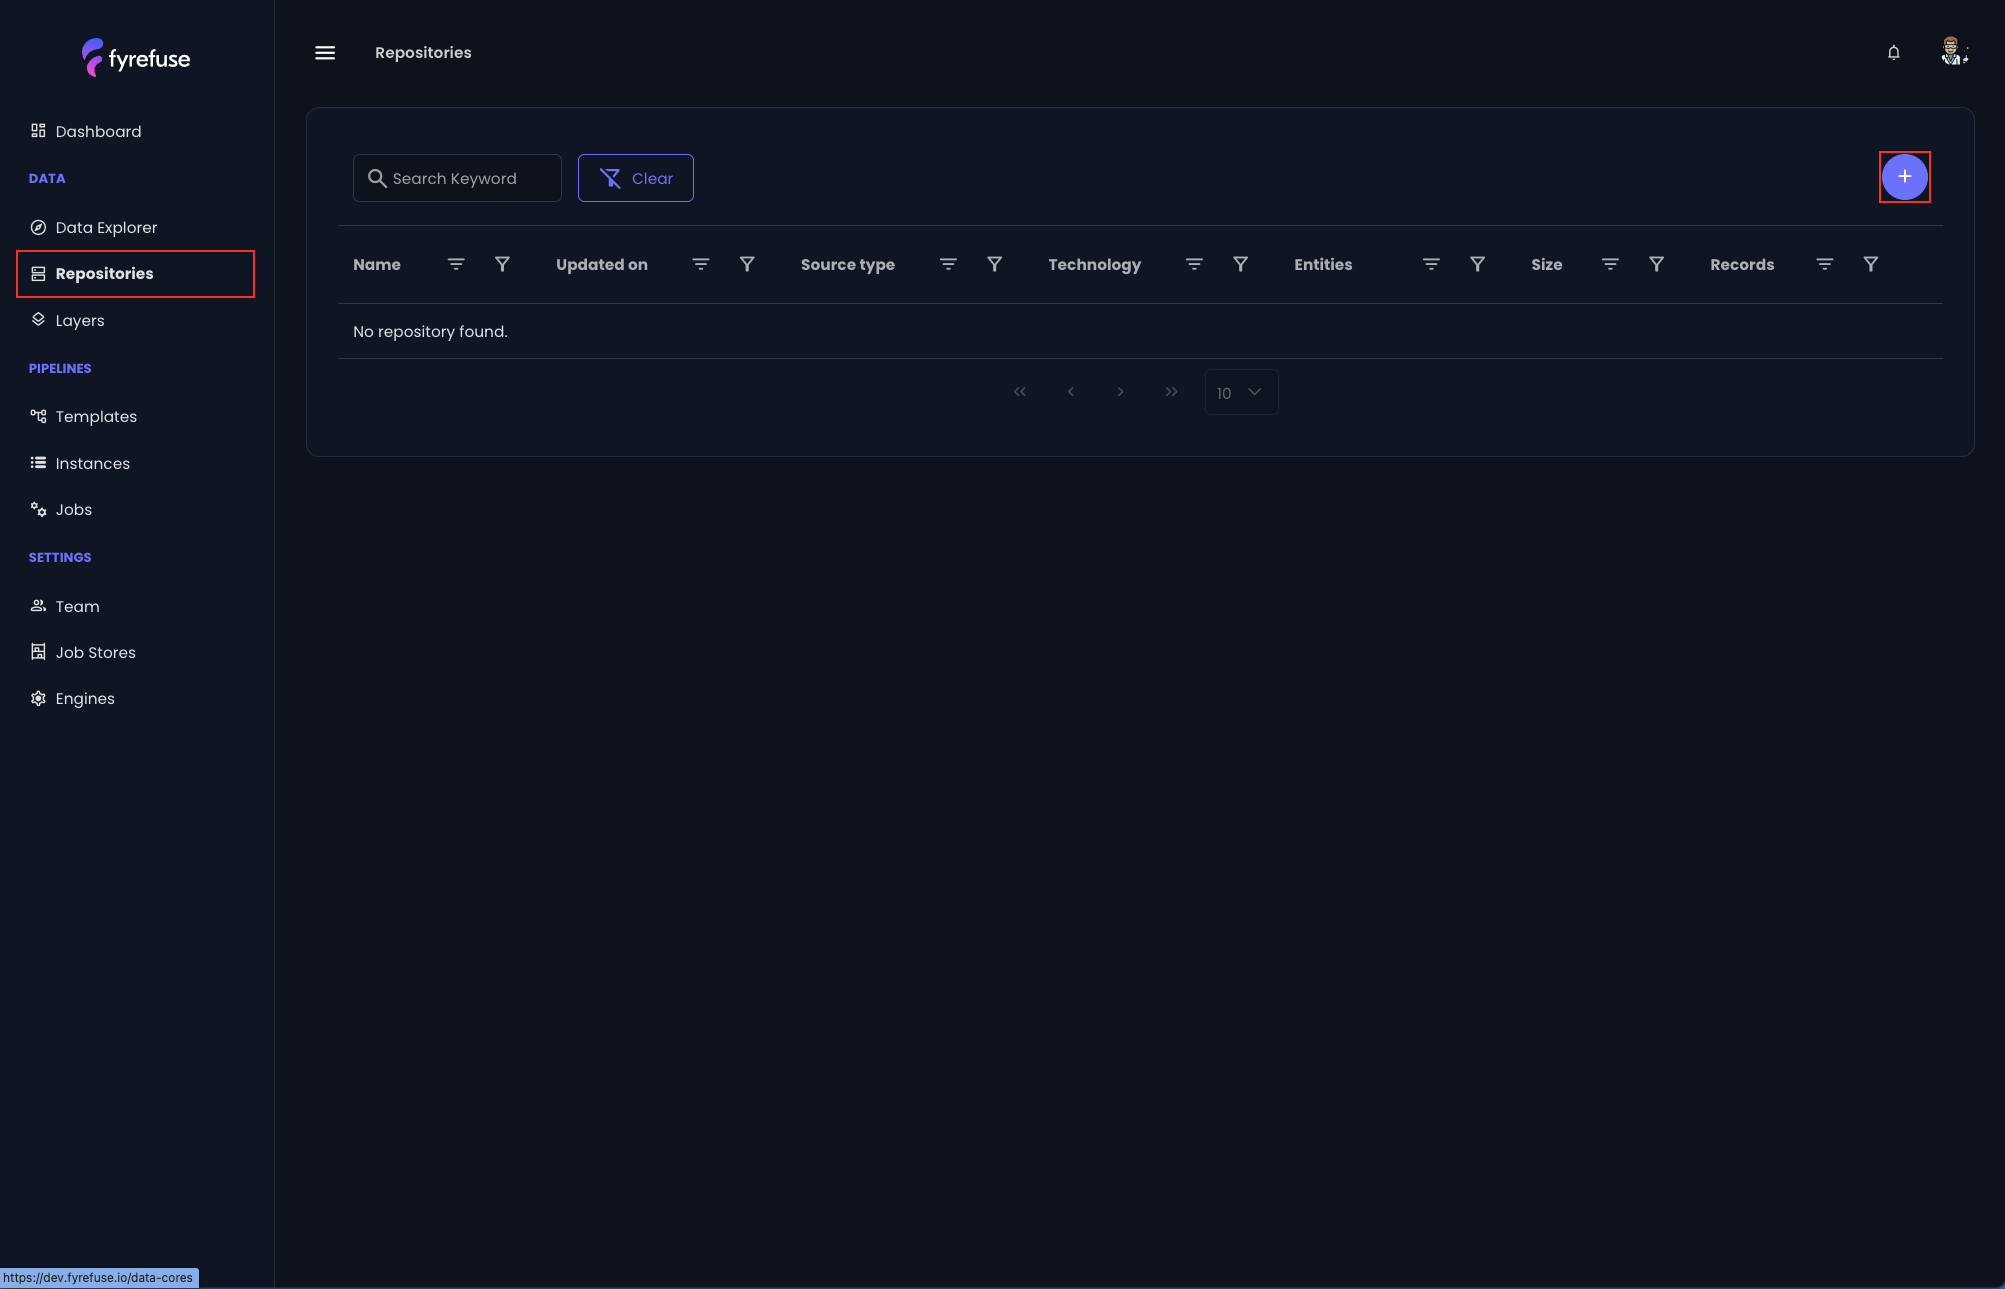
In order to do so, let’s move to the “Repositories” section on the left navigation menu and click on the “+” button on the top right.
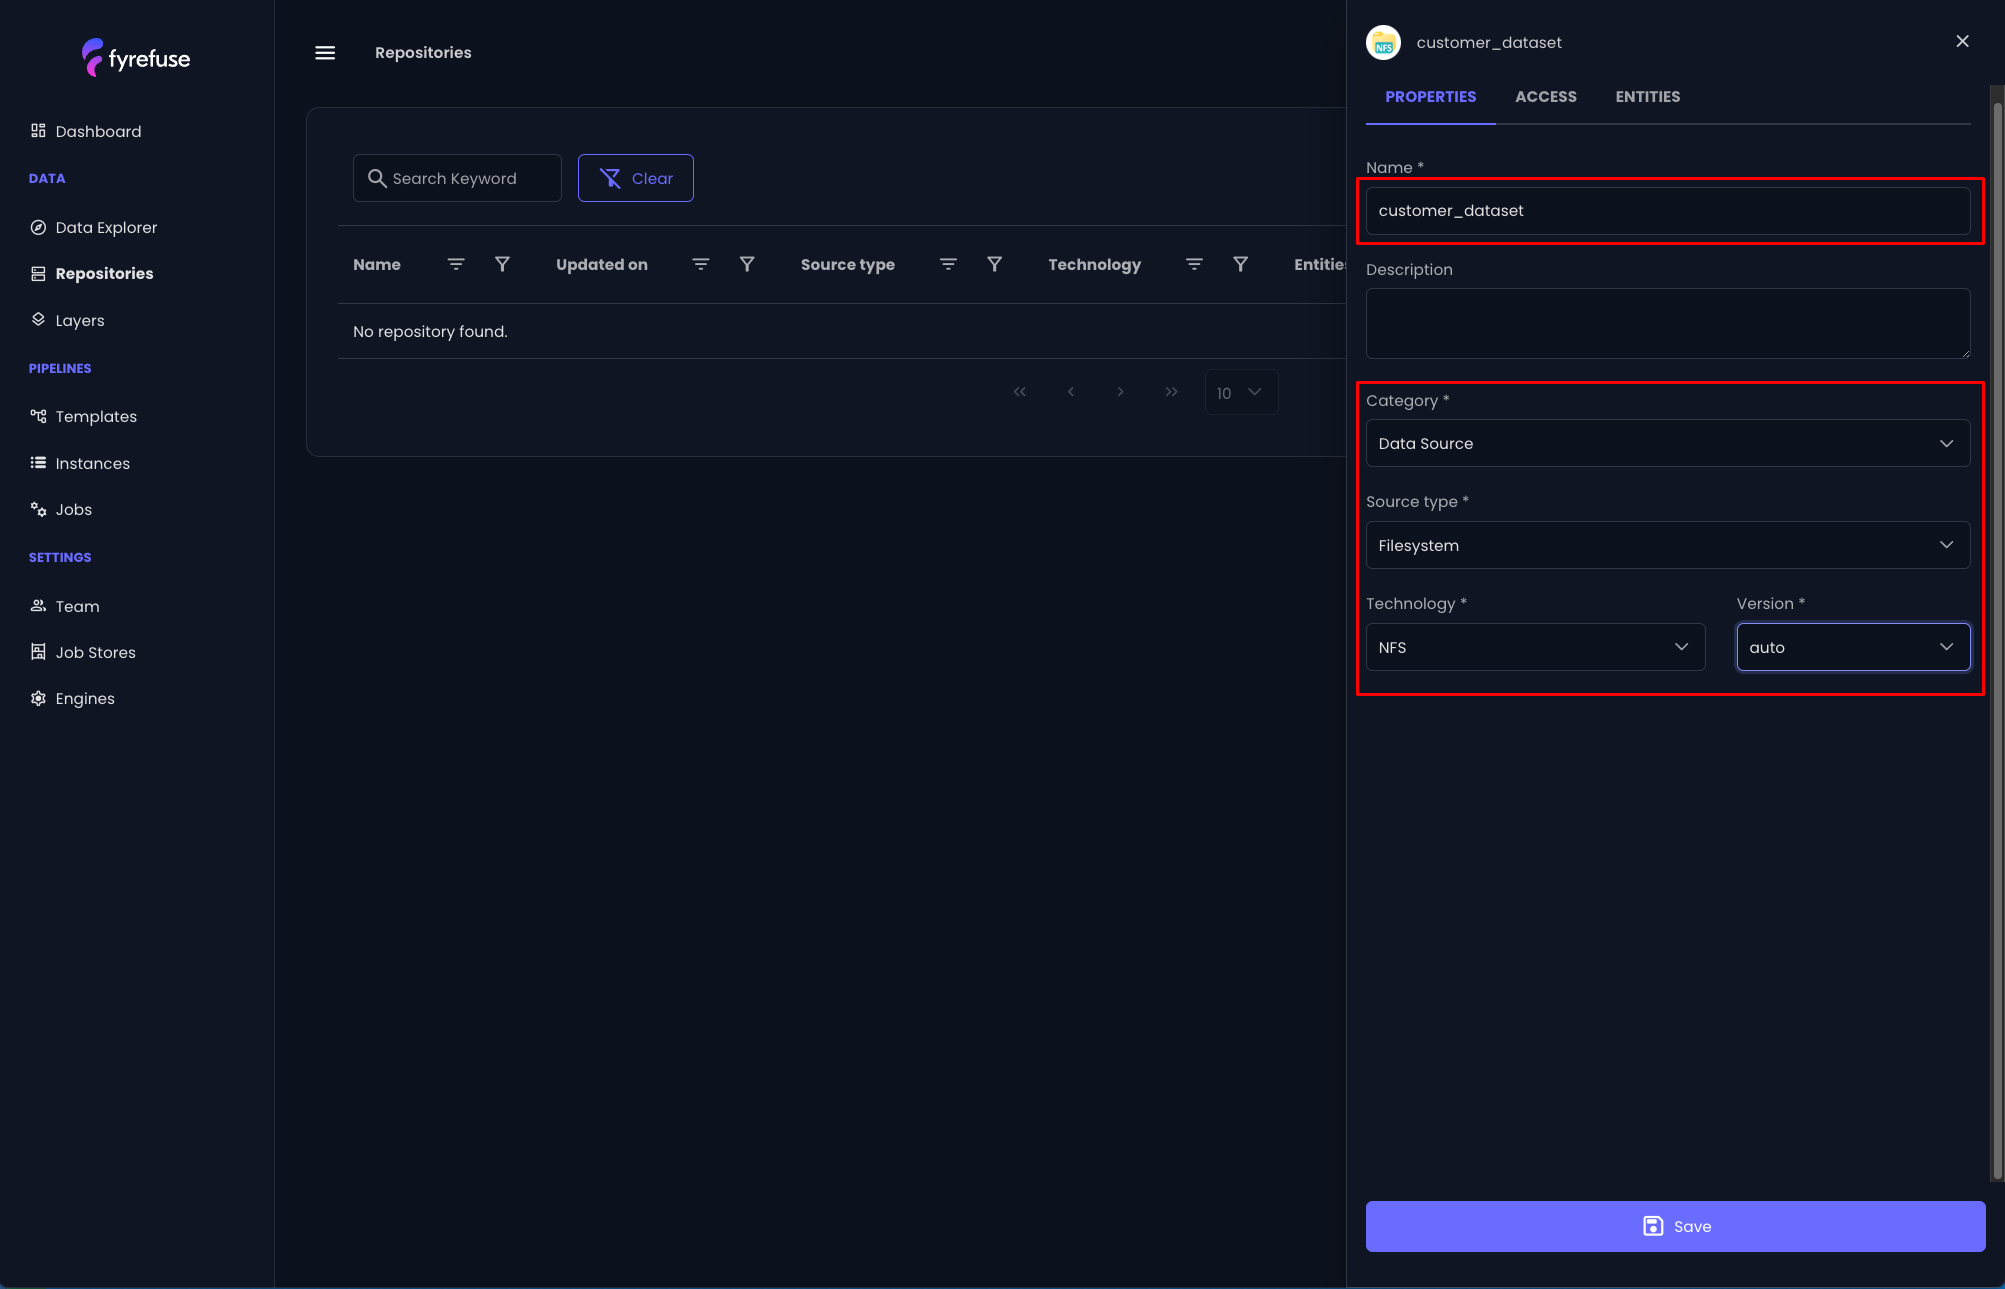
Let’s name the new repository “customer_dataset” and select the following values for the next fields:
- Category: Data Source
- Source Type: Filesystem
- Technology: NFS
- Version: Auto
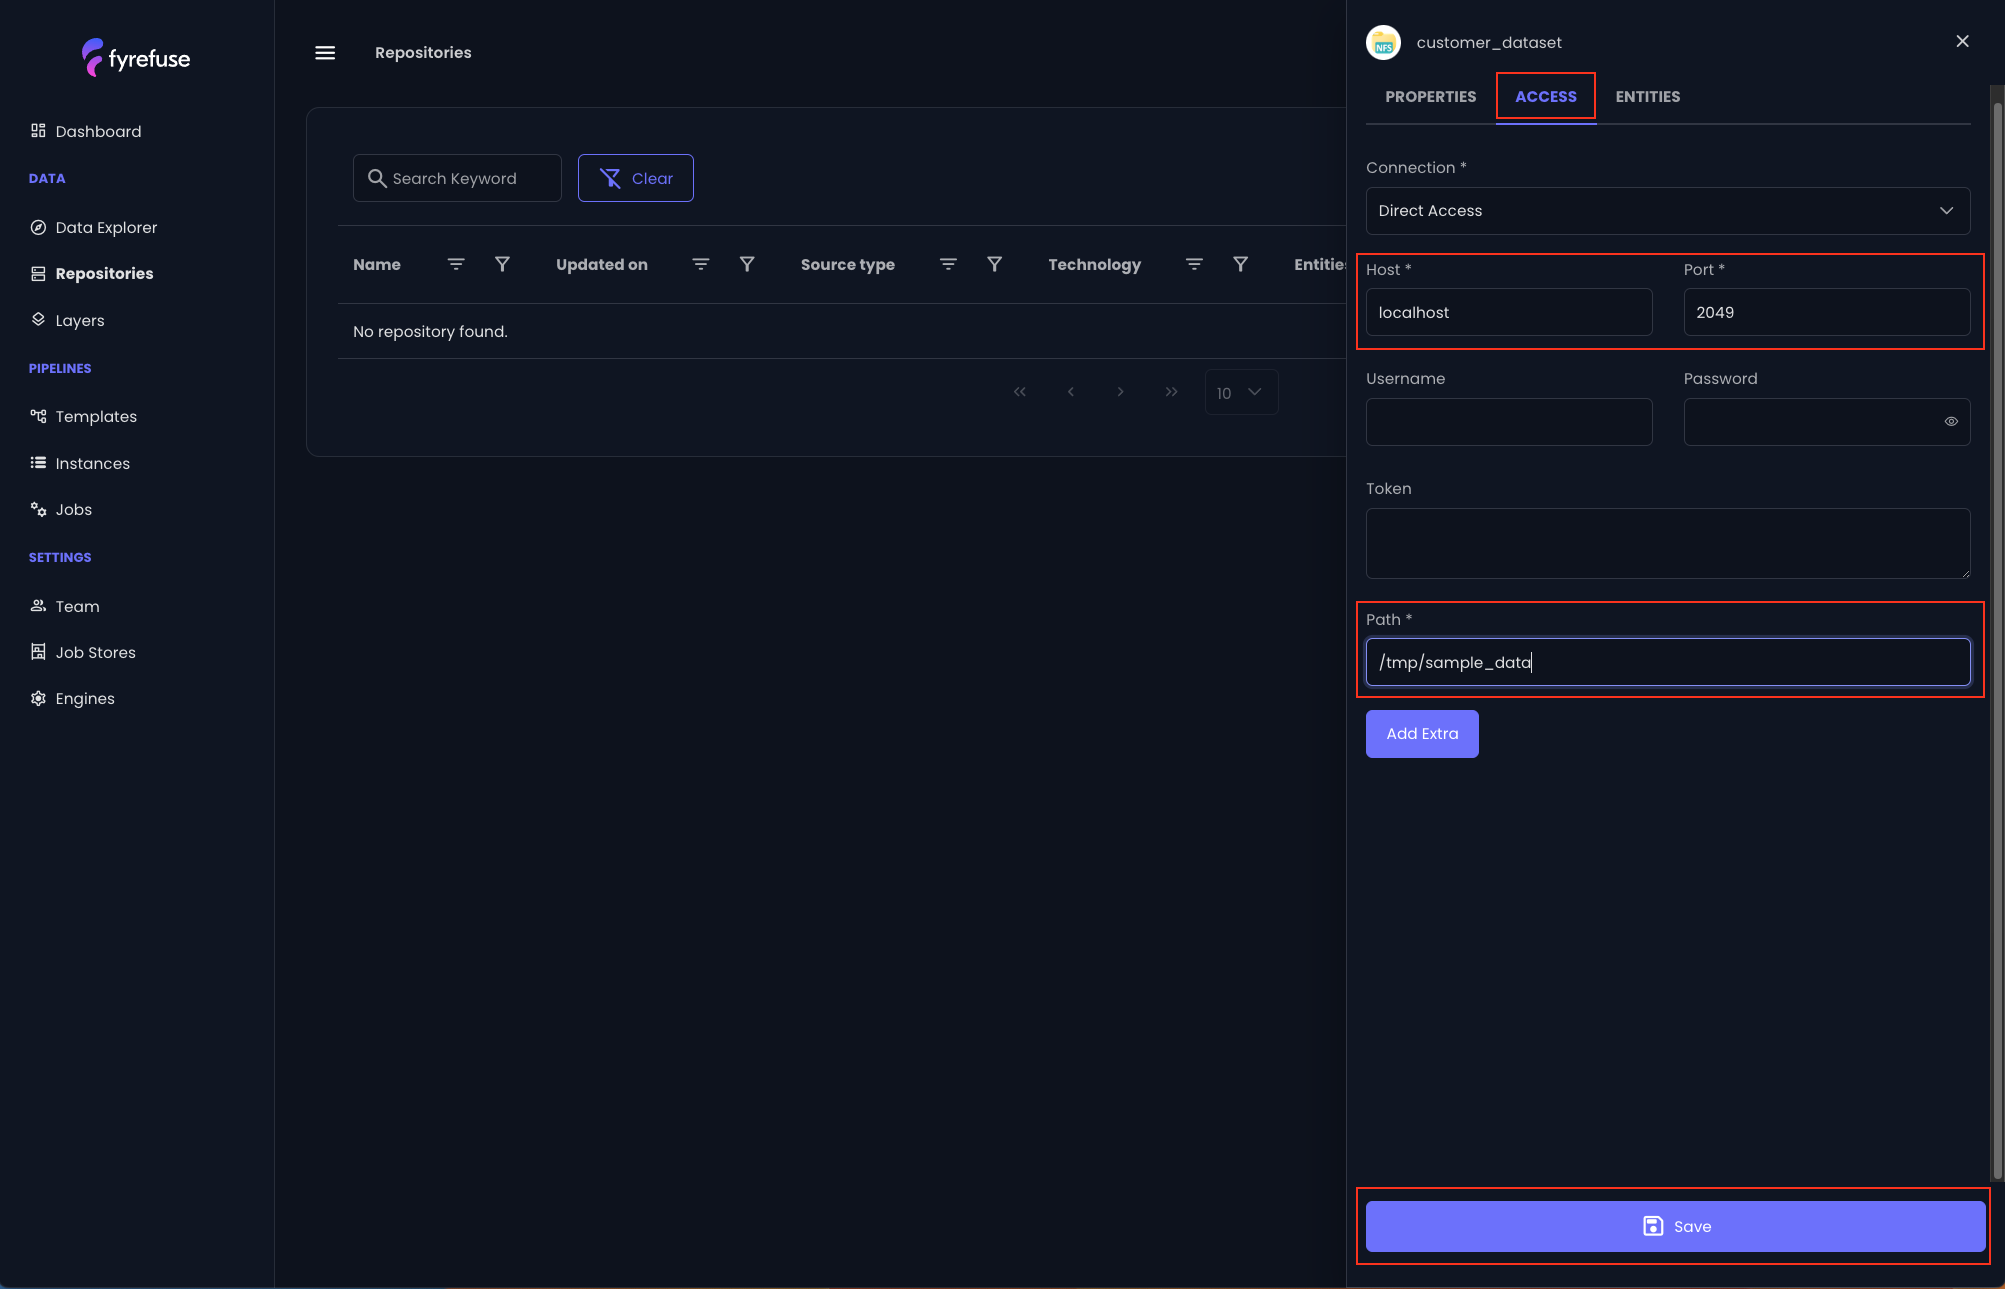
Move to the “Access” tab for configuring the access parameters. For an NFS volume you will just need to set the Host, Port and Path.
- Host: localhost
- Port: 2049
- Path: /tmp/sample_data
Then click “Save” to persist the changes.
The new repository will then appear in the main repositories list.
Continue its configuration by selecting it and move to the third tab “Entities”.
Create a new Entity
Click the central “+” button for creating a new Entity.
The entity’s filename must be set with the same name of the source file customers.csv, be careful to not commit typos!
This value also determines the entity name. Don’t worry if it is too long, you can change it during the pipeline design later on.
The next step is to create the schema of the data contained in the source file. It will be used by Fyrefuse to assist you with the data validation.
To do so, click on the big button “Create Schema” and start to define the attributes. You will need to specify the attribute name and attribute type (be aware that also the attributes order matters, especially for semi-structured file formats like csv).
Use the “+” button beside each row to add a new attribute below.
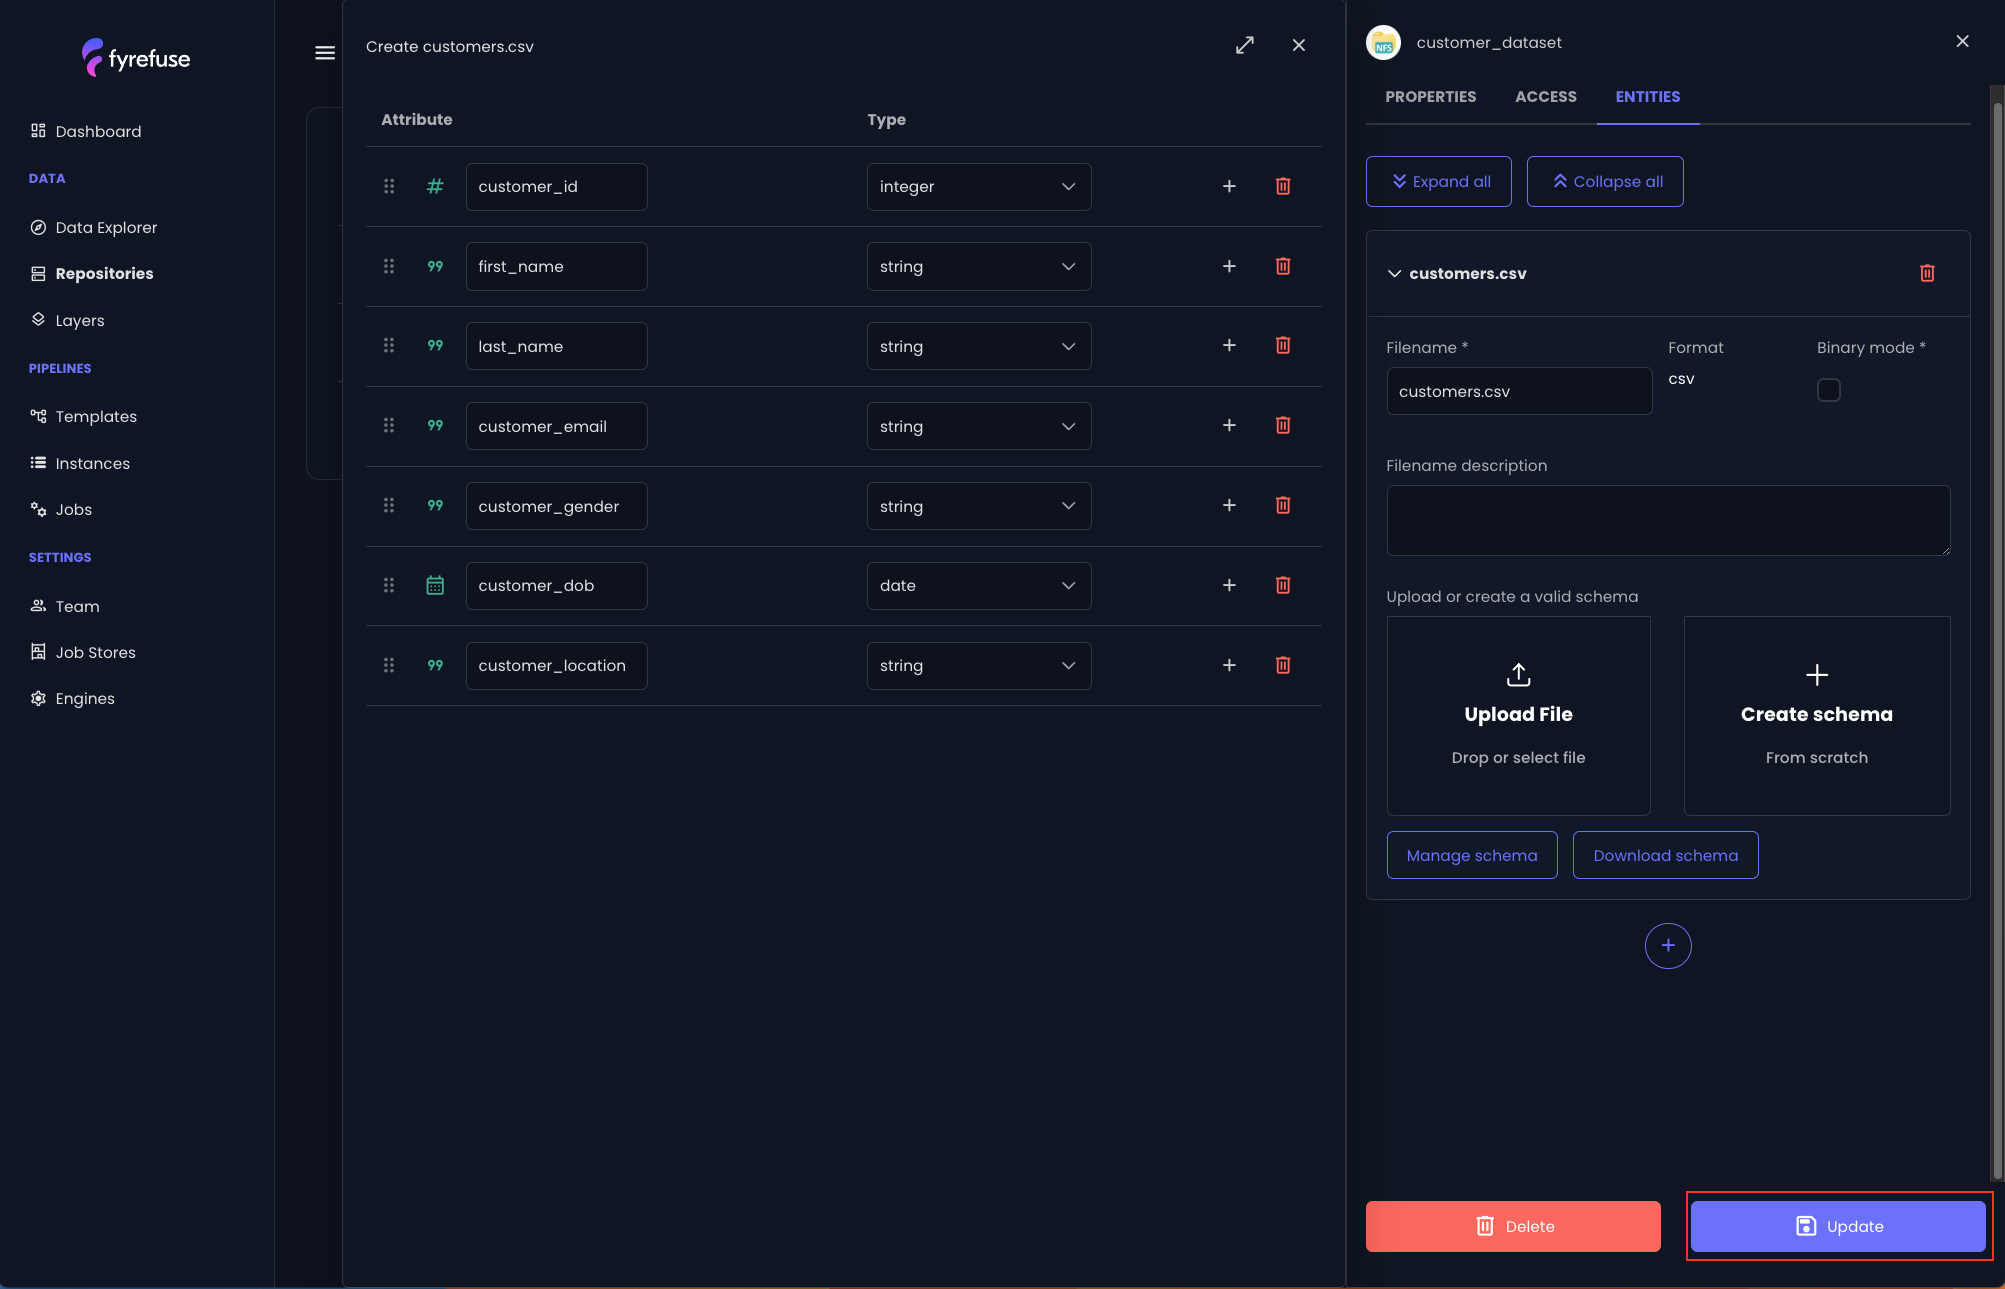
When you are done, click the “Update” button on the bottom right.
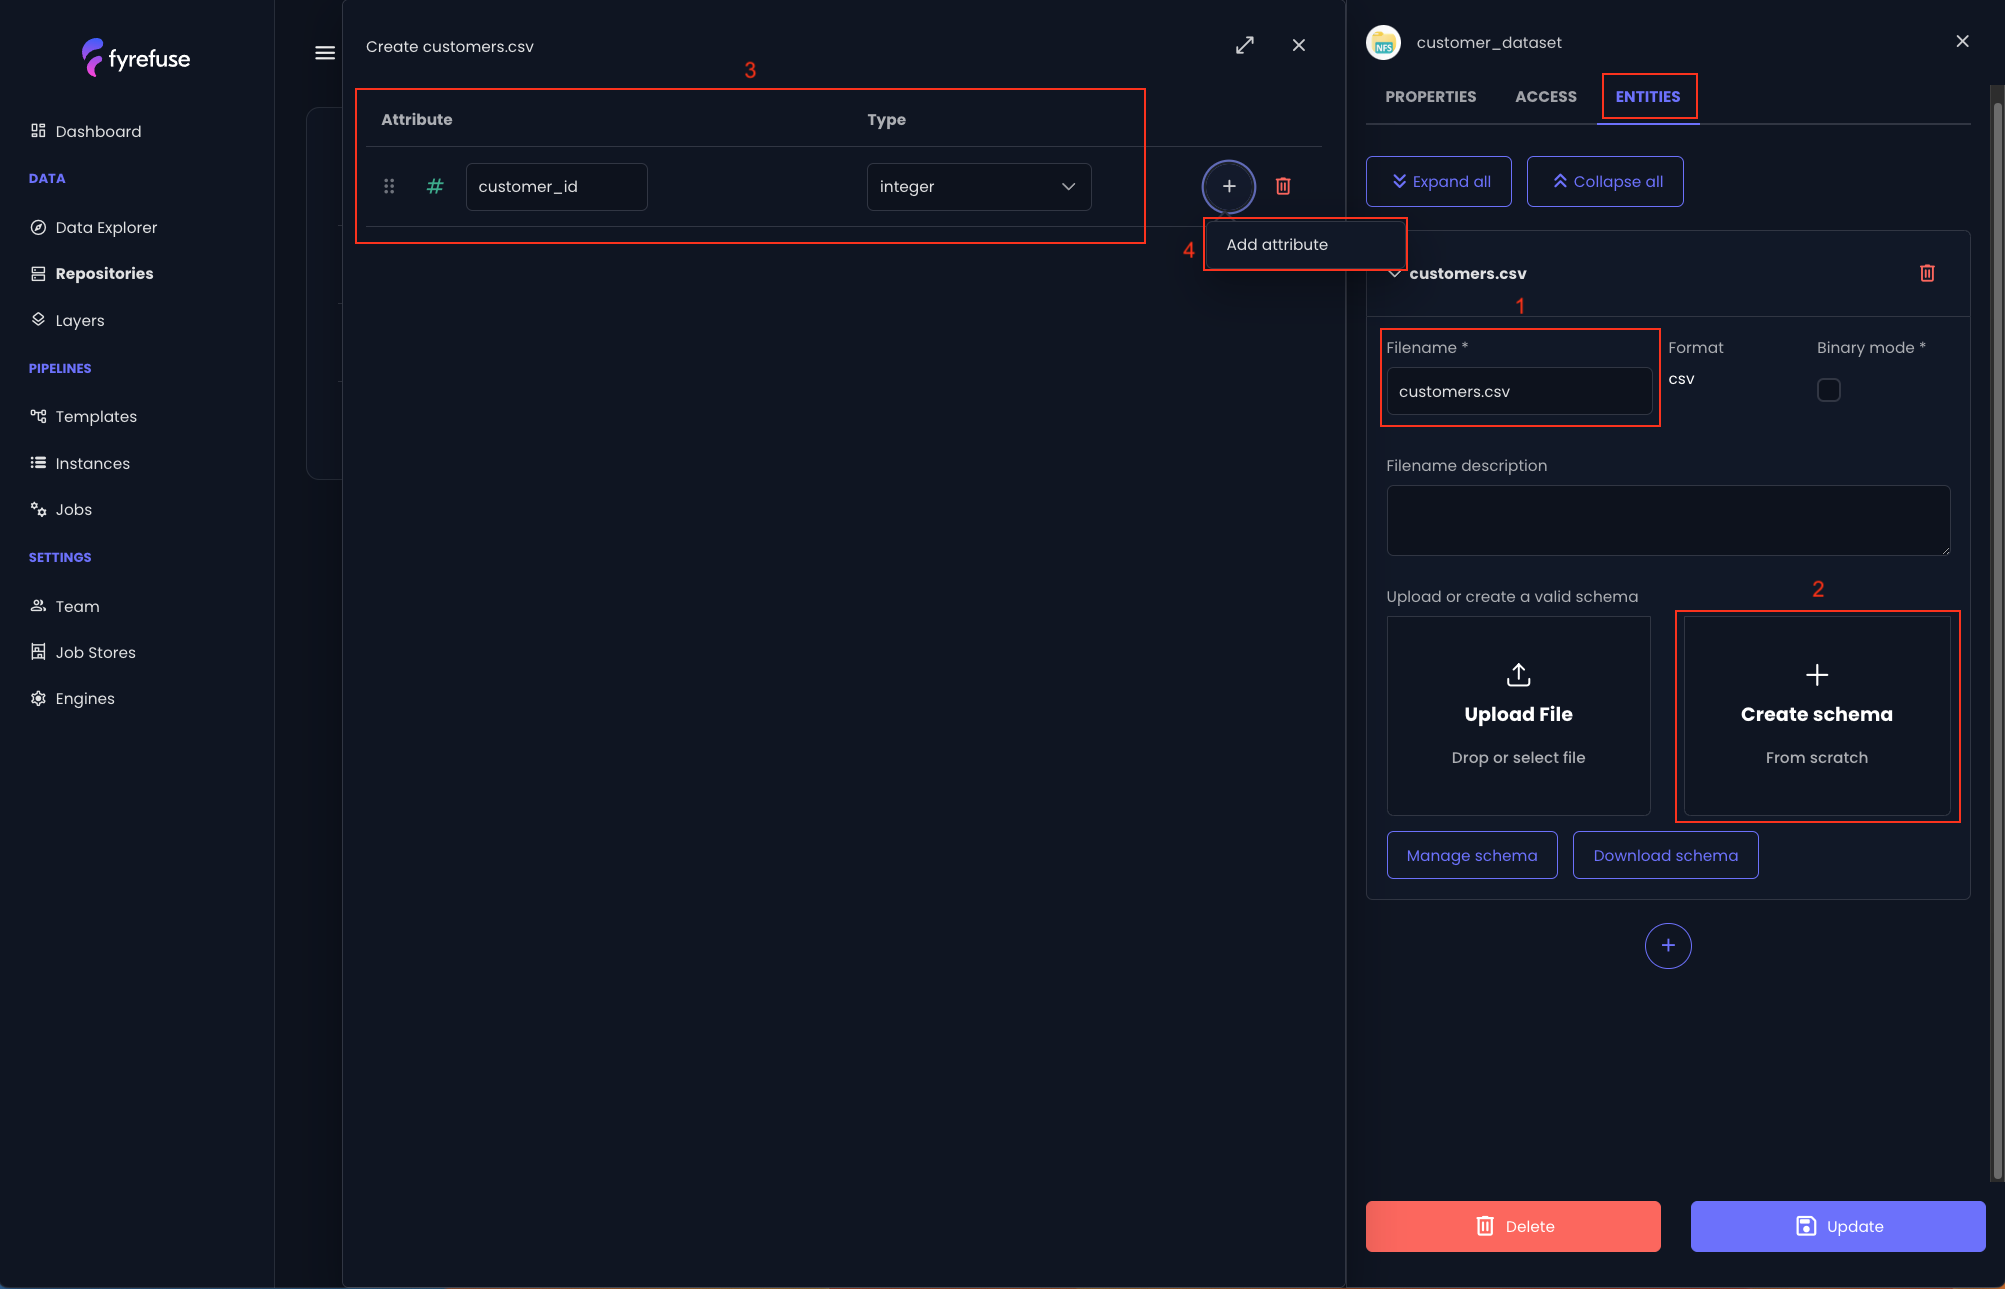
Here the complete attribute list:
- customer_id: integer
- first_name: string
- last_name: string
- customer_email: string
- customer_gender: string
- customer_dob: date
- customer_location: string
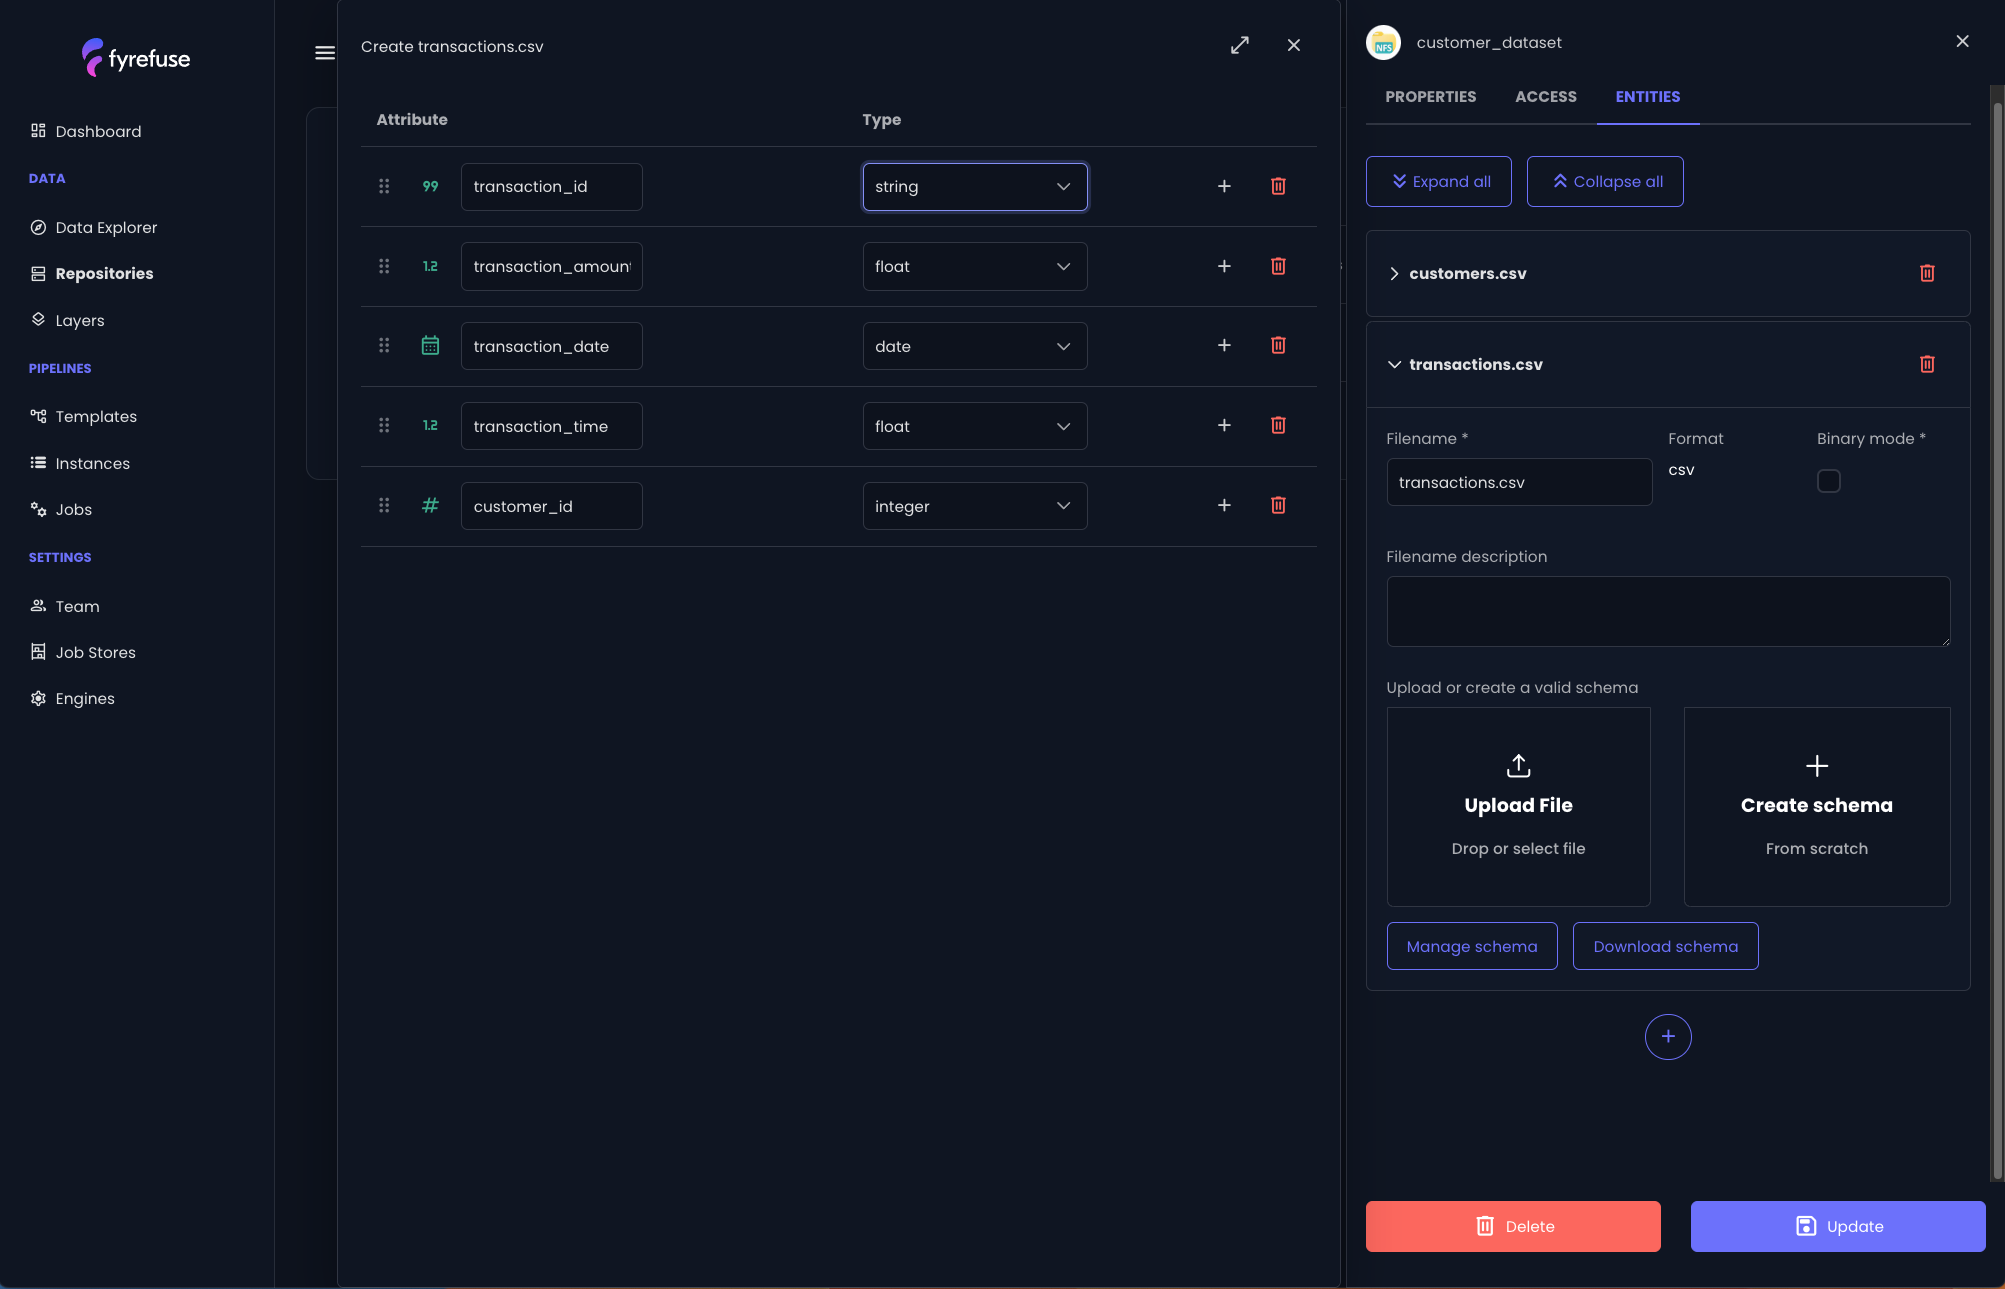
Apply the same procedure to define the second entity, named transactions.csv, using the complete list of attributes provided:
- transaction_id: string
- transaction_amount: float
- transaction_date: date
- transaction_time: float
- customer_id: integer
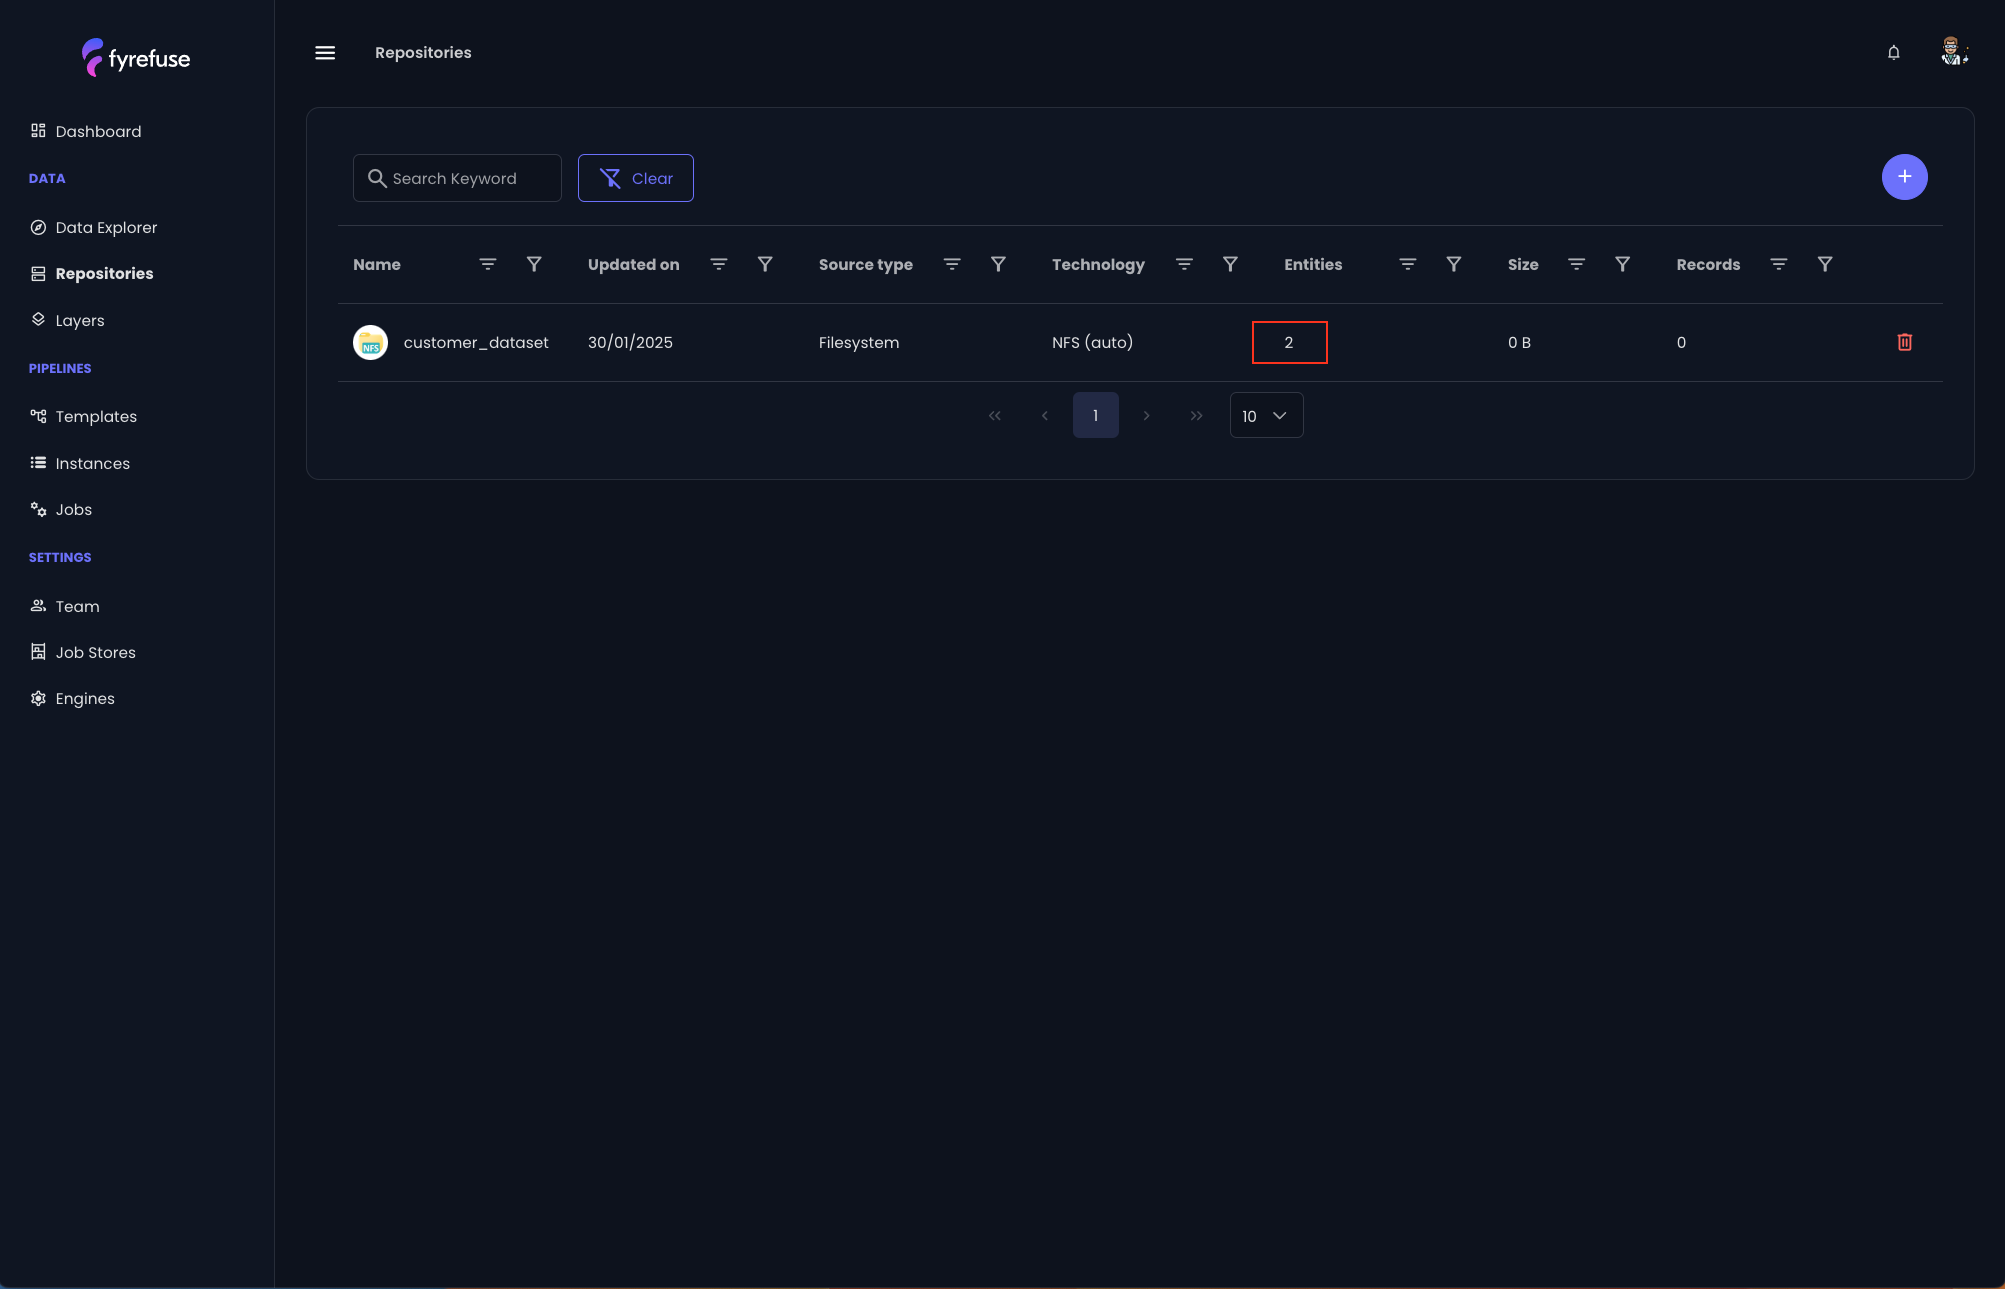
At the end you will see your repository with two registered entities.
Create your first Layer
After having created the repository with its entities it is now time to create your first layer and related tables that are going to be used as targets in your pipeline.
The steps to follow are very similar to the ones followed for the repository.
Let’s move to the “Layers” section on the left navigation menu and click on the “+” button on the top right.
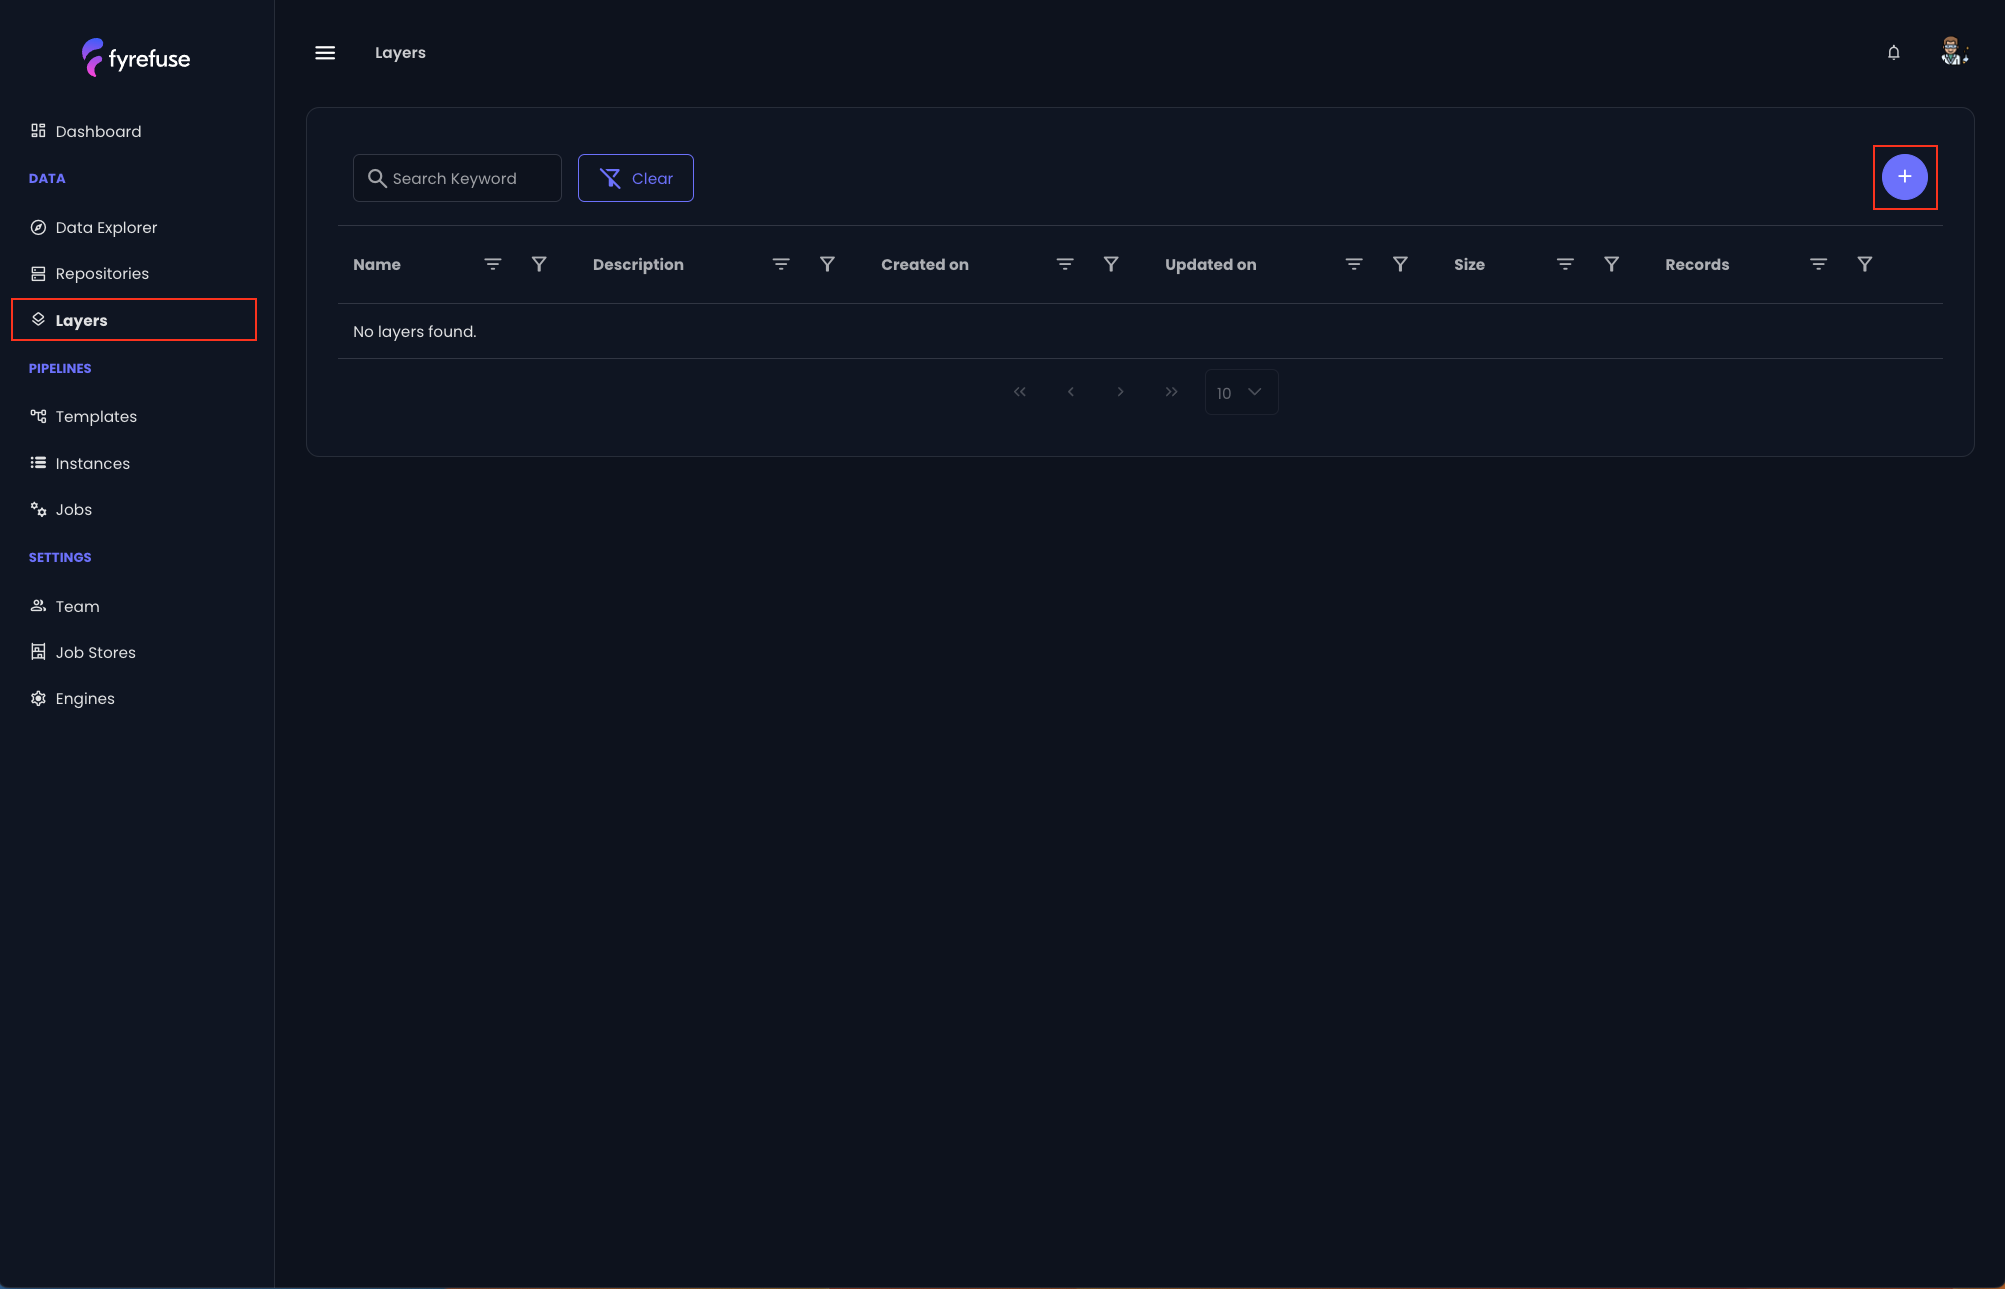
Let’s name the new layer “my_first_layer” and optionally change its color. Then click “Save” to persist the changes.
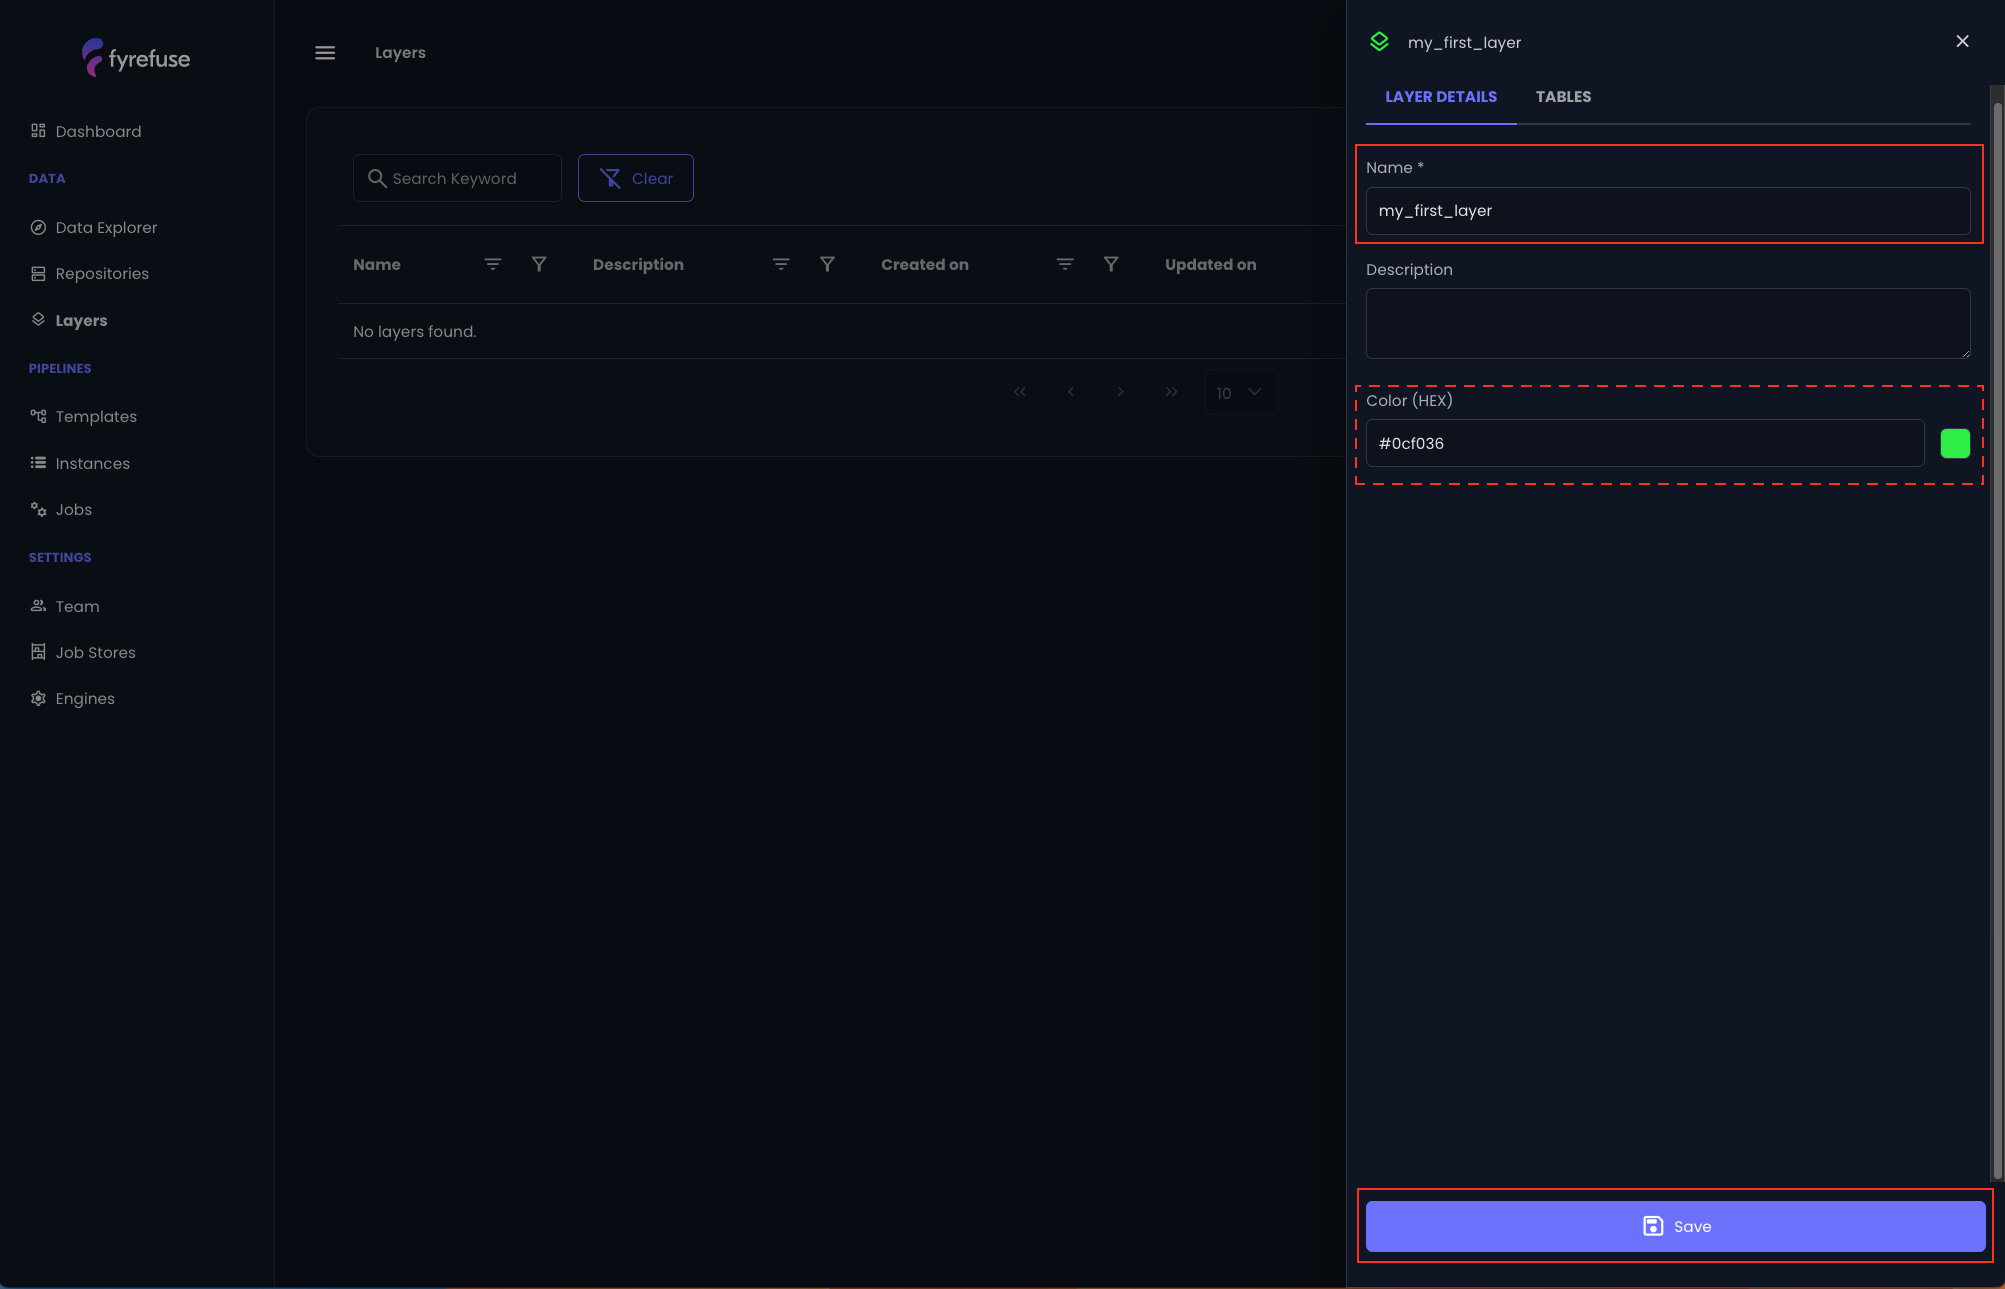
The new layer will then appear in the main layers list.
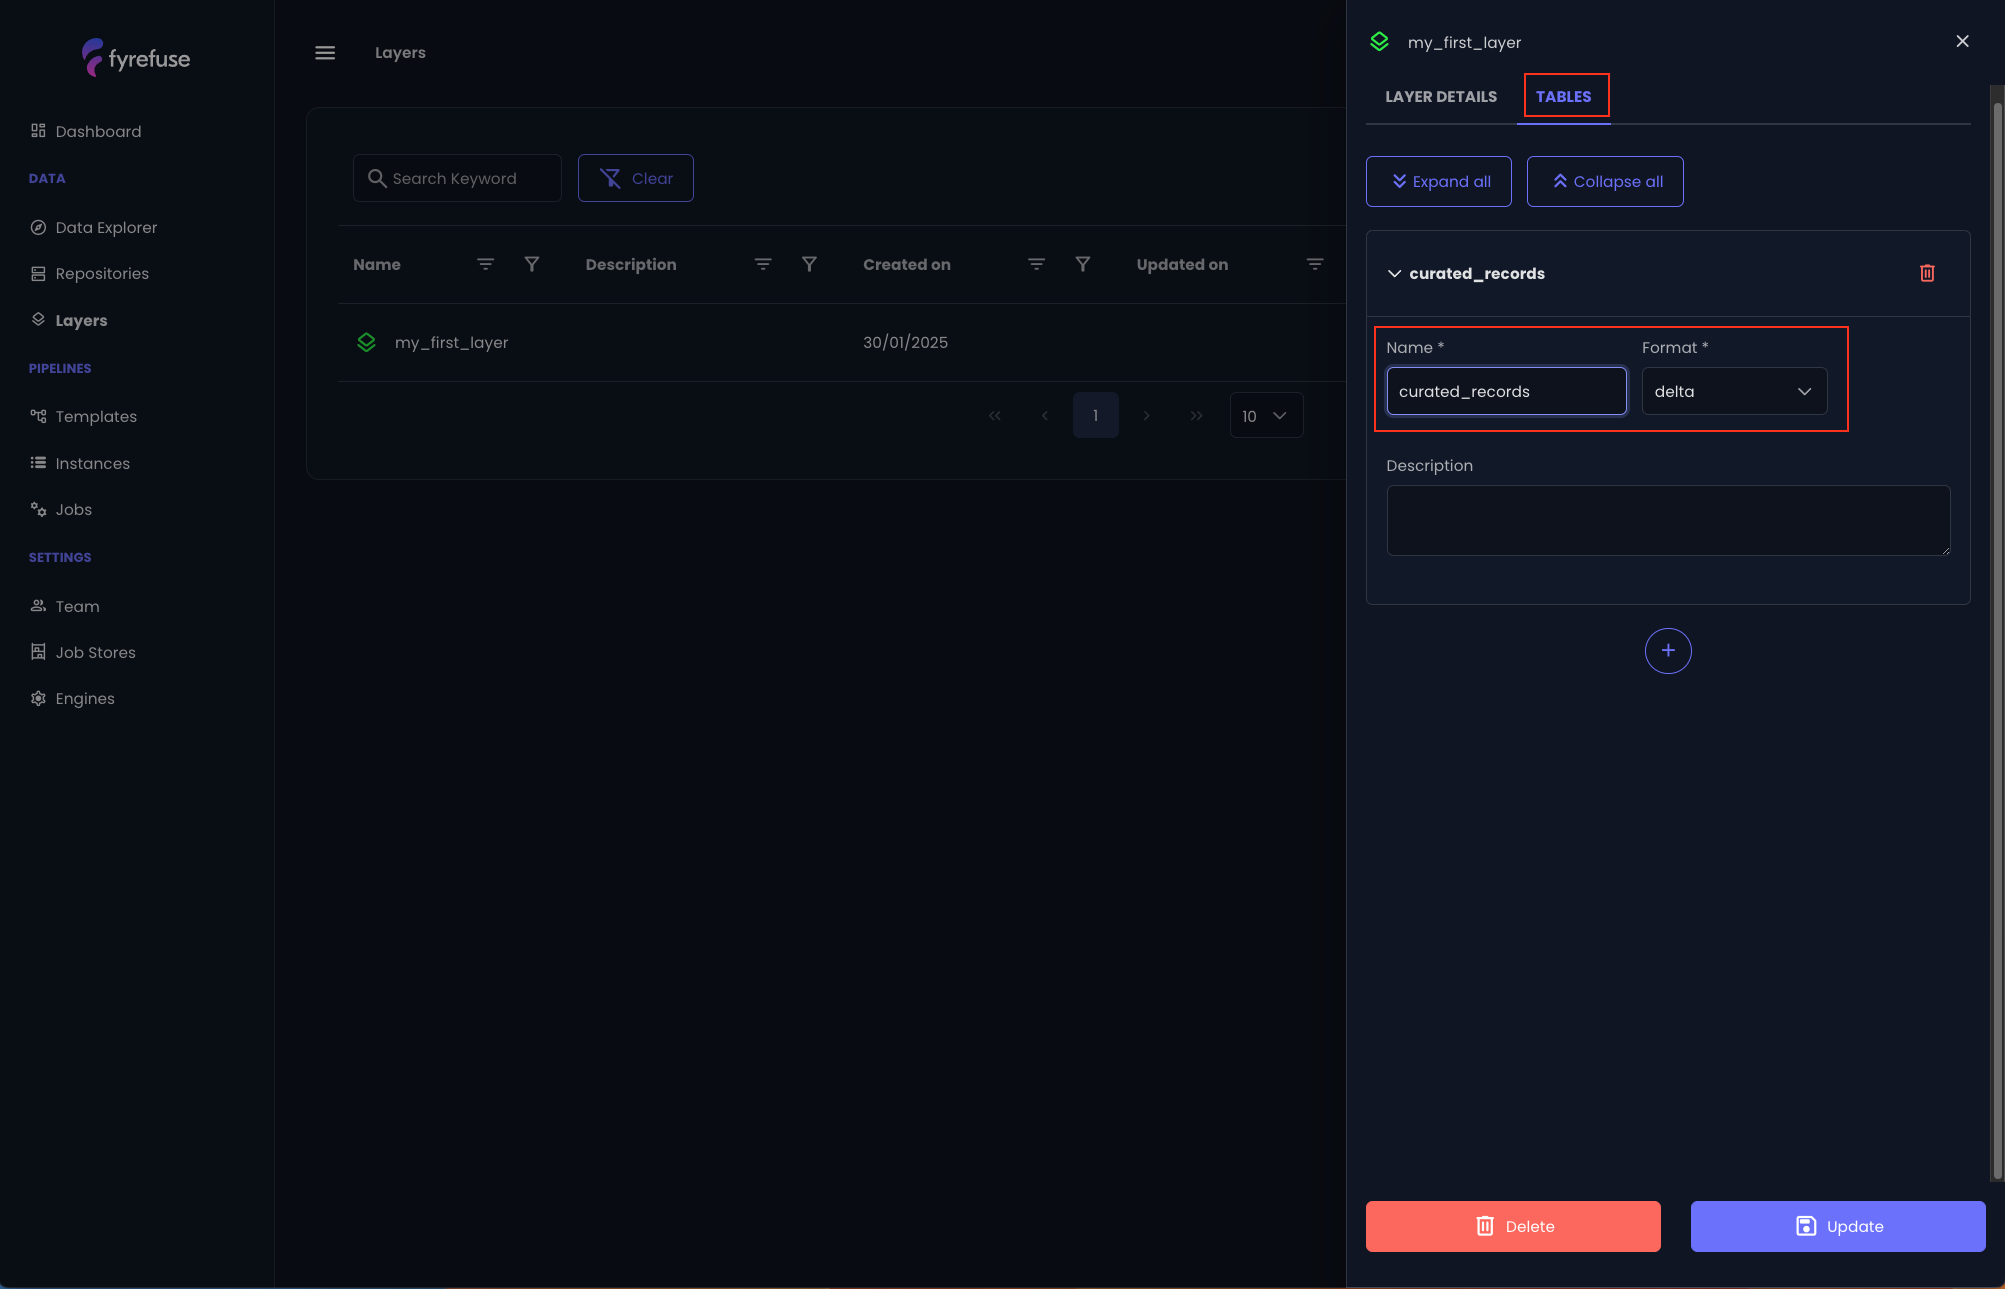
Continue its configuration by selecting it and move to the second tab “Tables”.
Create a new Table
Create a new table with the central “+” button and name it “curated_records”. Make sure the selected format is “delta”. When you are done, click the “Update” button on the bottom right.
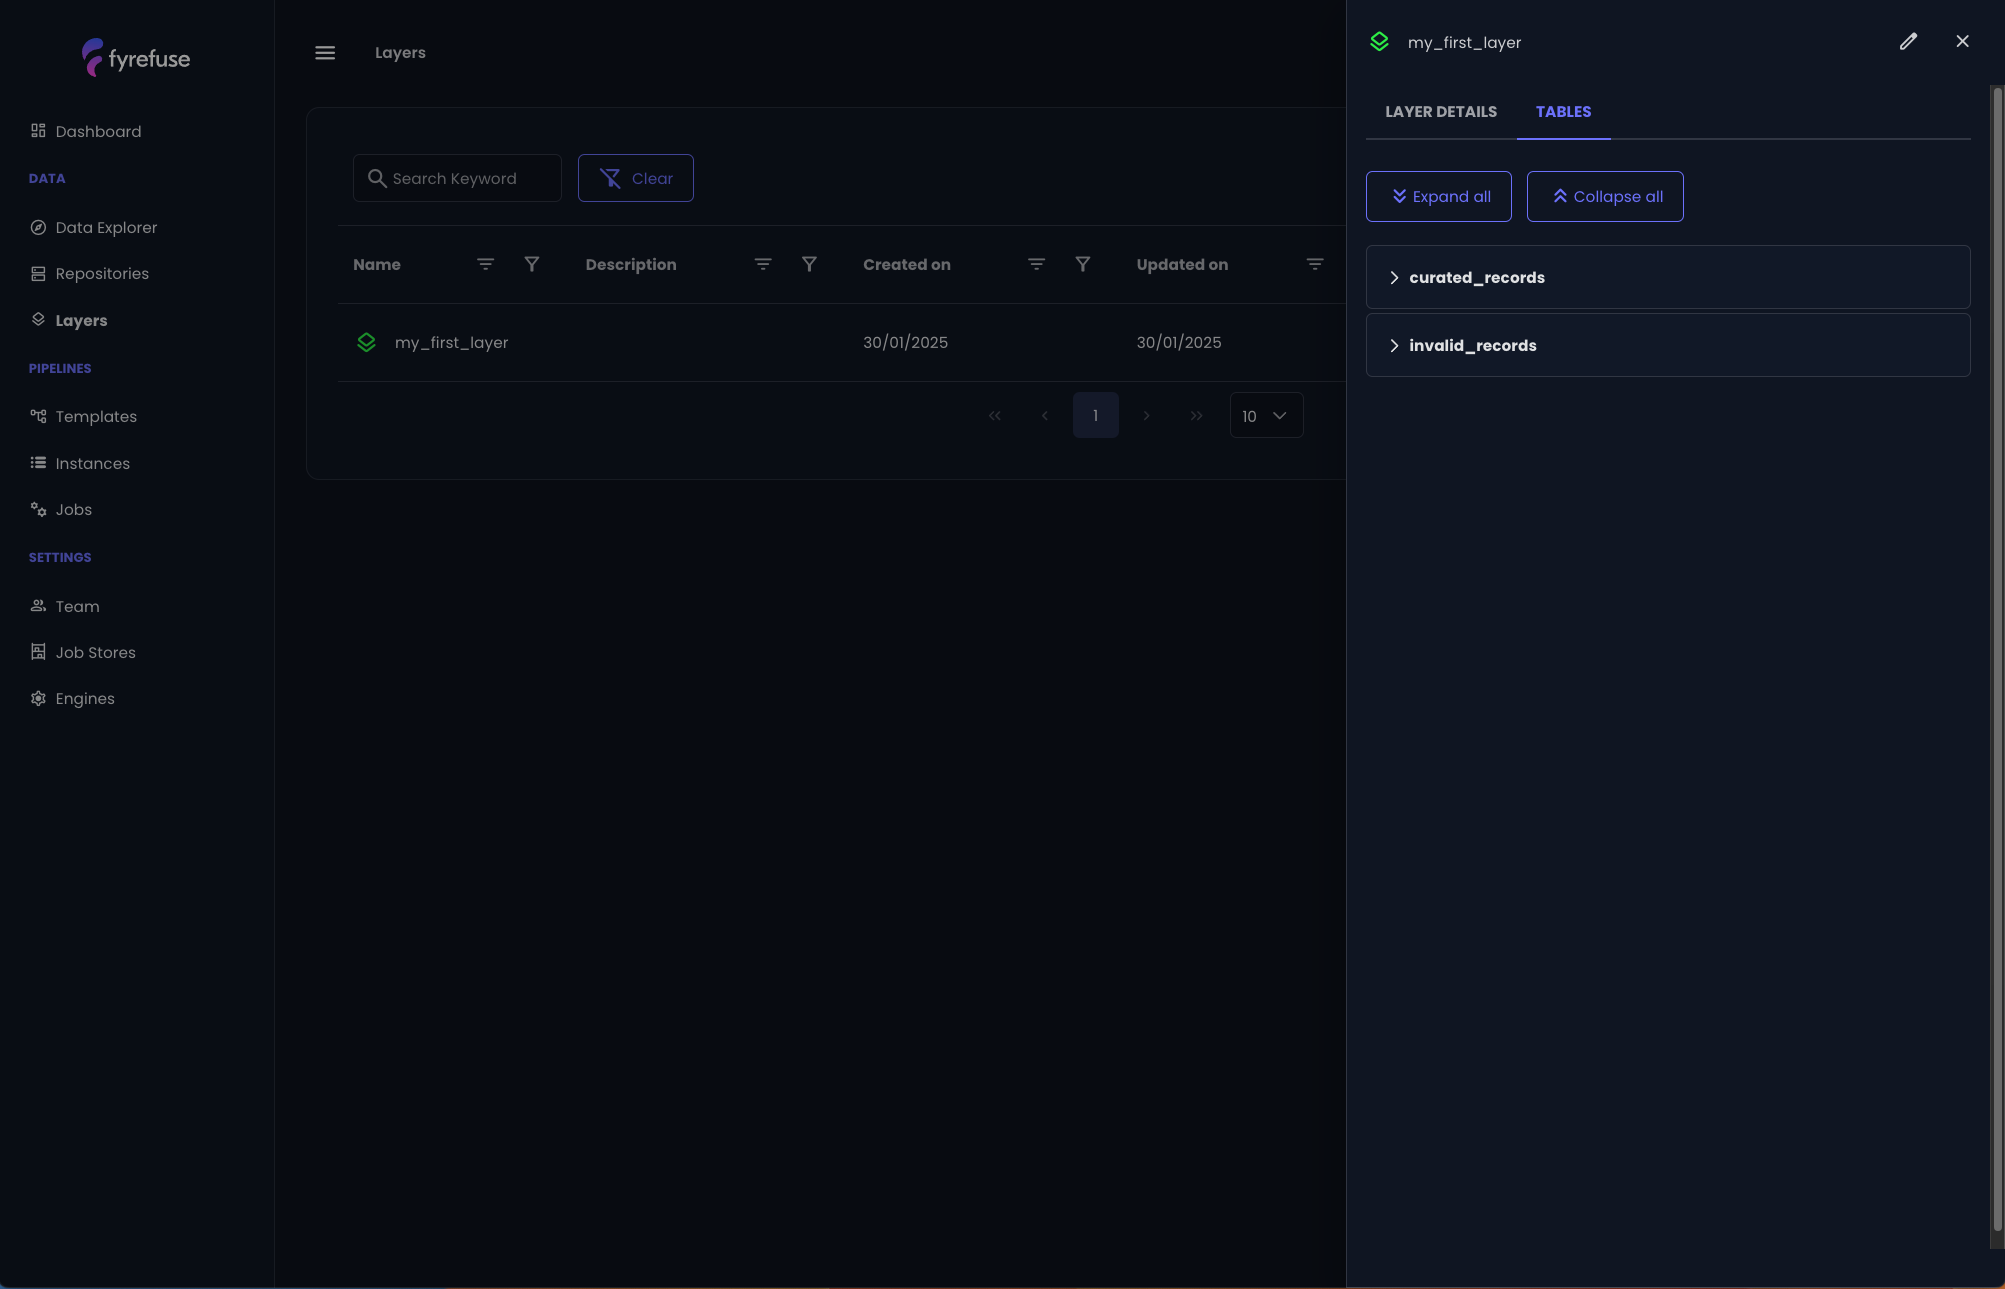
Repeat the same procedure for a second table “invalid_records”.
Build your first Pipeline template
Now that all the needed sources and targets are set up, it is time to create your first pipeline template.
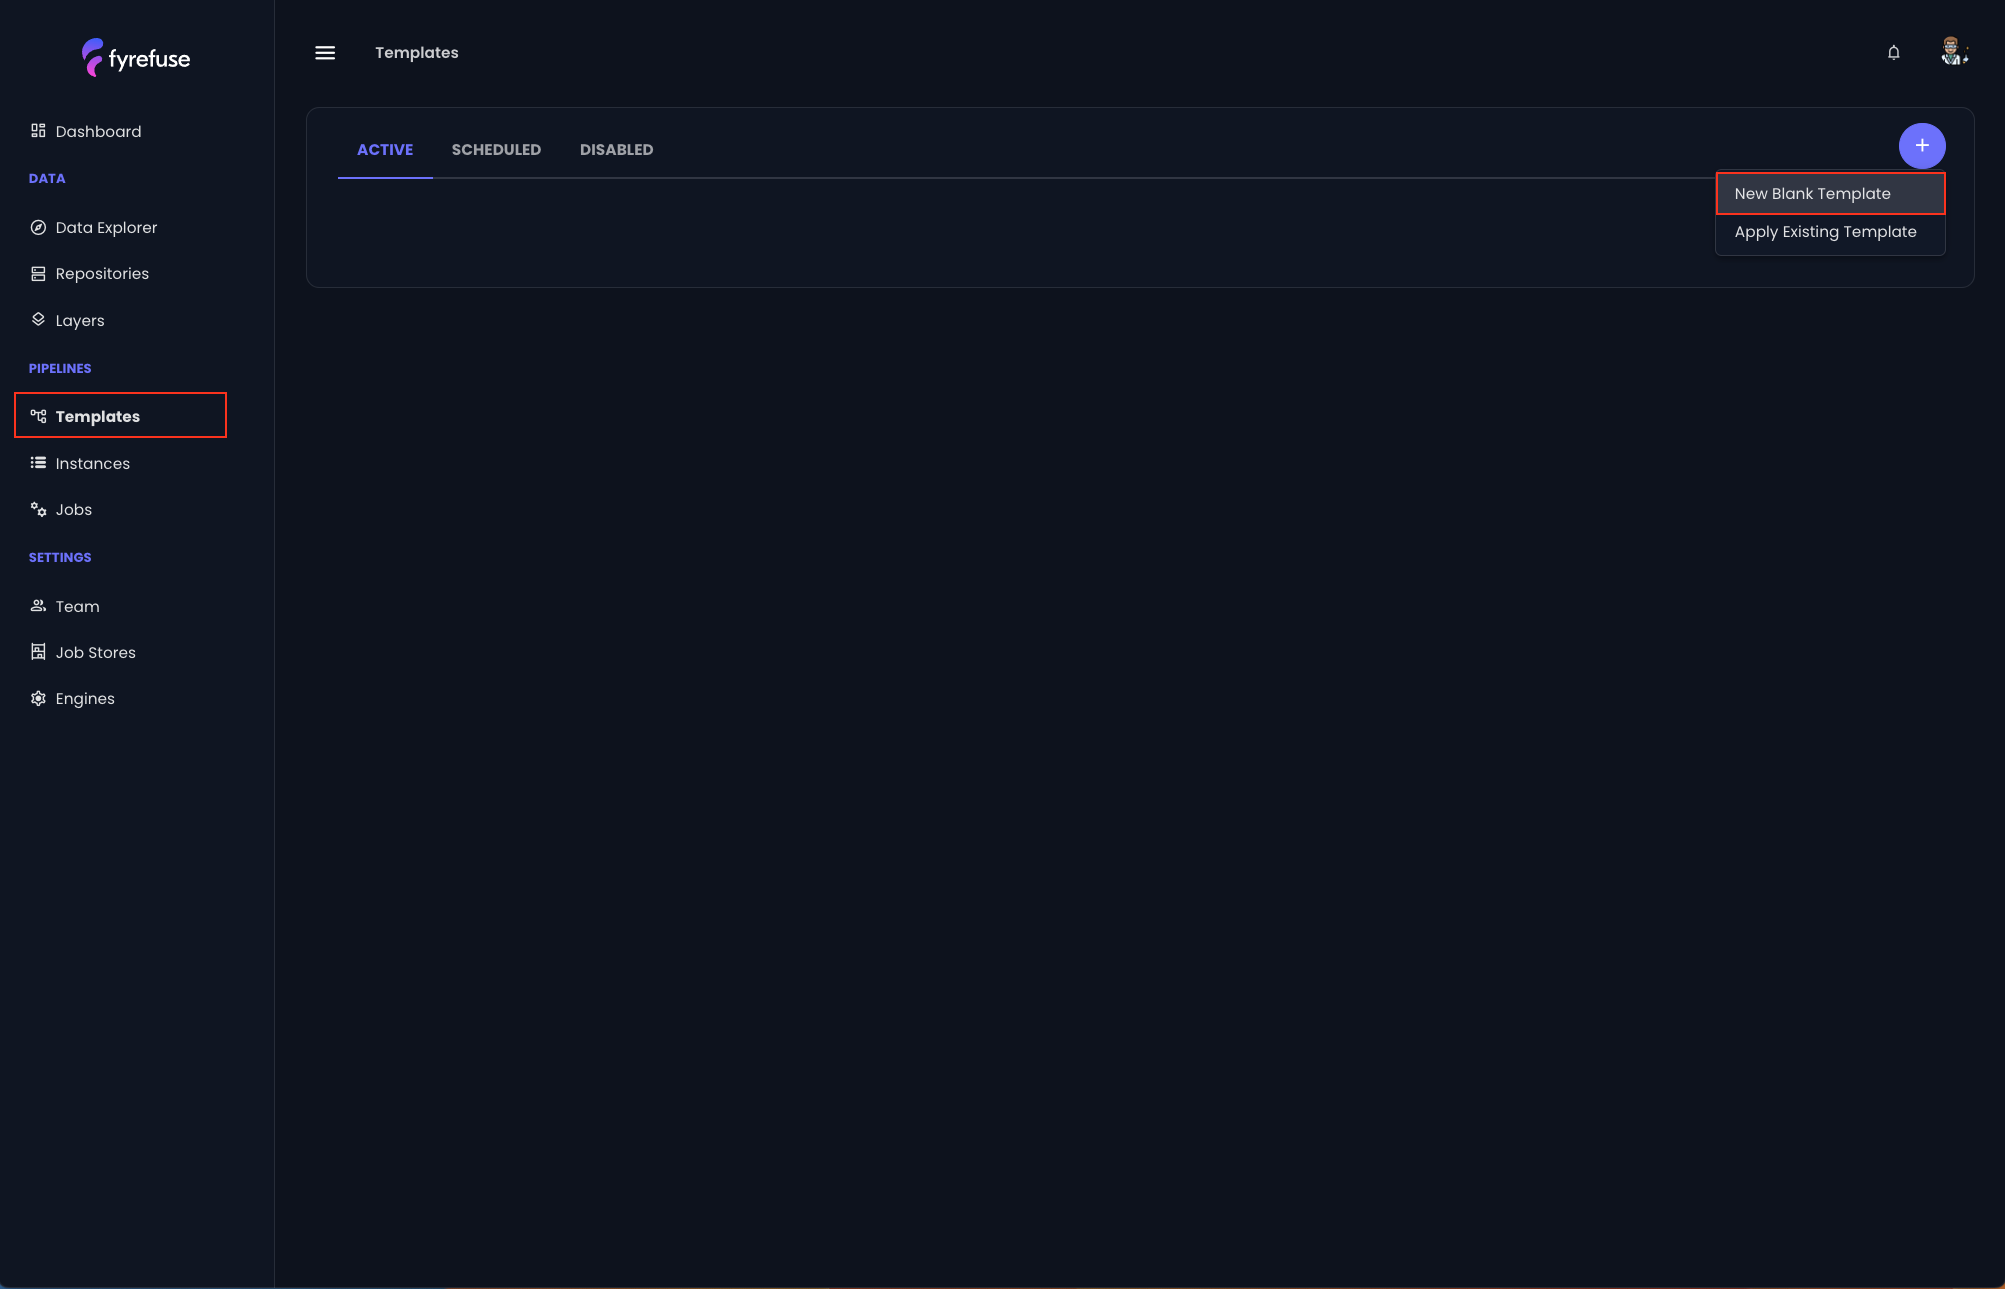
Let’s move to the “Templates” section, click on the “+” button on the top right and select “New Blank Template”.
Let’s call it “my first pipeline”.
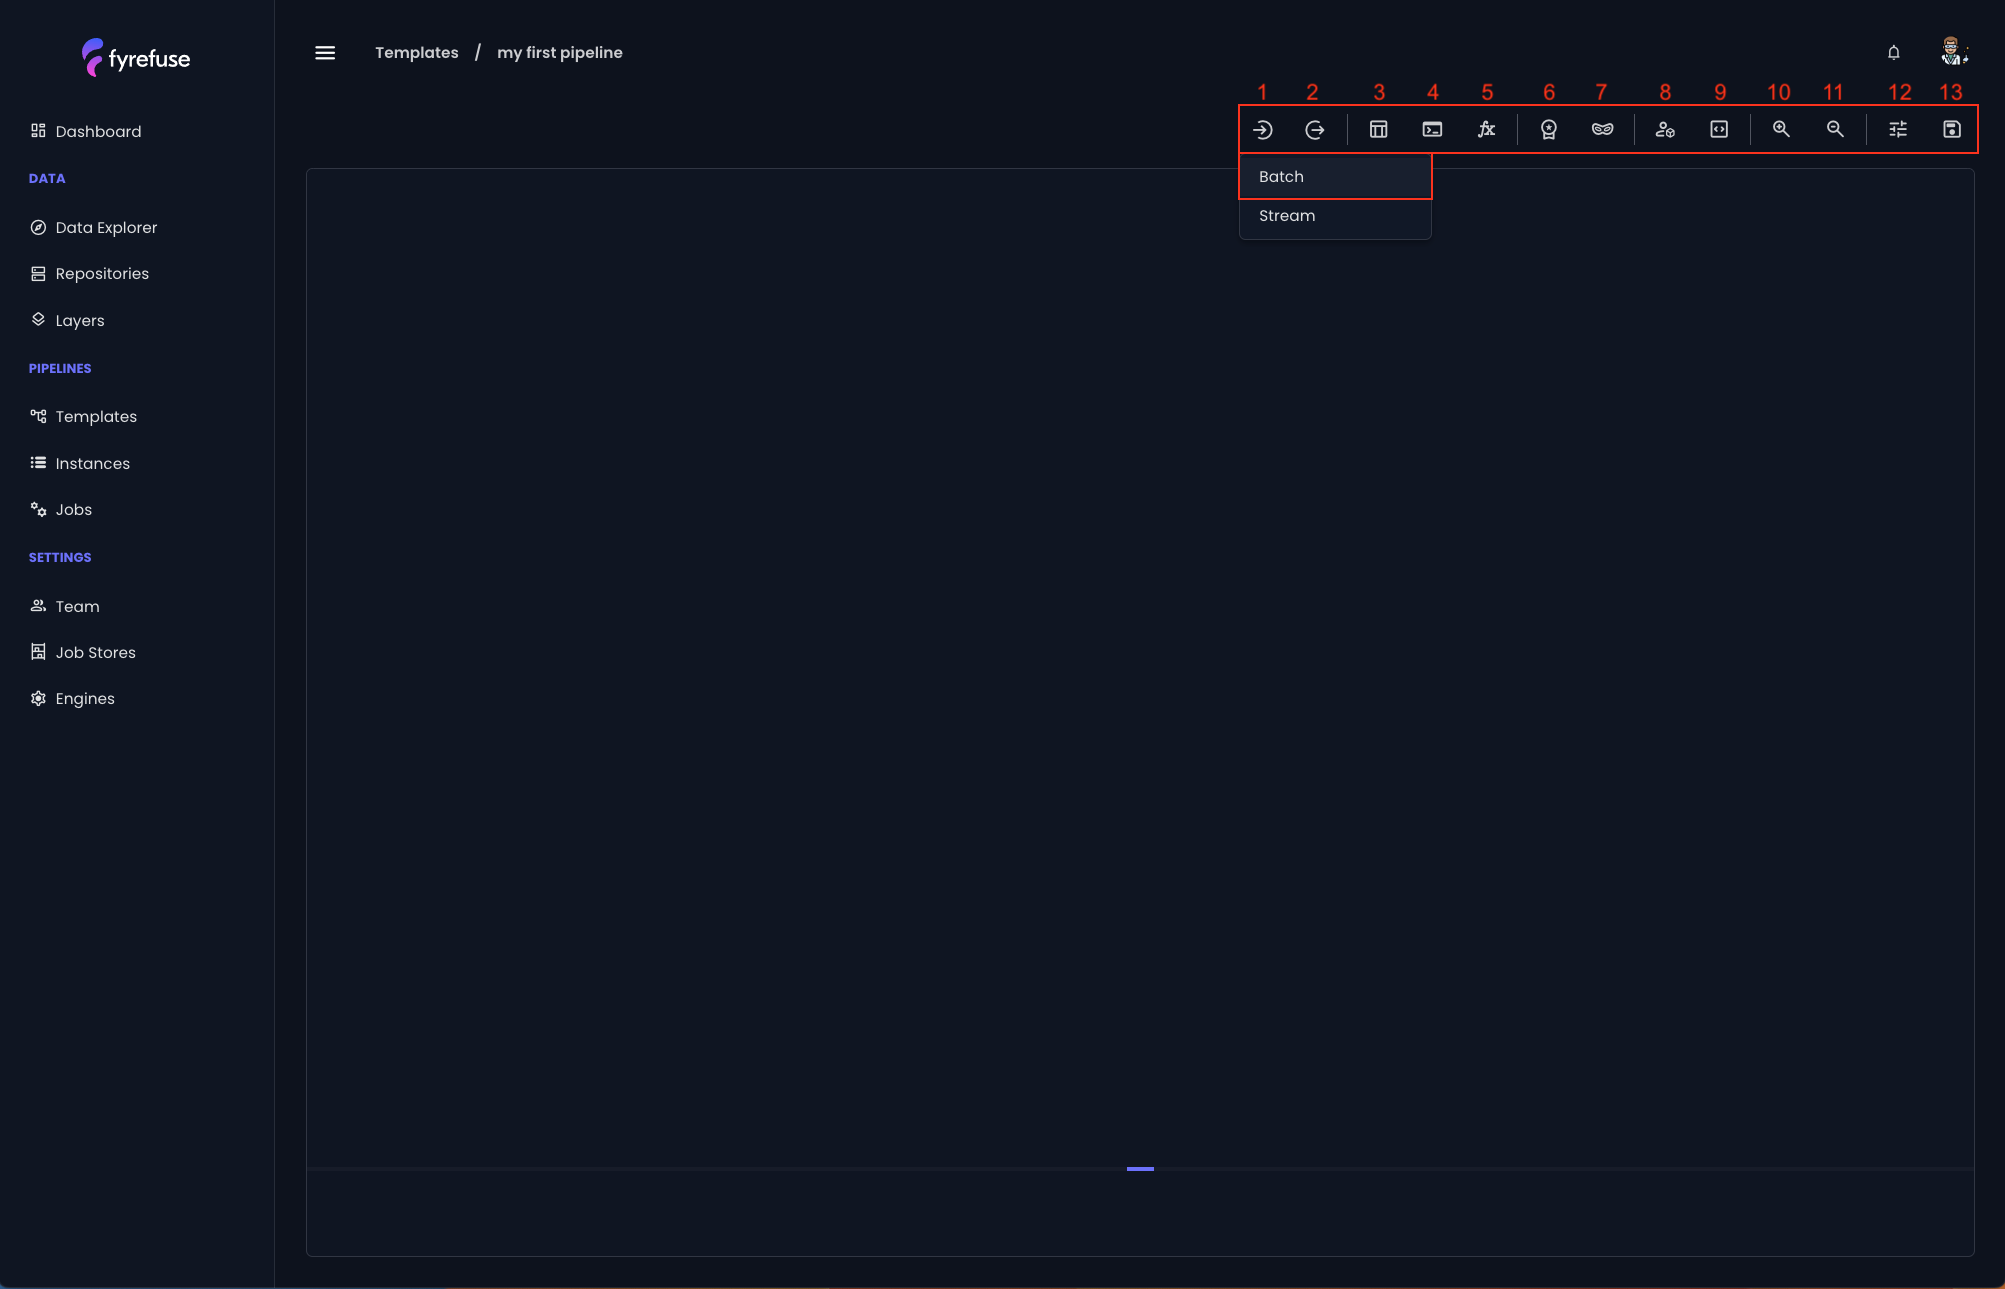
You are now in what we call “Pipeline Editor”. This is the interface that allows you to build your pipeline templates with a series of plug-and-play visual tools.
Here an overview of them:
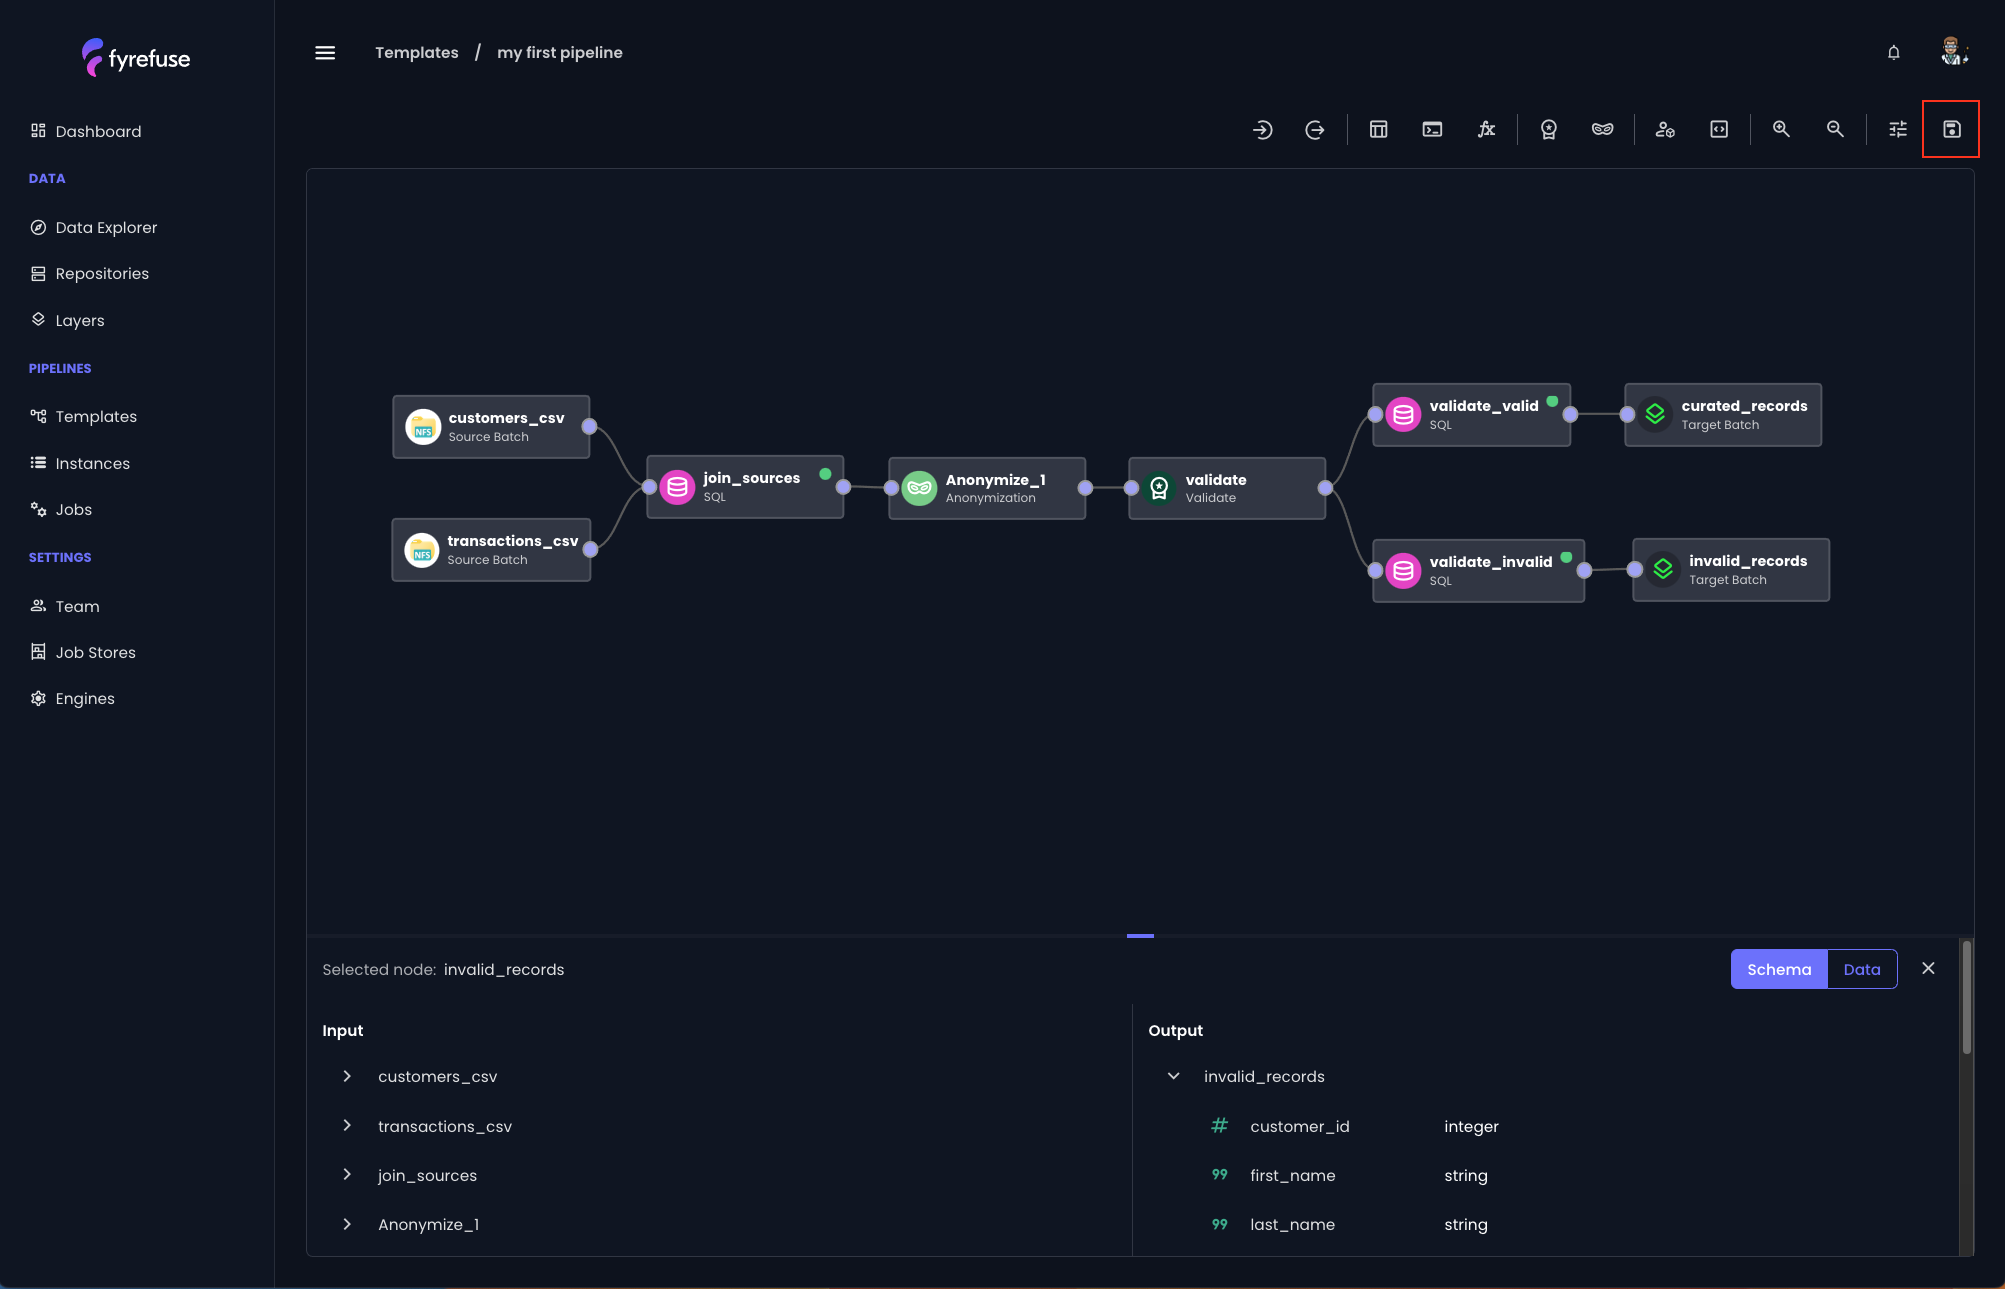
- Source job
- Target job
- SQL job
- Script job
- Valiable job
- Validation job
- Anonymization job
- UDF job
- Custom job
- Zoom in
- Zoom out
- Pipeline deployment settings
- Save button
As you can see, the jobs are grouped using a visual divider ( | ) to help distinguish them based on their logic:
- Group 1 (1, 2): Jobs for connecting the pipeline to sources and targets.
- Group 2 (3, 4, 5): Low-code jobs.
- Group 3 (6, 7): No-code jobs.
- Group 4 (8, 9): Custom-code jobs.
- Group 5 (10, 11): Zooming buttons.
- Group 6 (12, 13): Pipeline advanced deployment settings and the save button.
After this quick overview of the toolbar, let’s start building the pipeline!
Create the source jobs
The first element that has to be created in your pipeline is the source. In order to do so, click the “Sources” button (1) and select “Batch”.
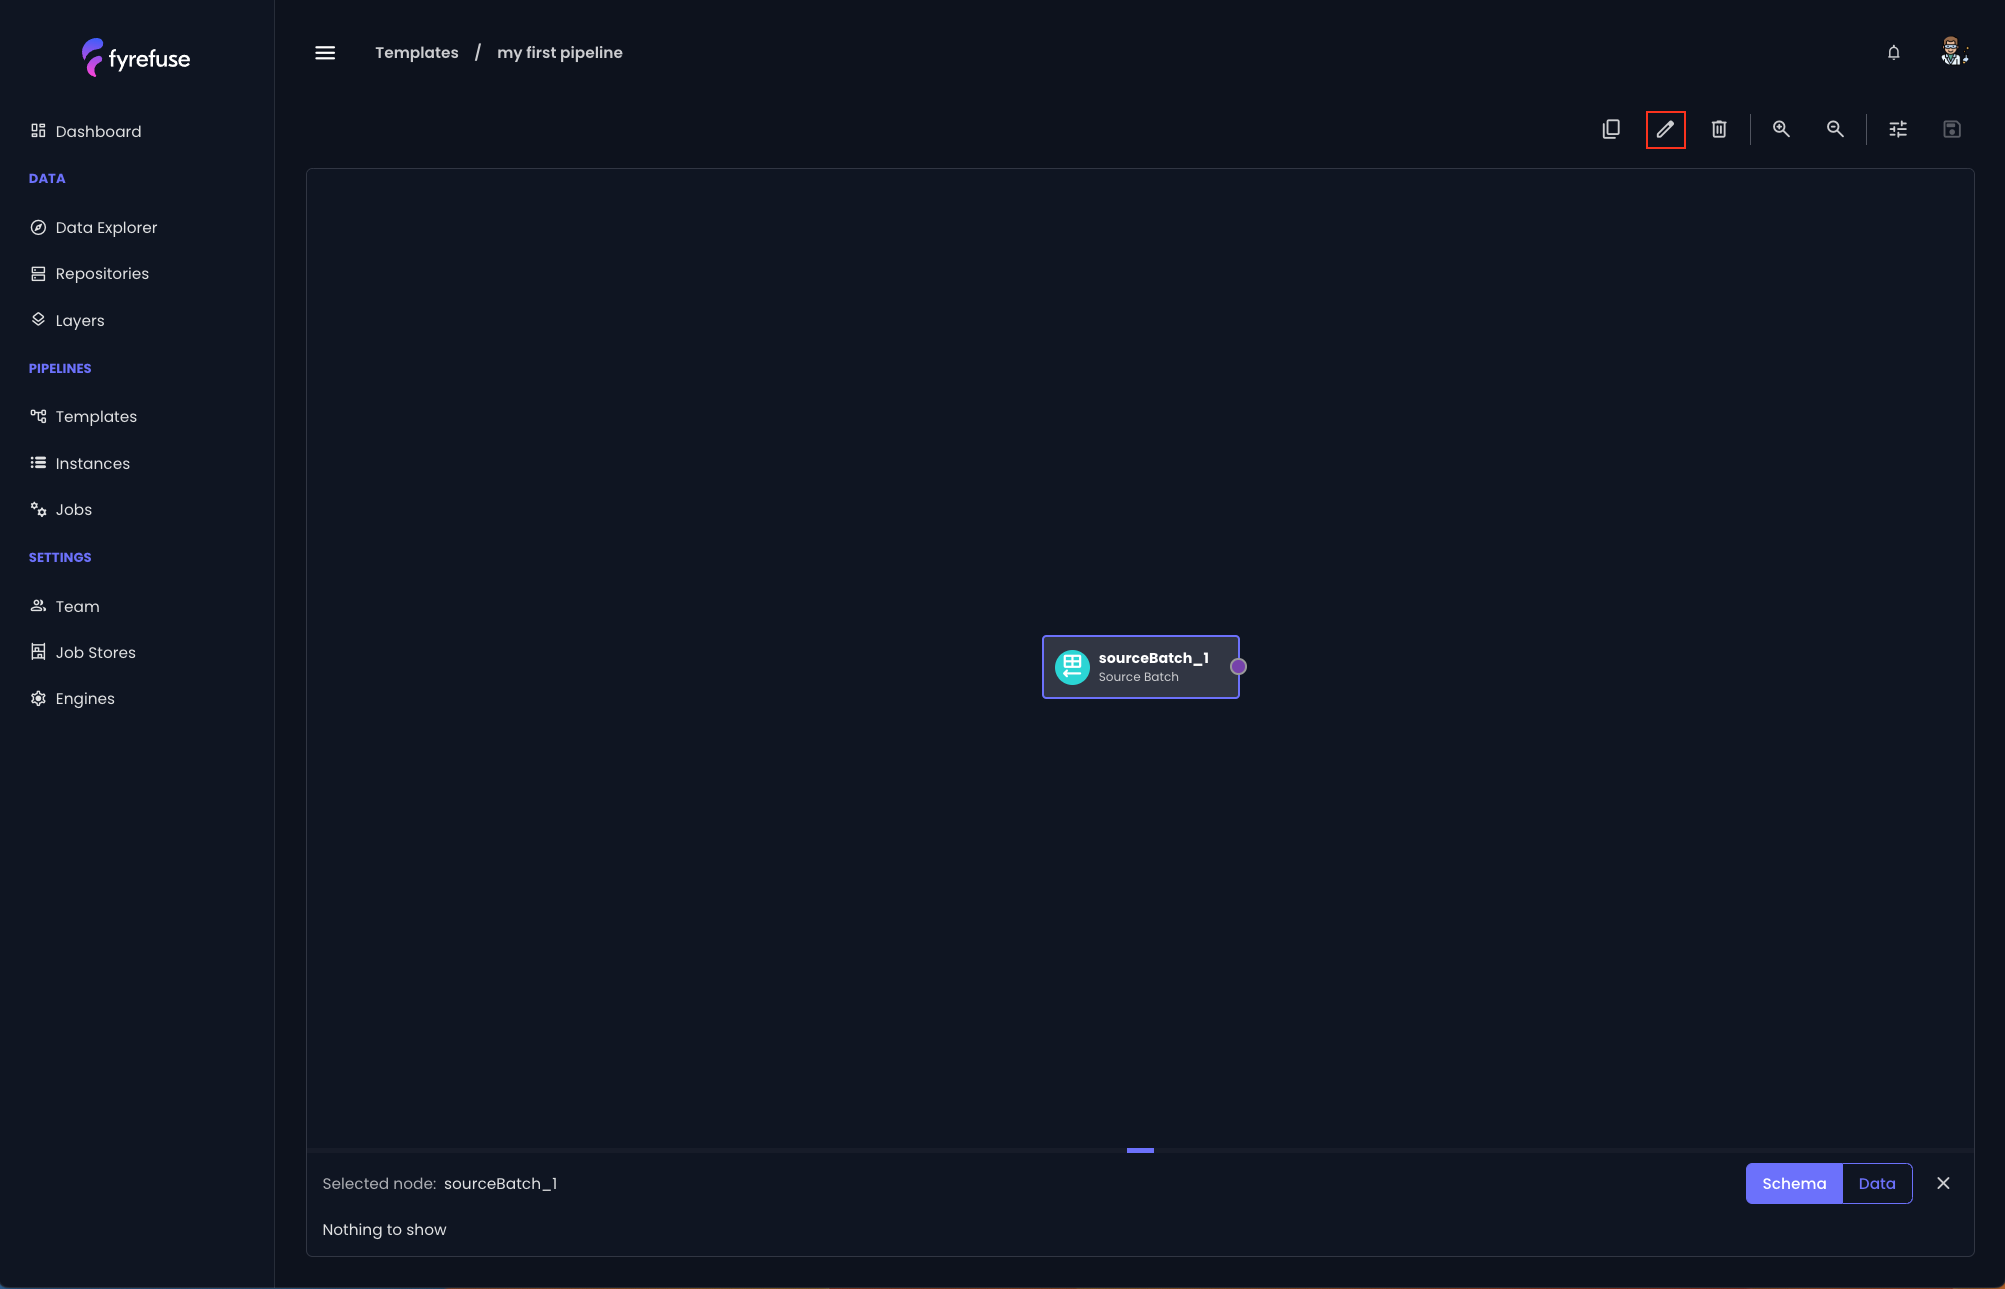
When creating a new source/target job, the very first thing to do is to bind an entity (or table) to it.
For both cases the process is the same. Just select the job in the canvas and click on the pencil icon in the toolbar to open the configuration panel.
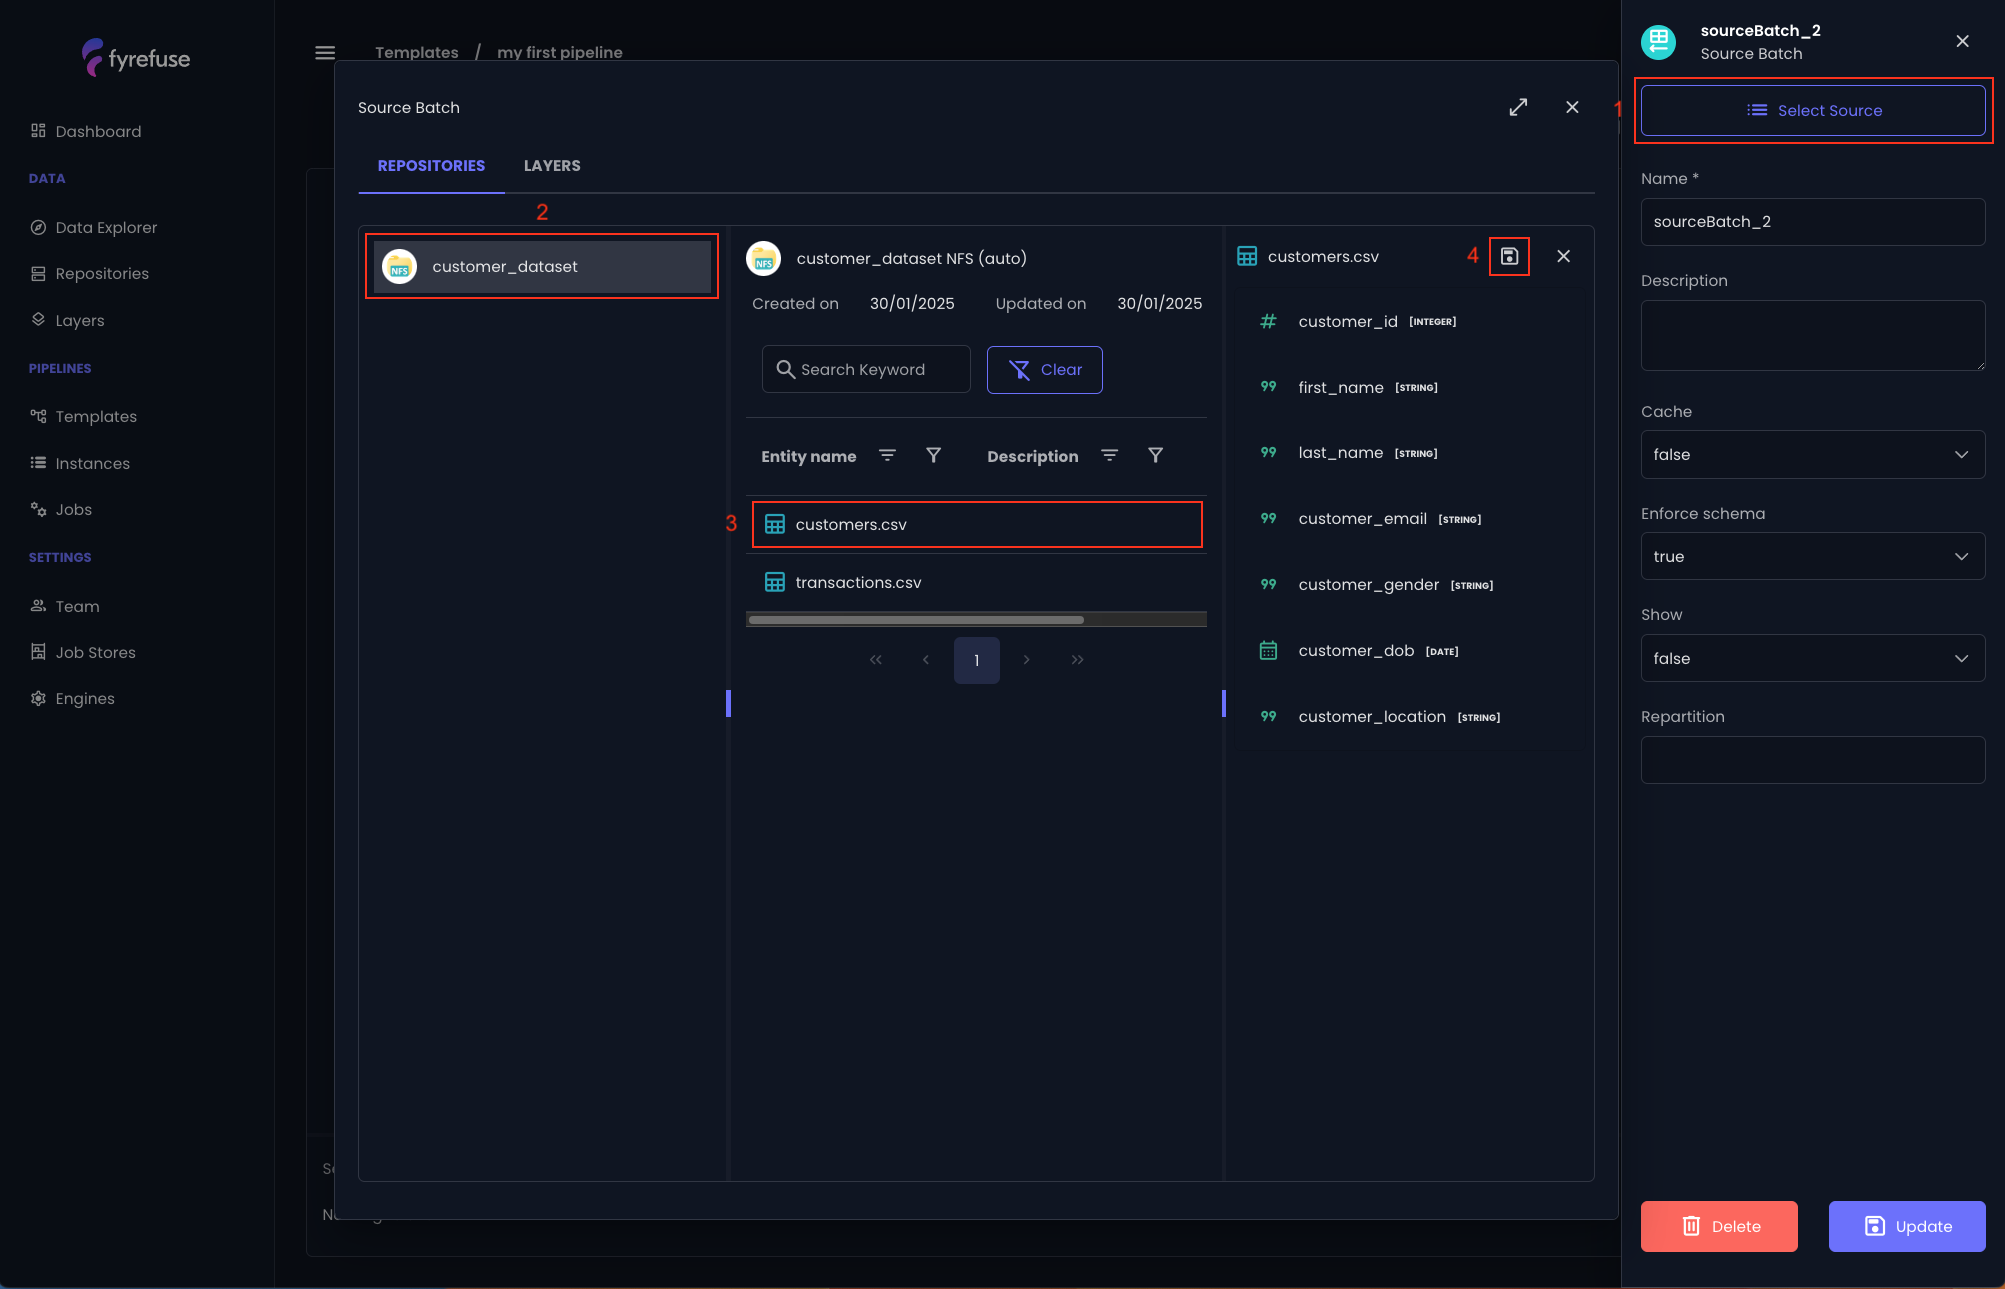
Click again on “Select Source”, now you have quick access to all the repositories and layers defined in your project.
The modal has two upper tabs for selecting respectively repositories or layers and it is divided into three sections, following the Fyrefuse datasources’ abstraction tree. On the left you will see the list of repositories (layers), in the middle you will find the entities (tables) of the selected repository (layer) and on the right there will be displayed the schema, if present, of the selected entity (table).
Select the customer_dataset, then customers.csv and click the save icon to confirm the binding.
Congratulations! You have just bound your first entity to a source job.
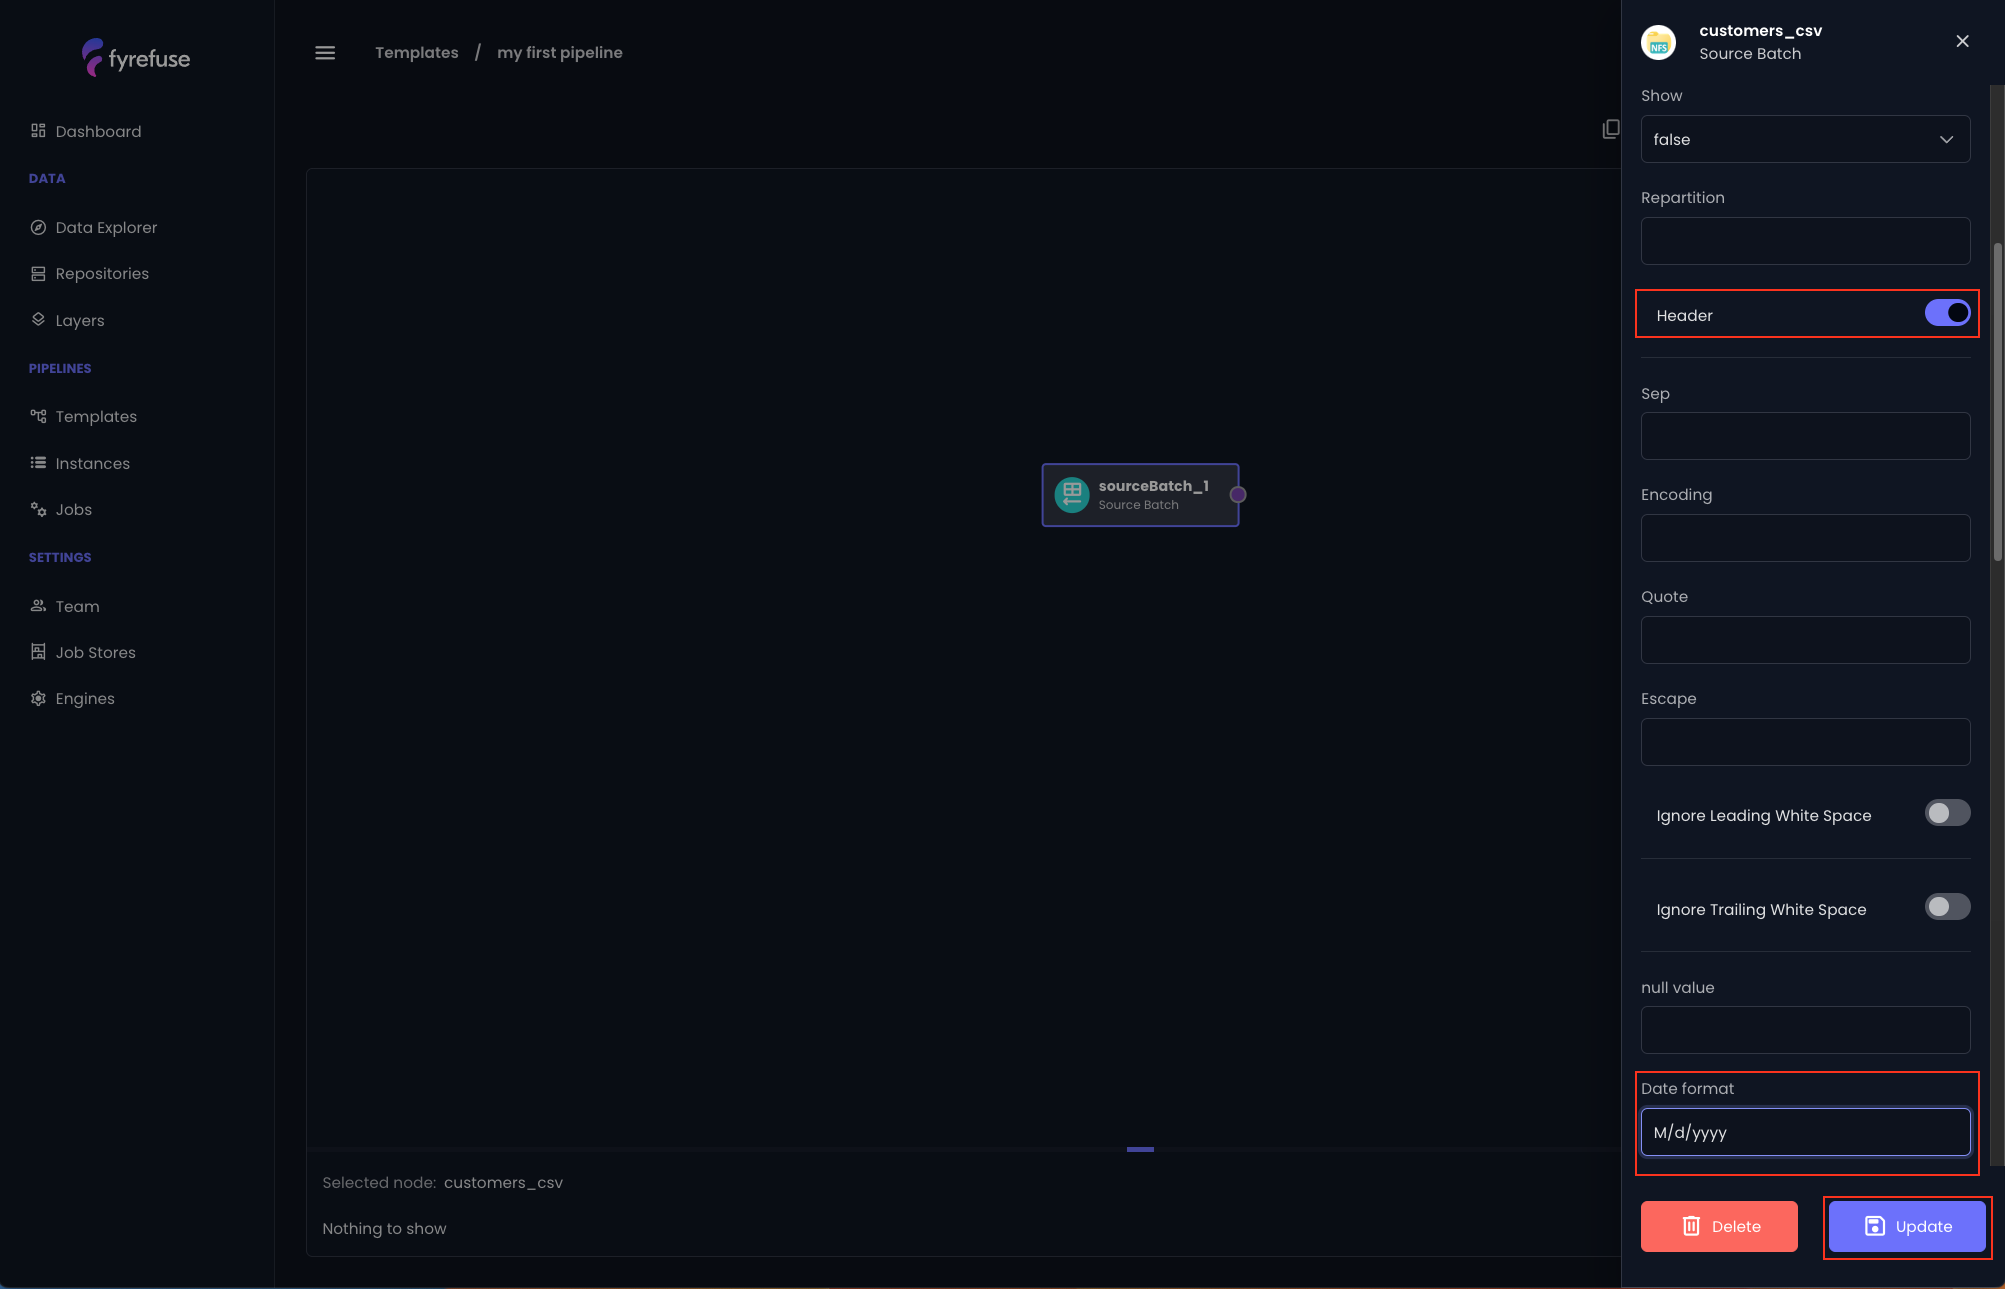
Before updating the source job with the changes there is one more thing to do. Enable the “Header” toggle and insert M/d/yyyy”“ as the value of “Date format” option.
Now click “Update” to persist the changes.
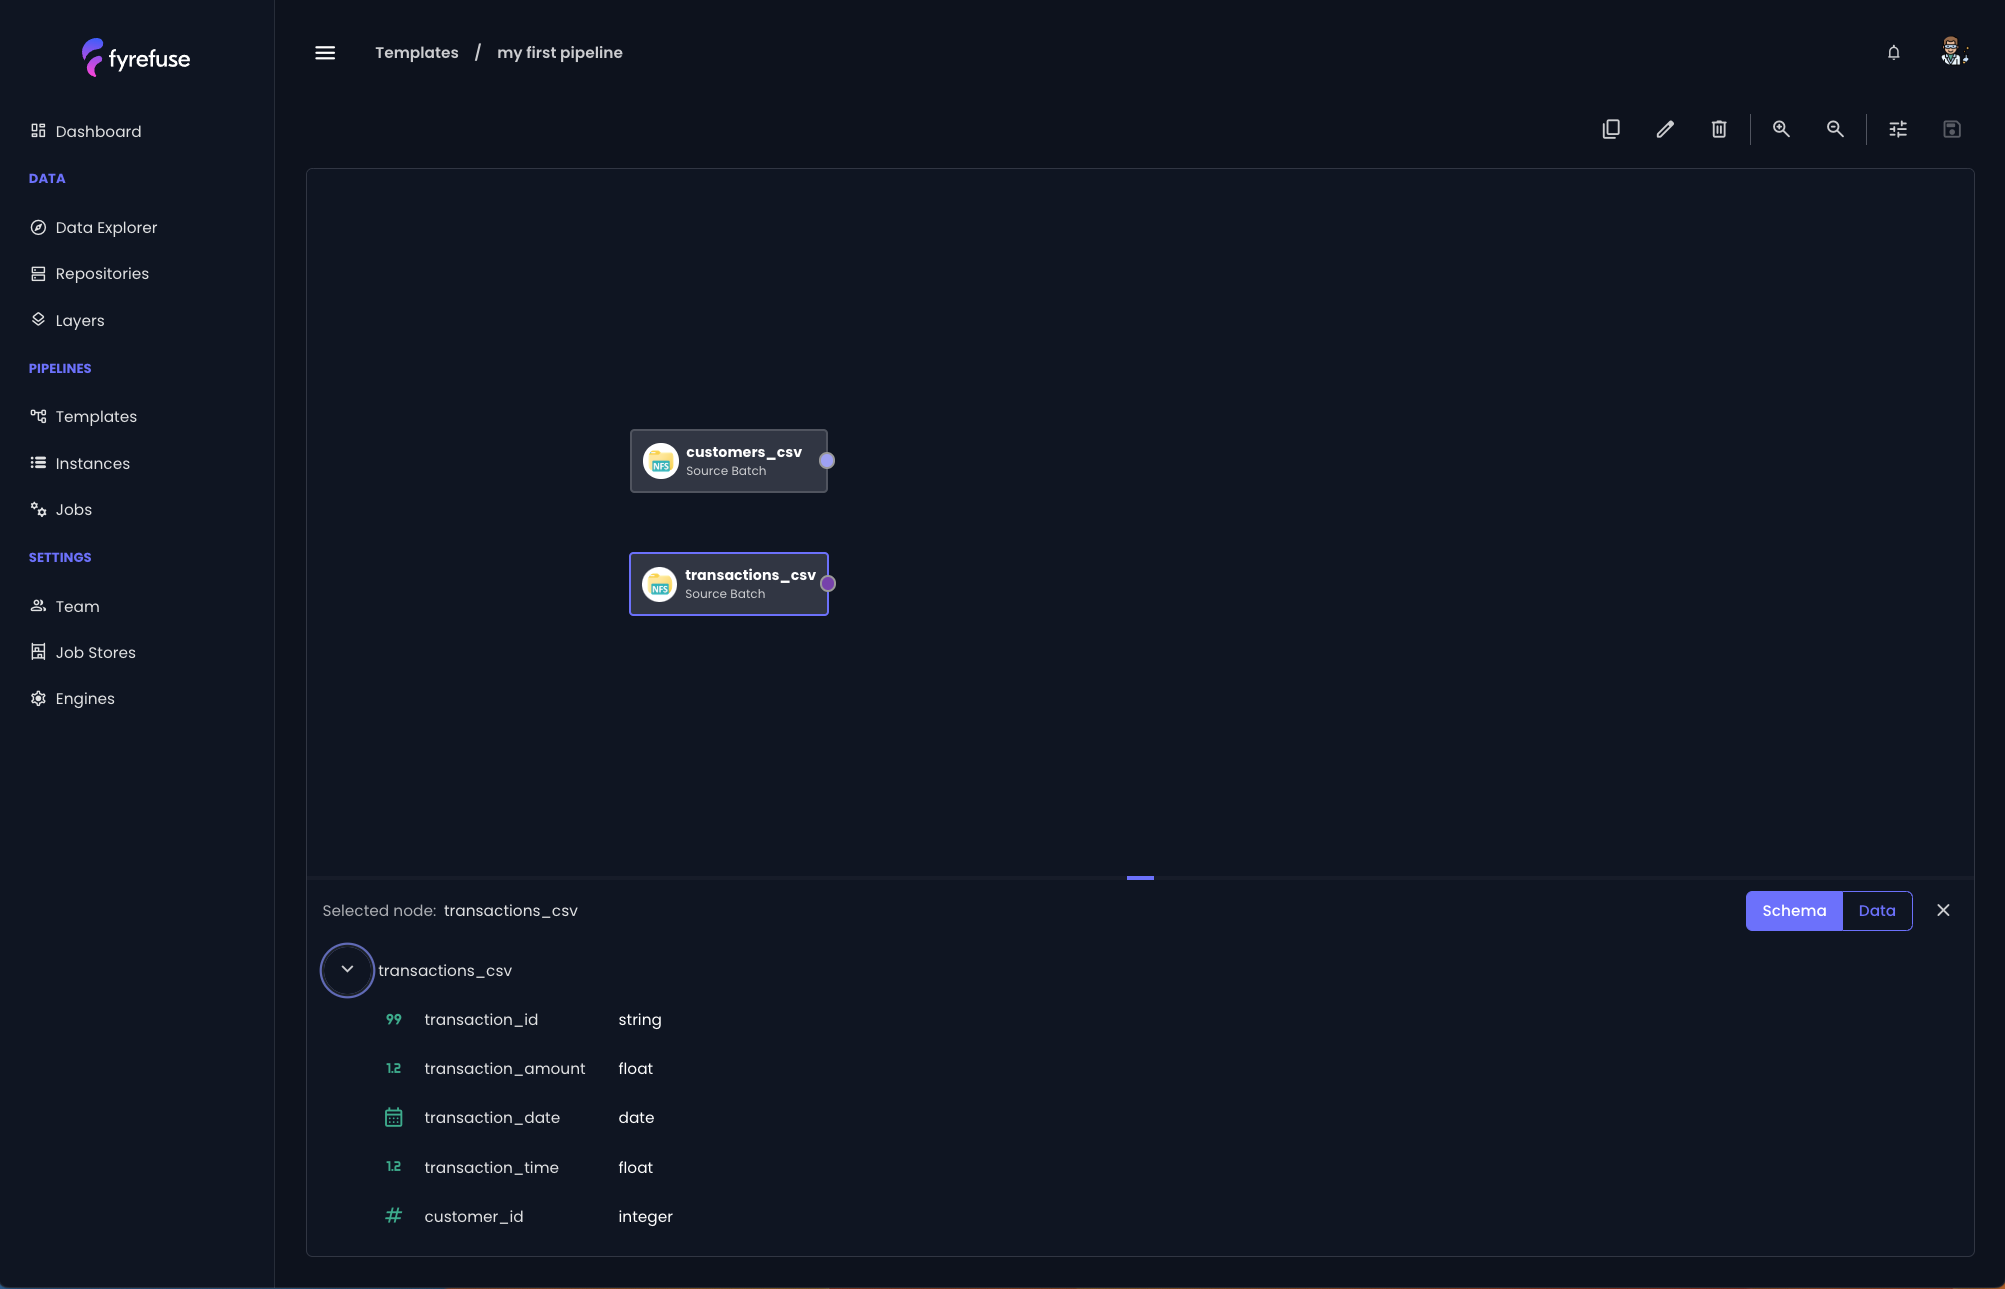
Repeat the same process for the second entity transactions.csv.
You now have completed the configuration of the source job.
Create the data processing jobs
SQL job
Now that your sources are ready, it's time to connect them to the first data processing job.
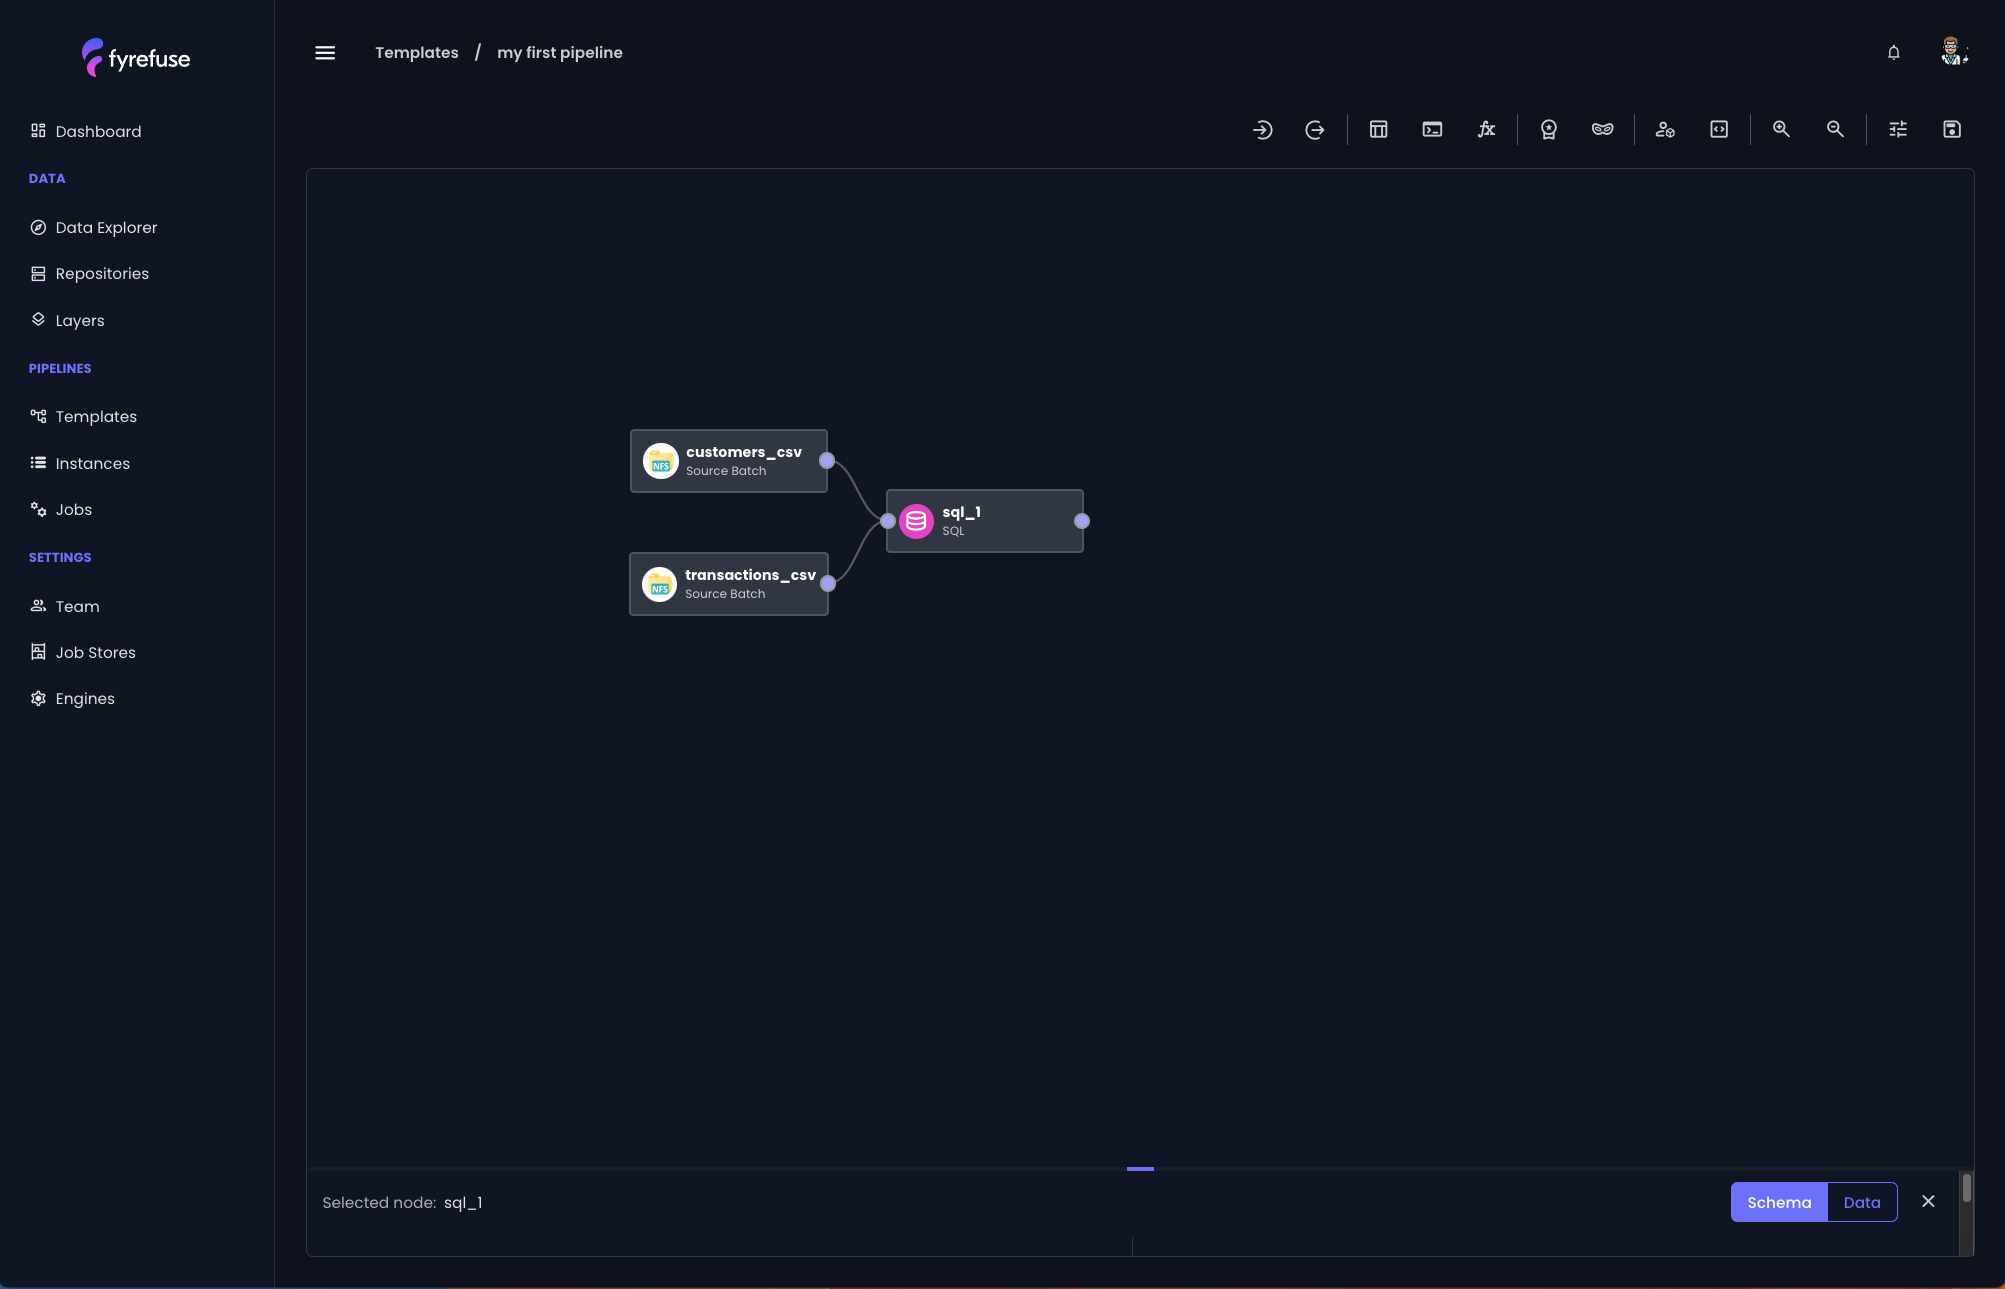
Your task is to merge the two datasets using the foreign key customer_id. To do this, you'll need a SQL job (3). Simply select a SQL job (3) from the toolbar and link it to both data sources.
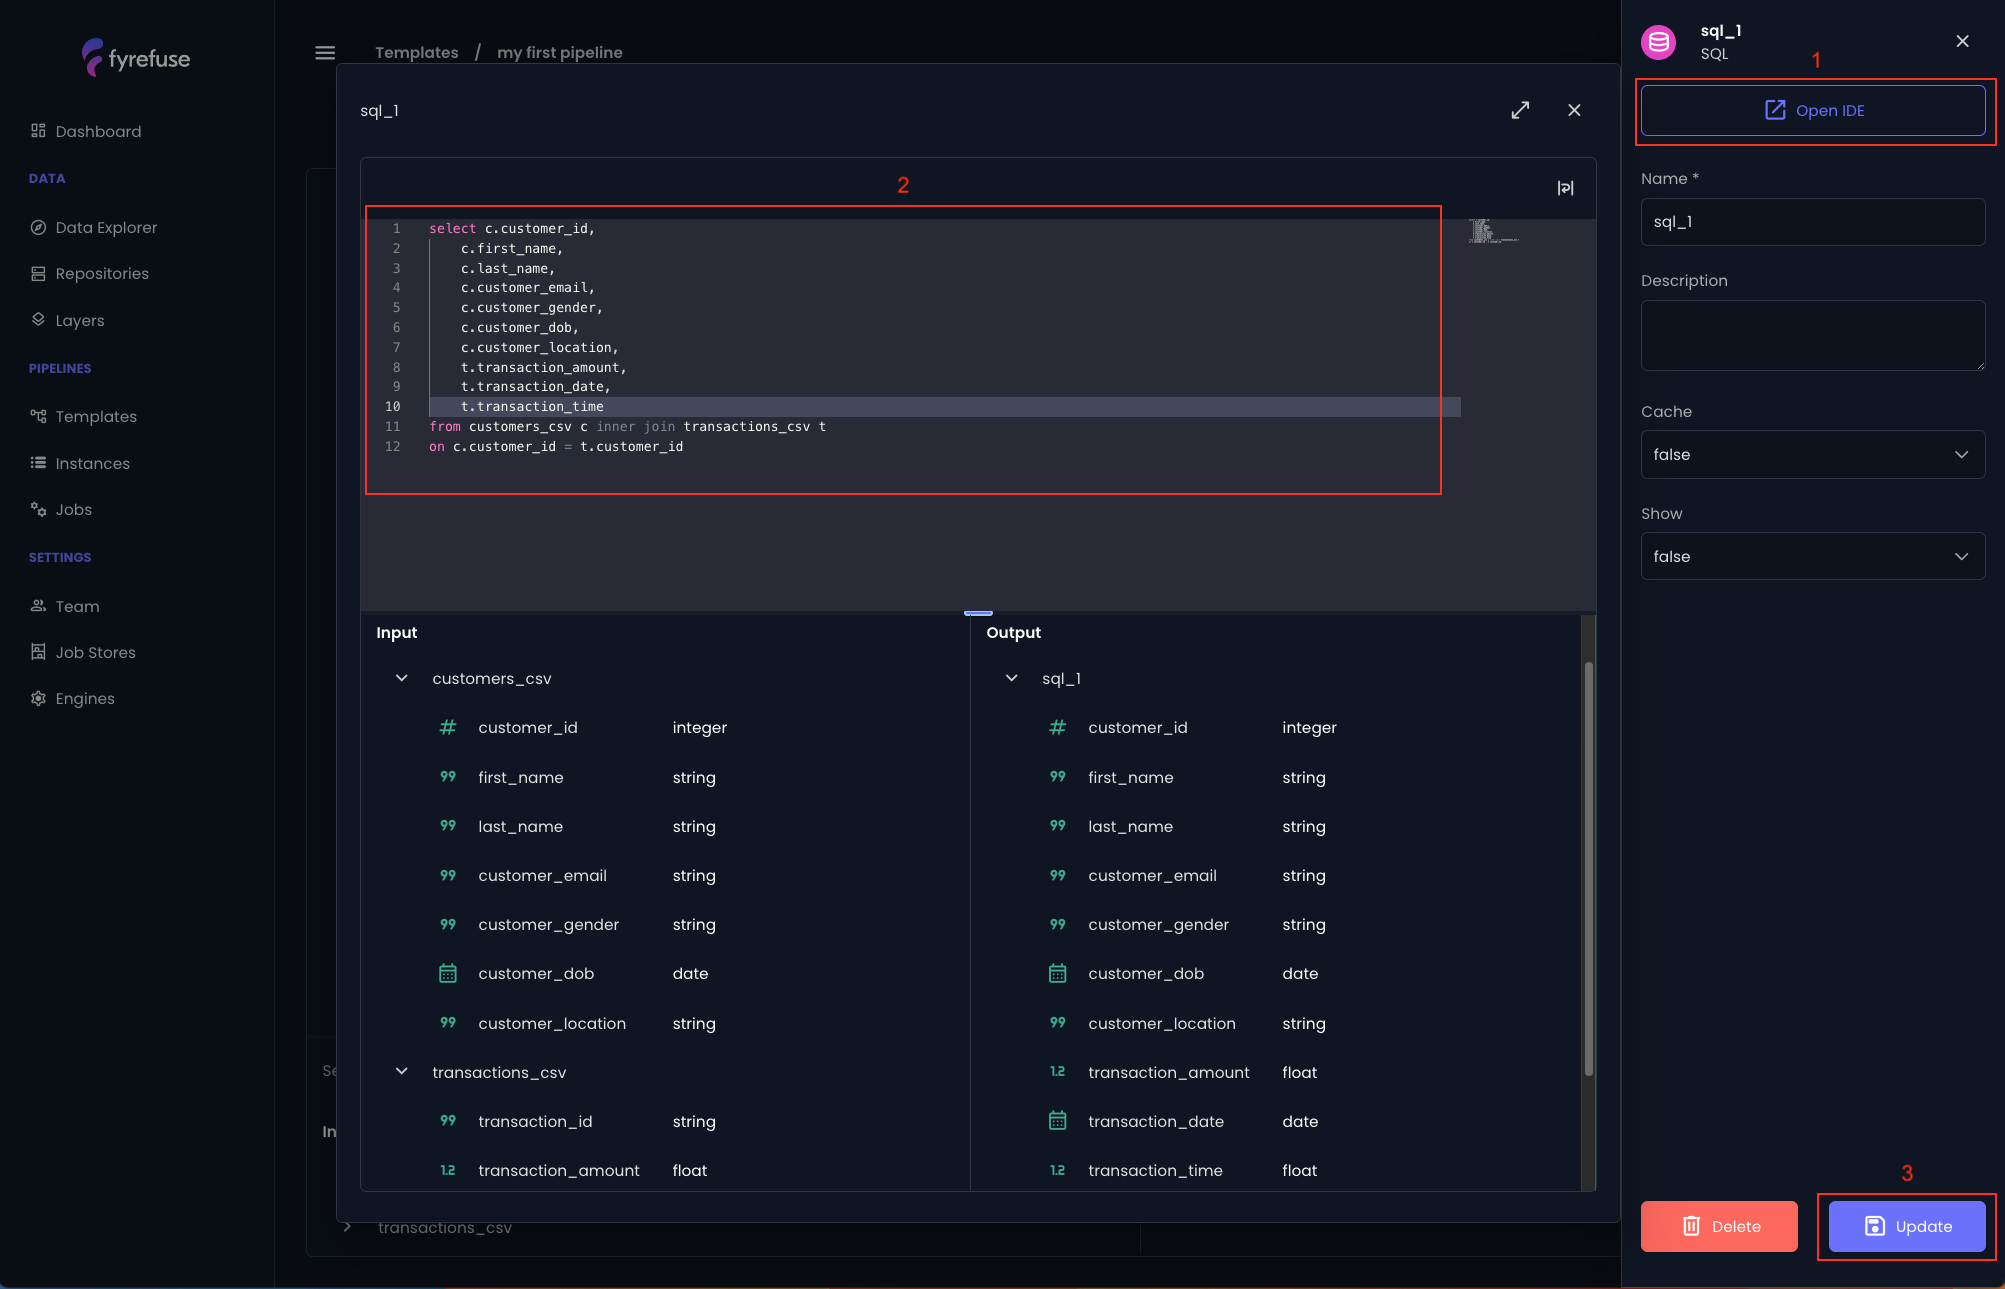
As you did for the sources, click on the sql_1 job and then on the pencil icon. You need to open the IDE for writing the merging query. You can copy and paste the following:
SELECT c.customer_id
	c.first_name,
	c.last_name,
    c.customer_email,
    c.customer_gender,
    c.customer_dob,
    c.customer_location,
    t.transaction_amount,
    t.transaction_date,
    t.transaction_time
FROM customers_csv c INNER JOIN transactions_csv t
ON c.customer_id = t.customer_id
From the left panel, you can optionally rename the job as “join_sources”. When you are done, click the “Update” button on the bottom right.
Anonymization job
The next phase involves anonymizing the incoming data in accordance with business rules and privacy policies. Fortunately, Fyrefuse provides a no-code solution for this! Simply select the Anonymization job (7) from the toolbar and connect it to the output of the SQL job.
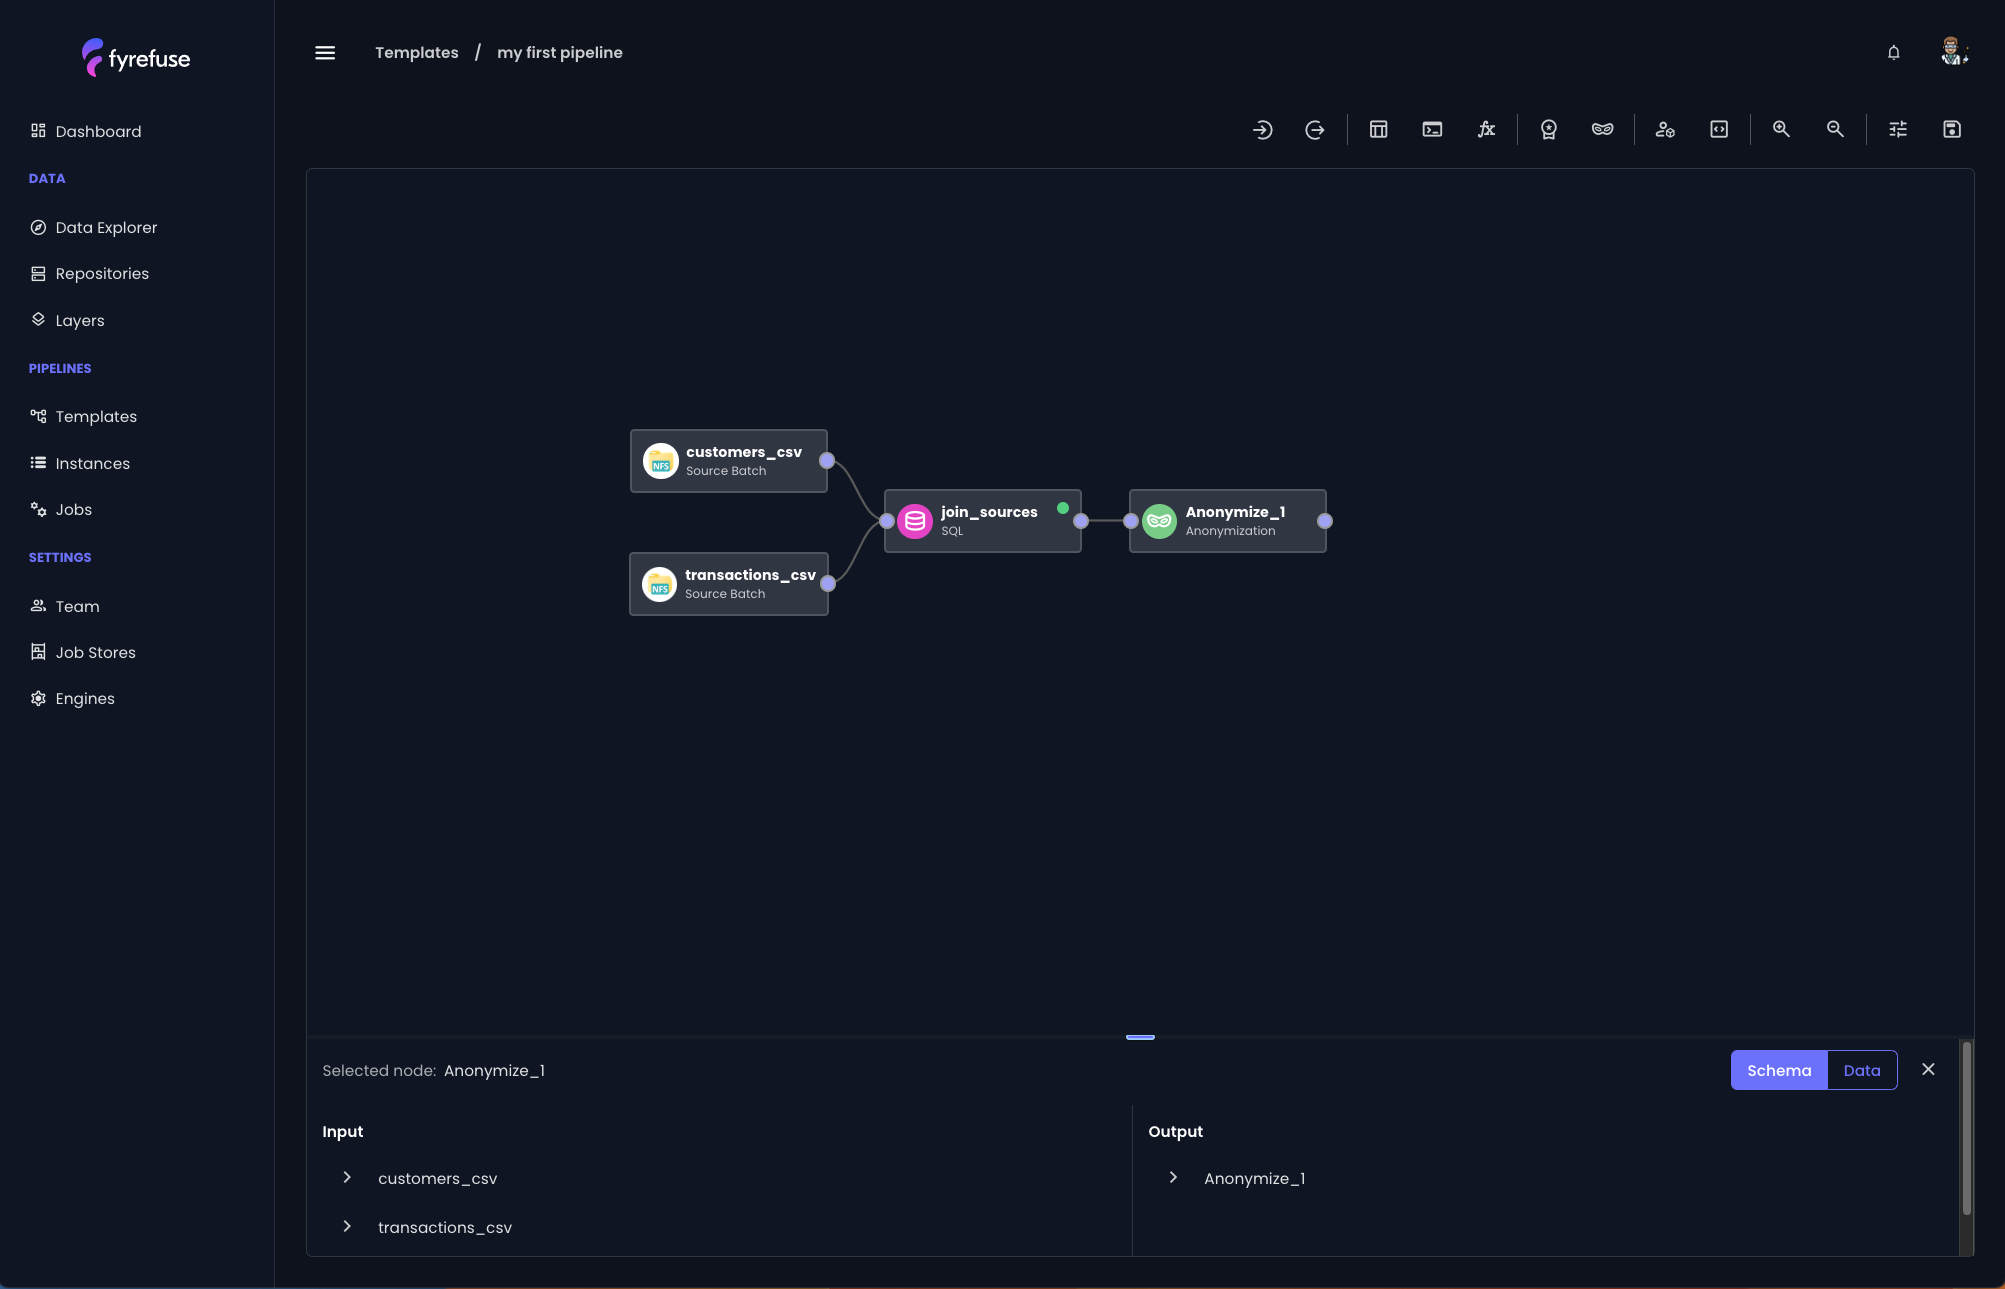
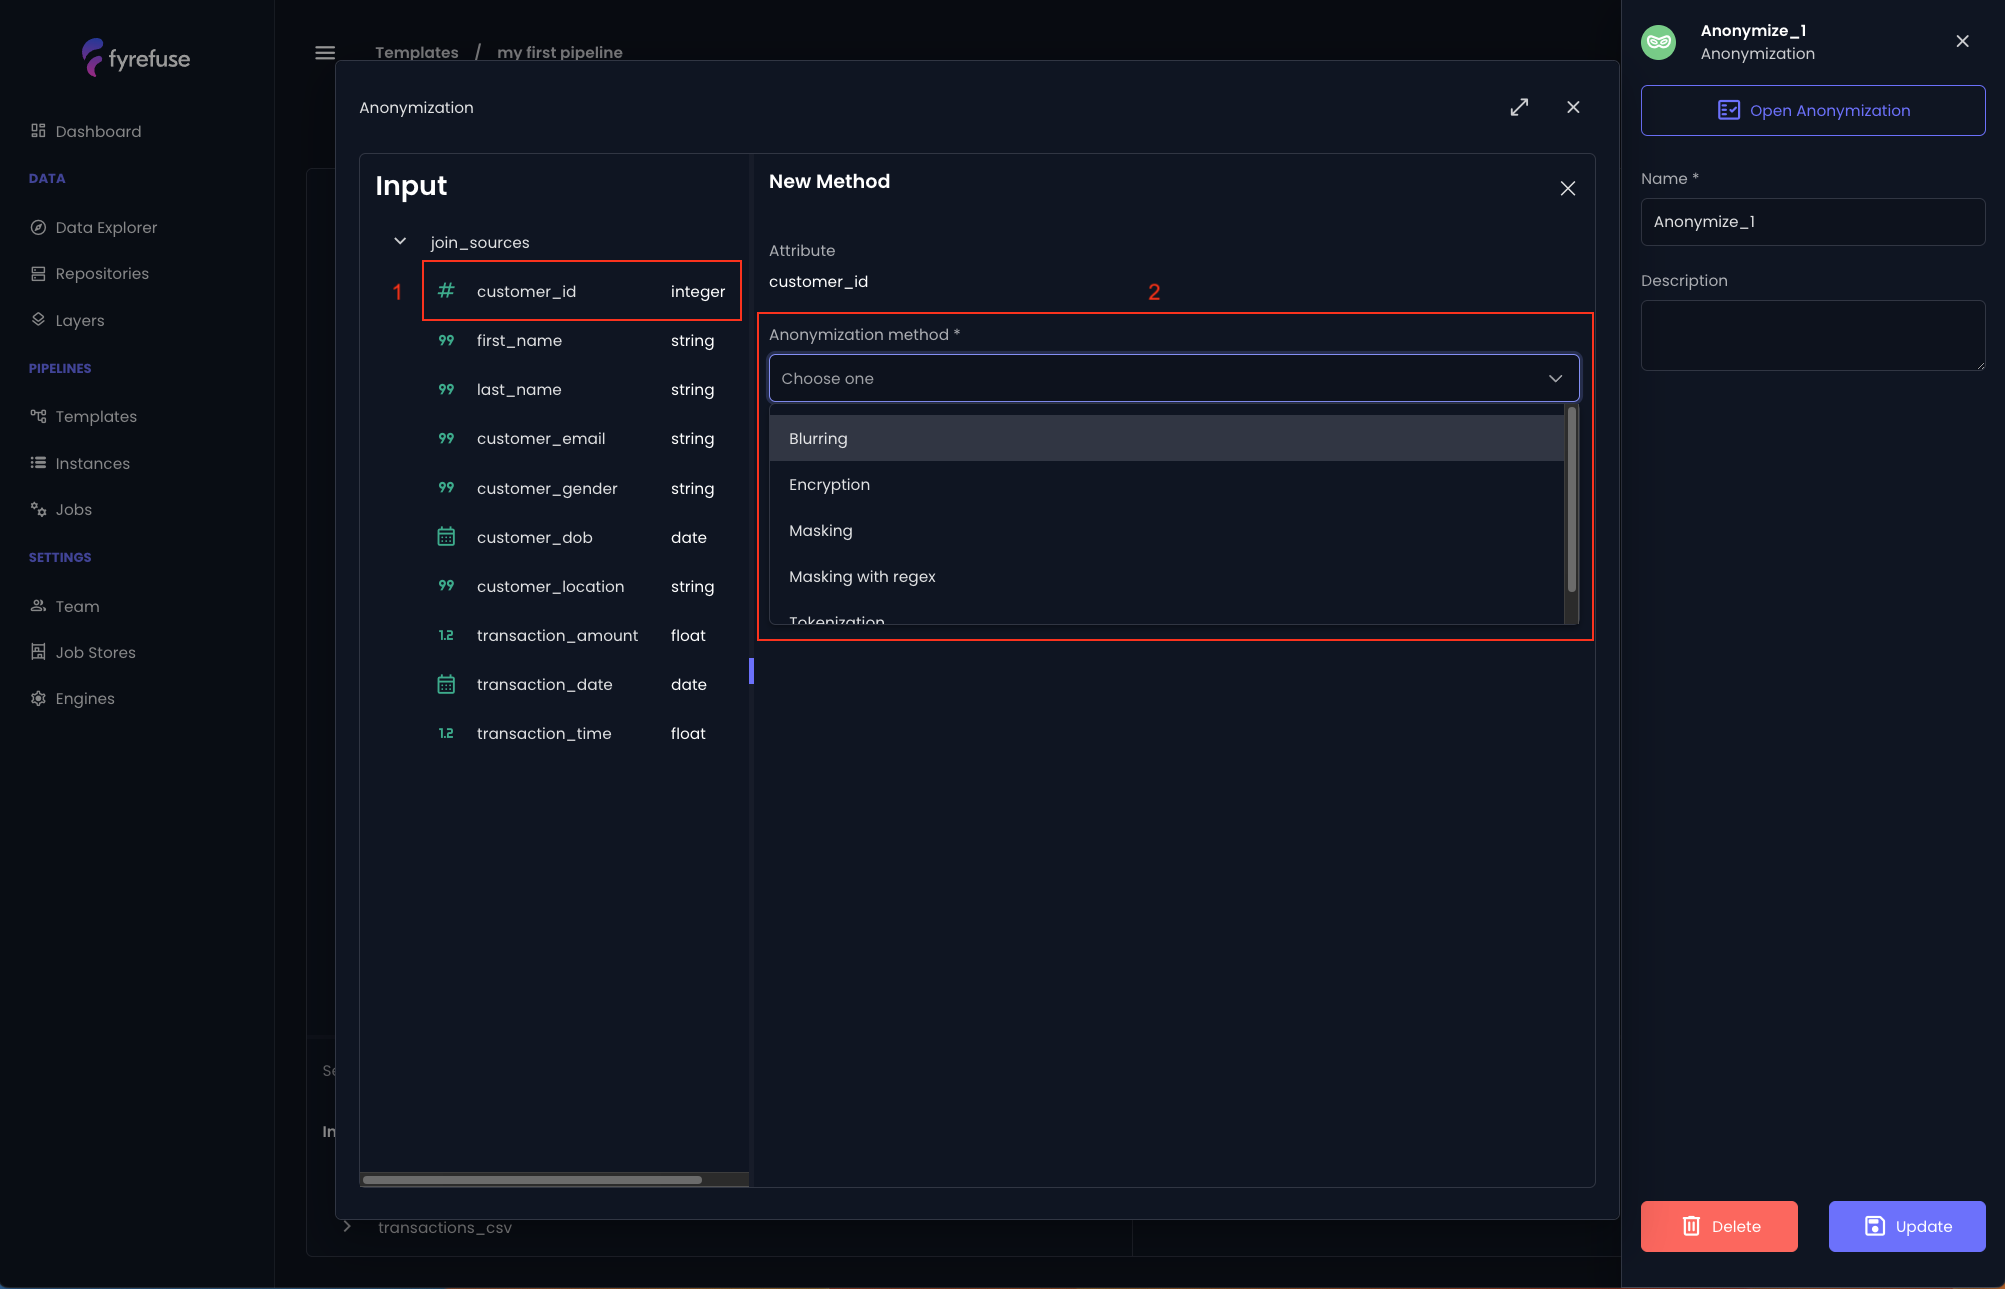
Now that you are more familiar with the pipeline editor logic, let’s jump into the anonymization job configuration and select the attributes that you want to anonymize.
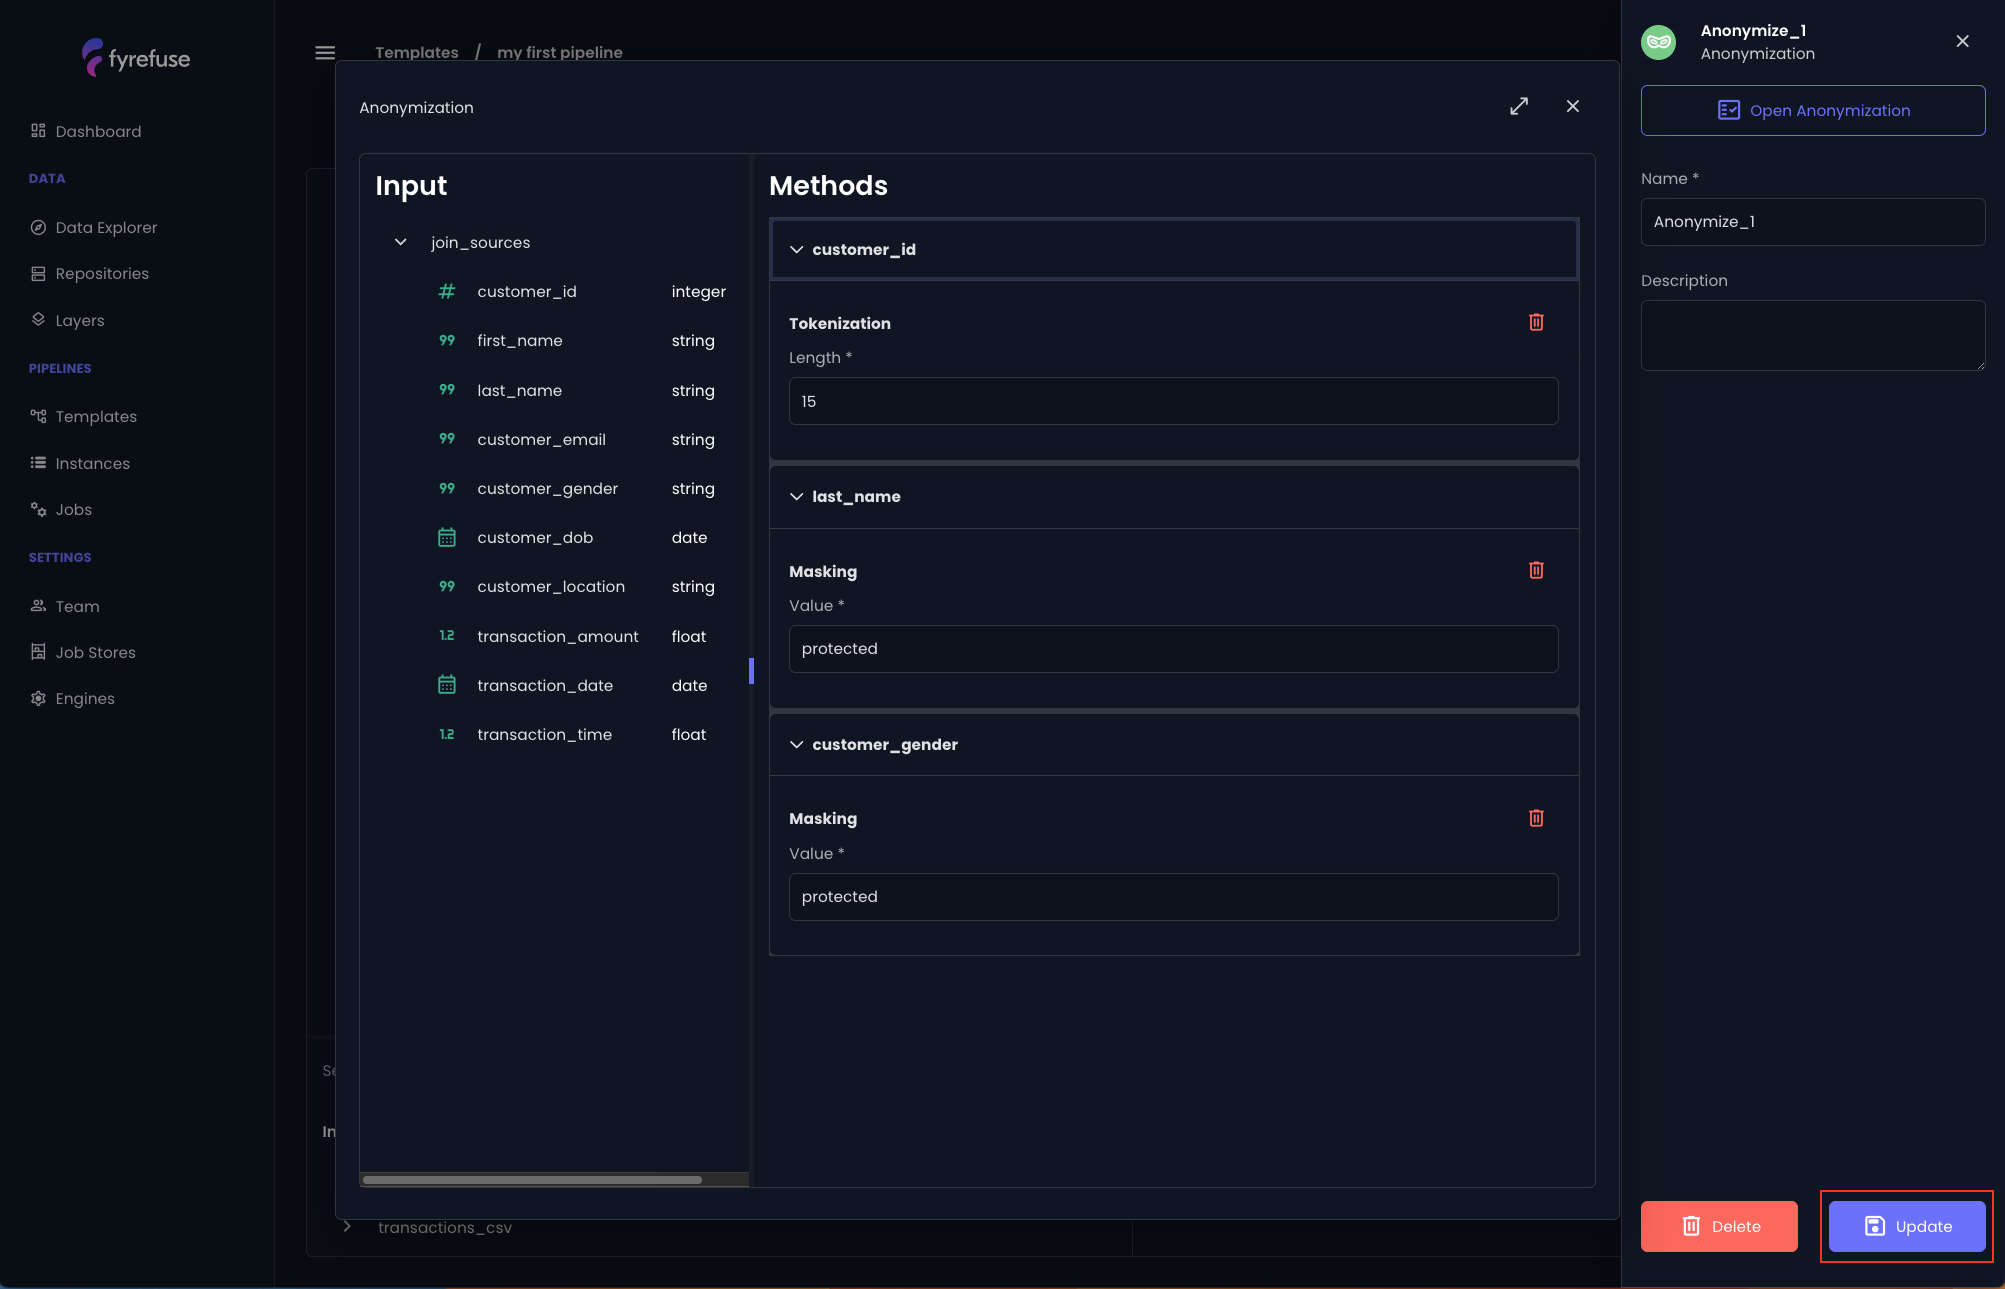
As the first example you can choose the customer_id, click on it and apply the “tokenization” method by clicking the small “+” on the right (below the length parameter).
Then apply the “Masking” method with value “protected” to the attributes “last_name” and “customer_gender”. The result should look like this.
Click the “Update” button on the bottom right.
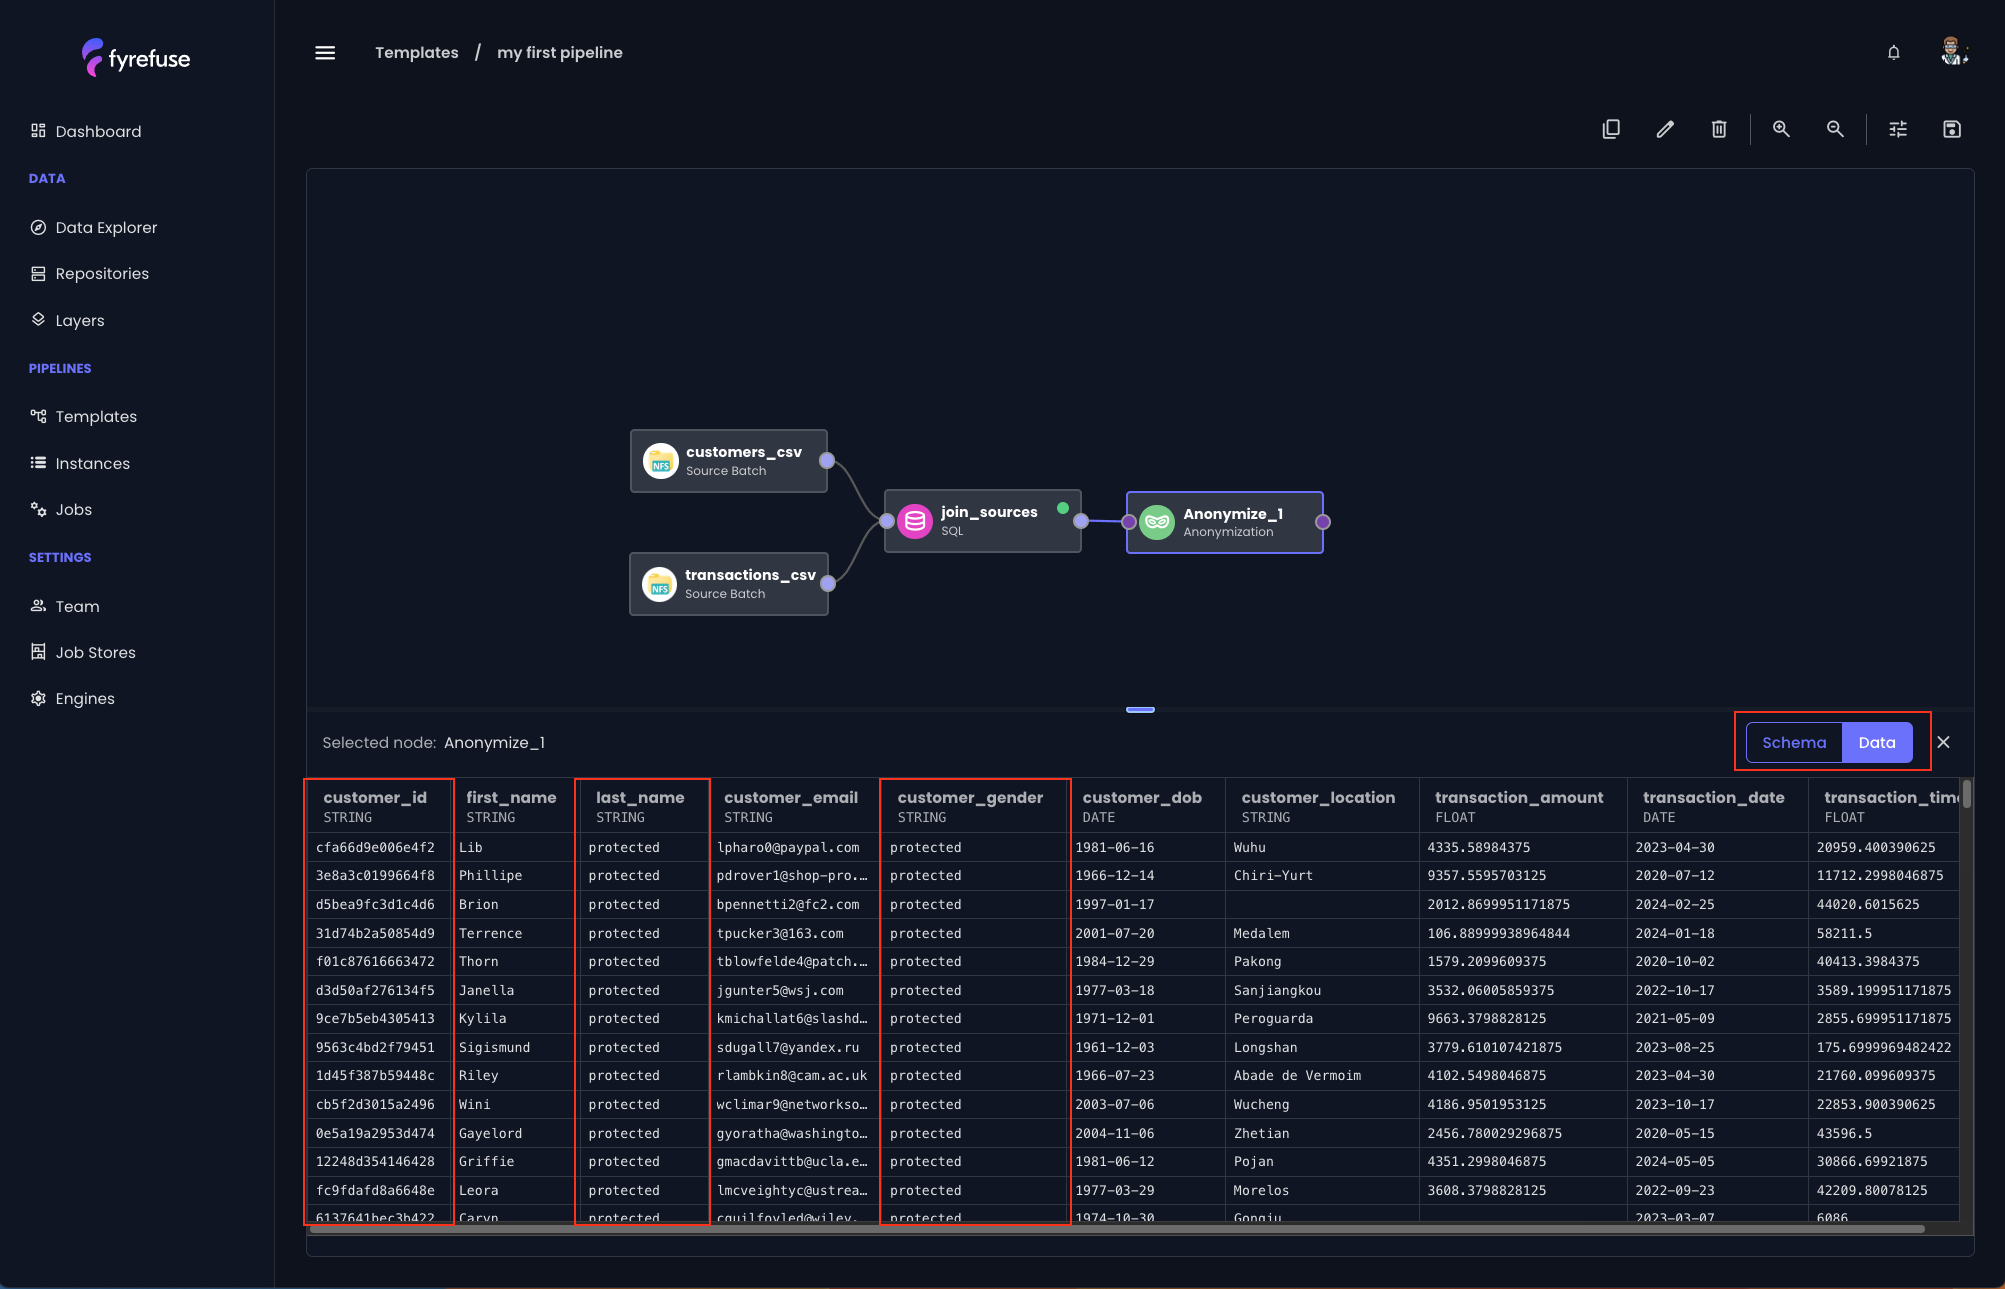
As a demonstration that everything has been set up correctly so far, change the switch to “Data” and drag the bottom section up.
This is the Fyrefuse Data Preview — a tool you’re bound to love, designed to save you valuable time during the pipeline design phase.
As its name suggests, it shows you a preview of what is happening in your pipeline flow. In this specific case, after selecting the anonymization job you will see the anonymization methods in action.
Validation job
We are almost there!
Now that we applied anonymization, the last thing to make sure is to provide clean data to the target. Let’s start by creating a new validation job (6) and connect it to the anonymization job. This job automatically creates a double branch in the pipeline flow that discriminates records that passed all the validation rules from the records that did not.
This automation can be really useful since it allows saving into two different locations the respective valid and invalid records.
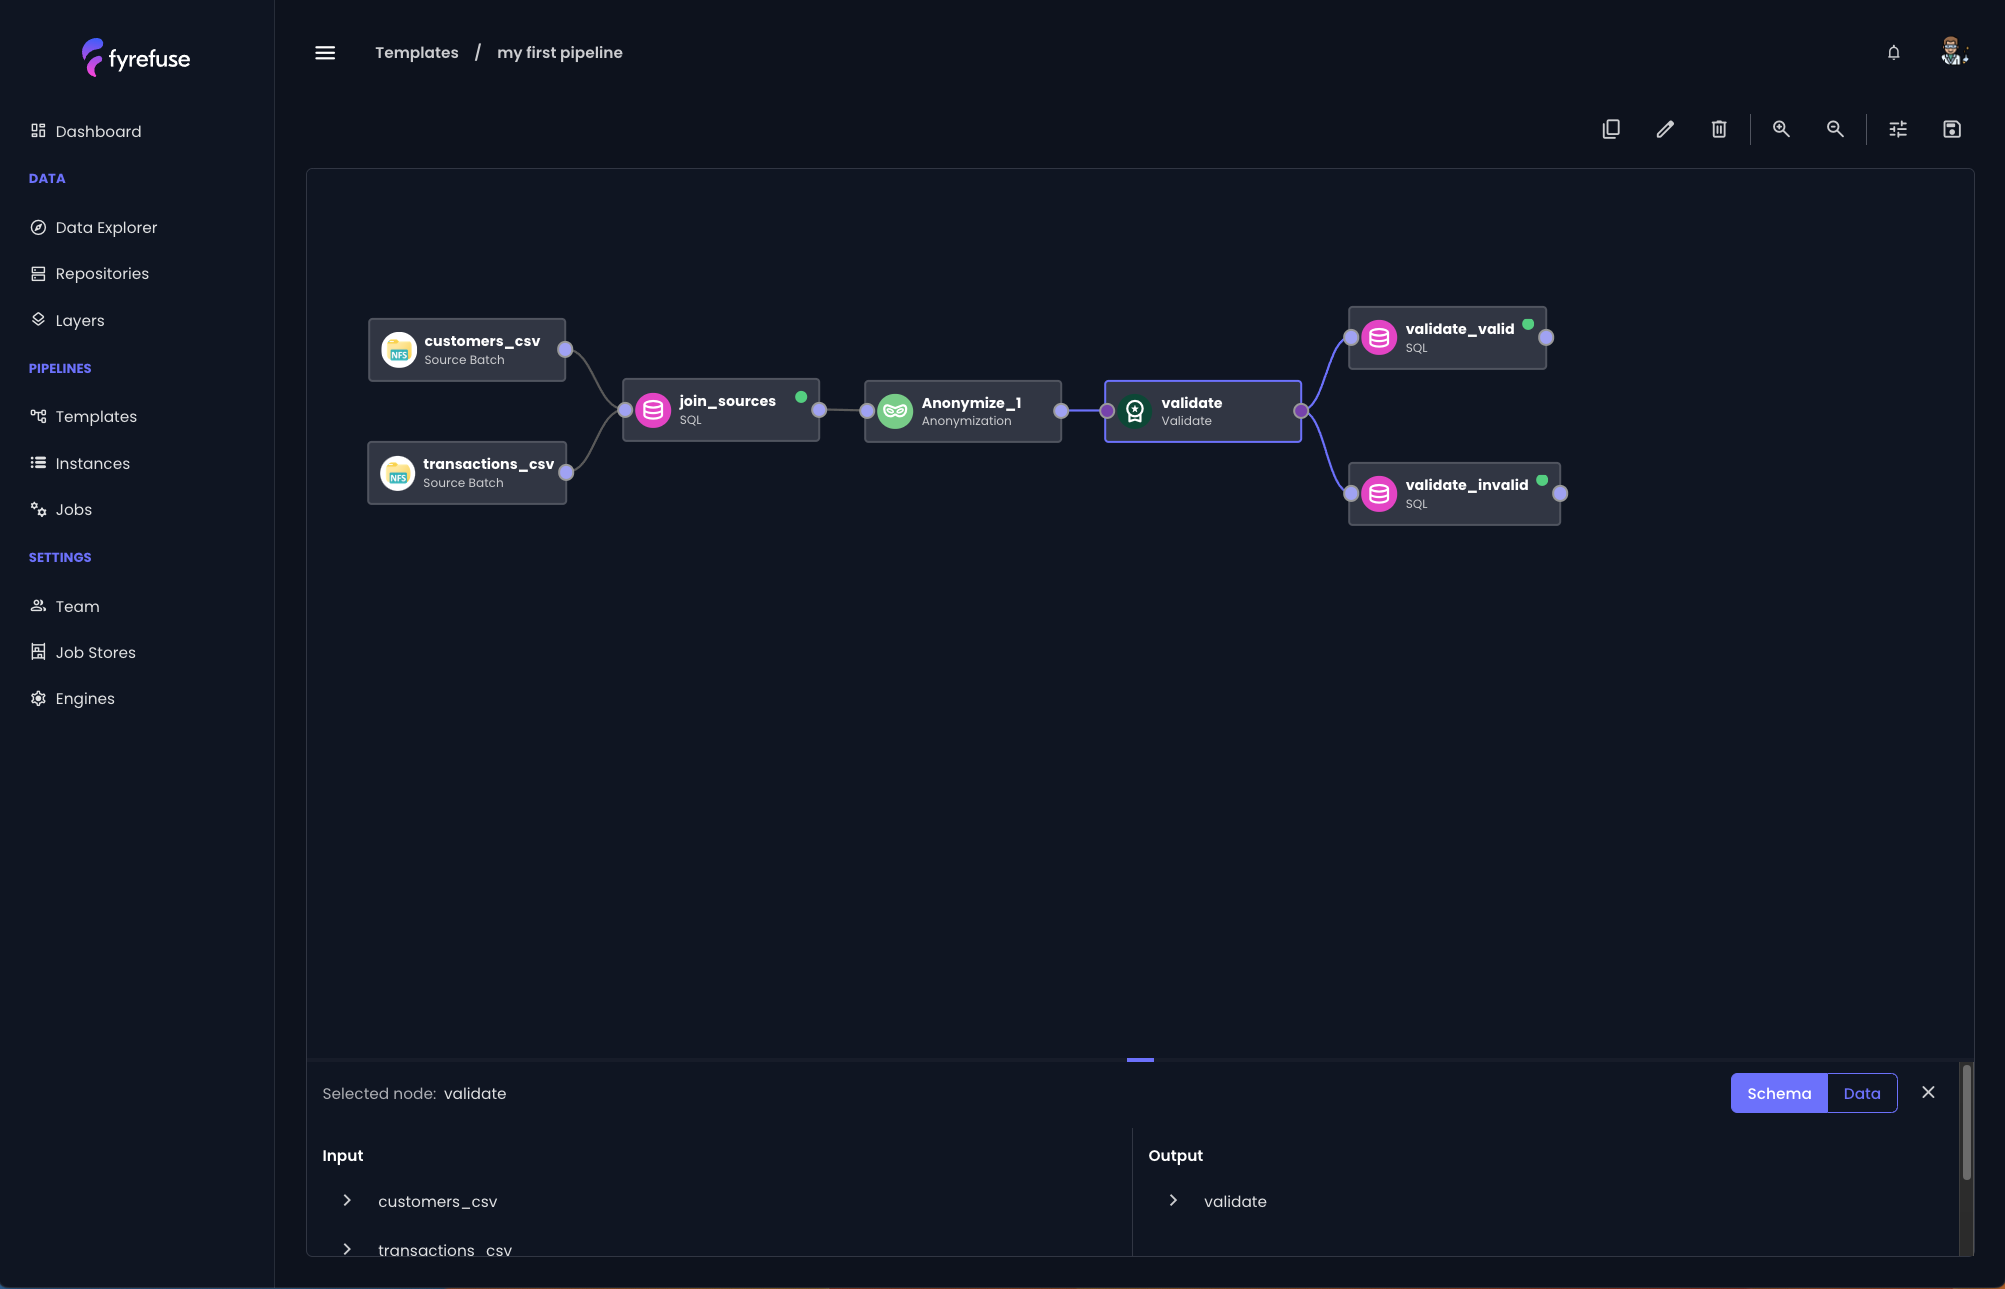
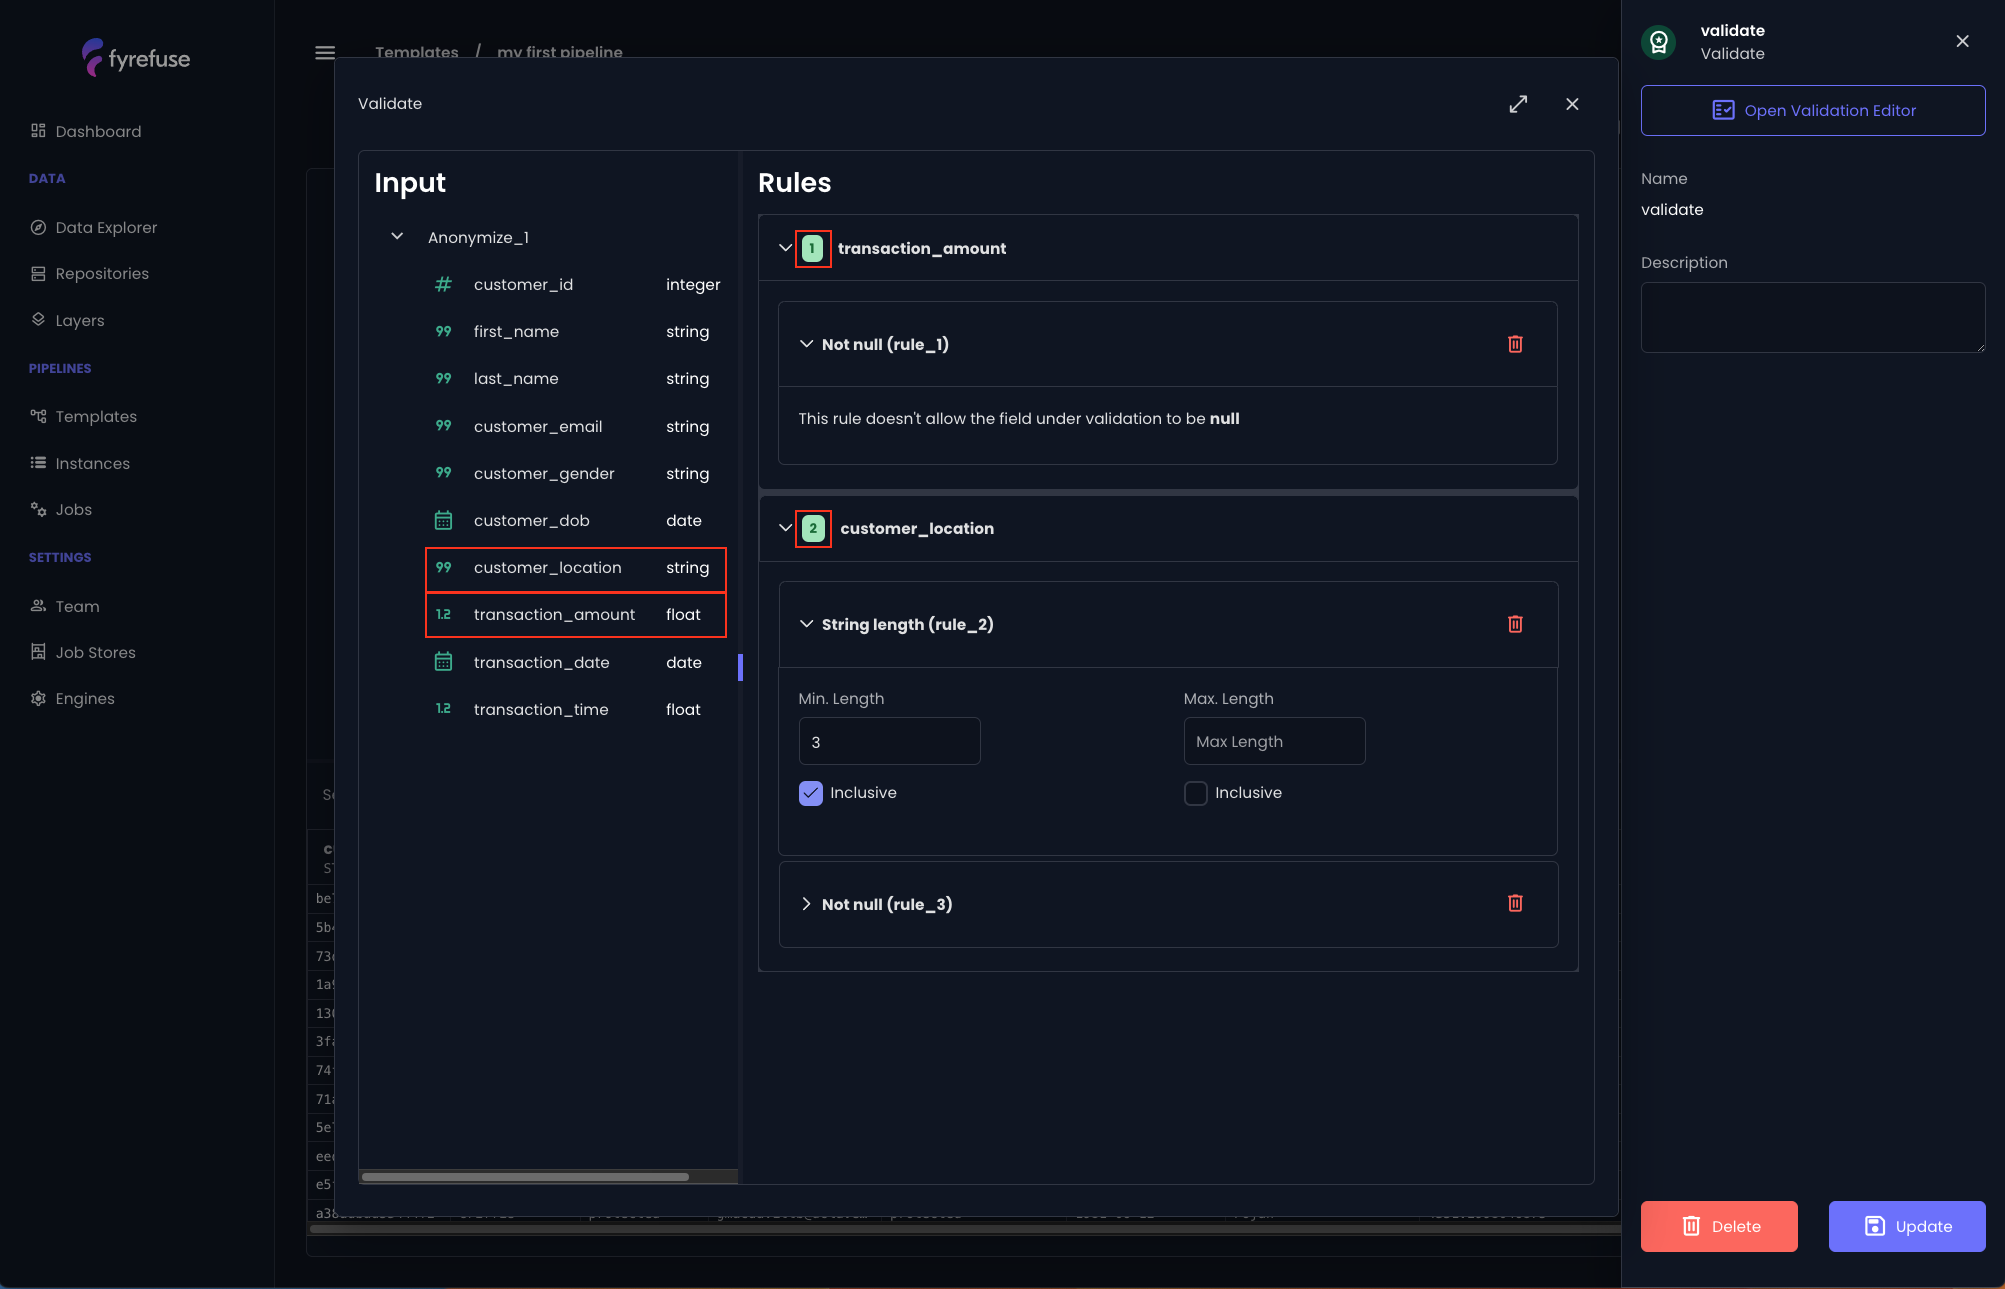
The process of applying validation rules closely follows the same approach as anonymization.
Here, we will enforce "not null" and "string length" constraints on the attributes customer_location and transaction_amount as demonstrated.
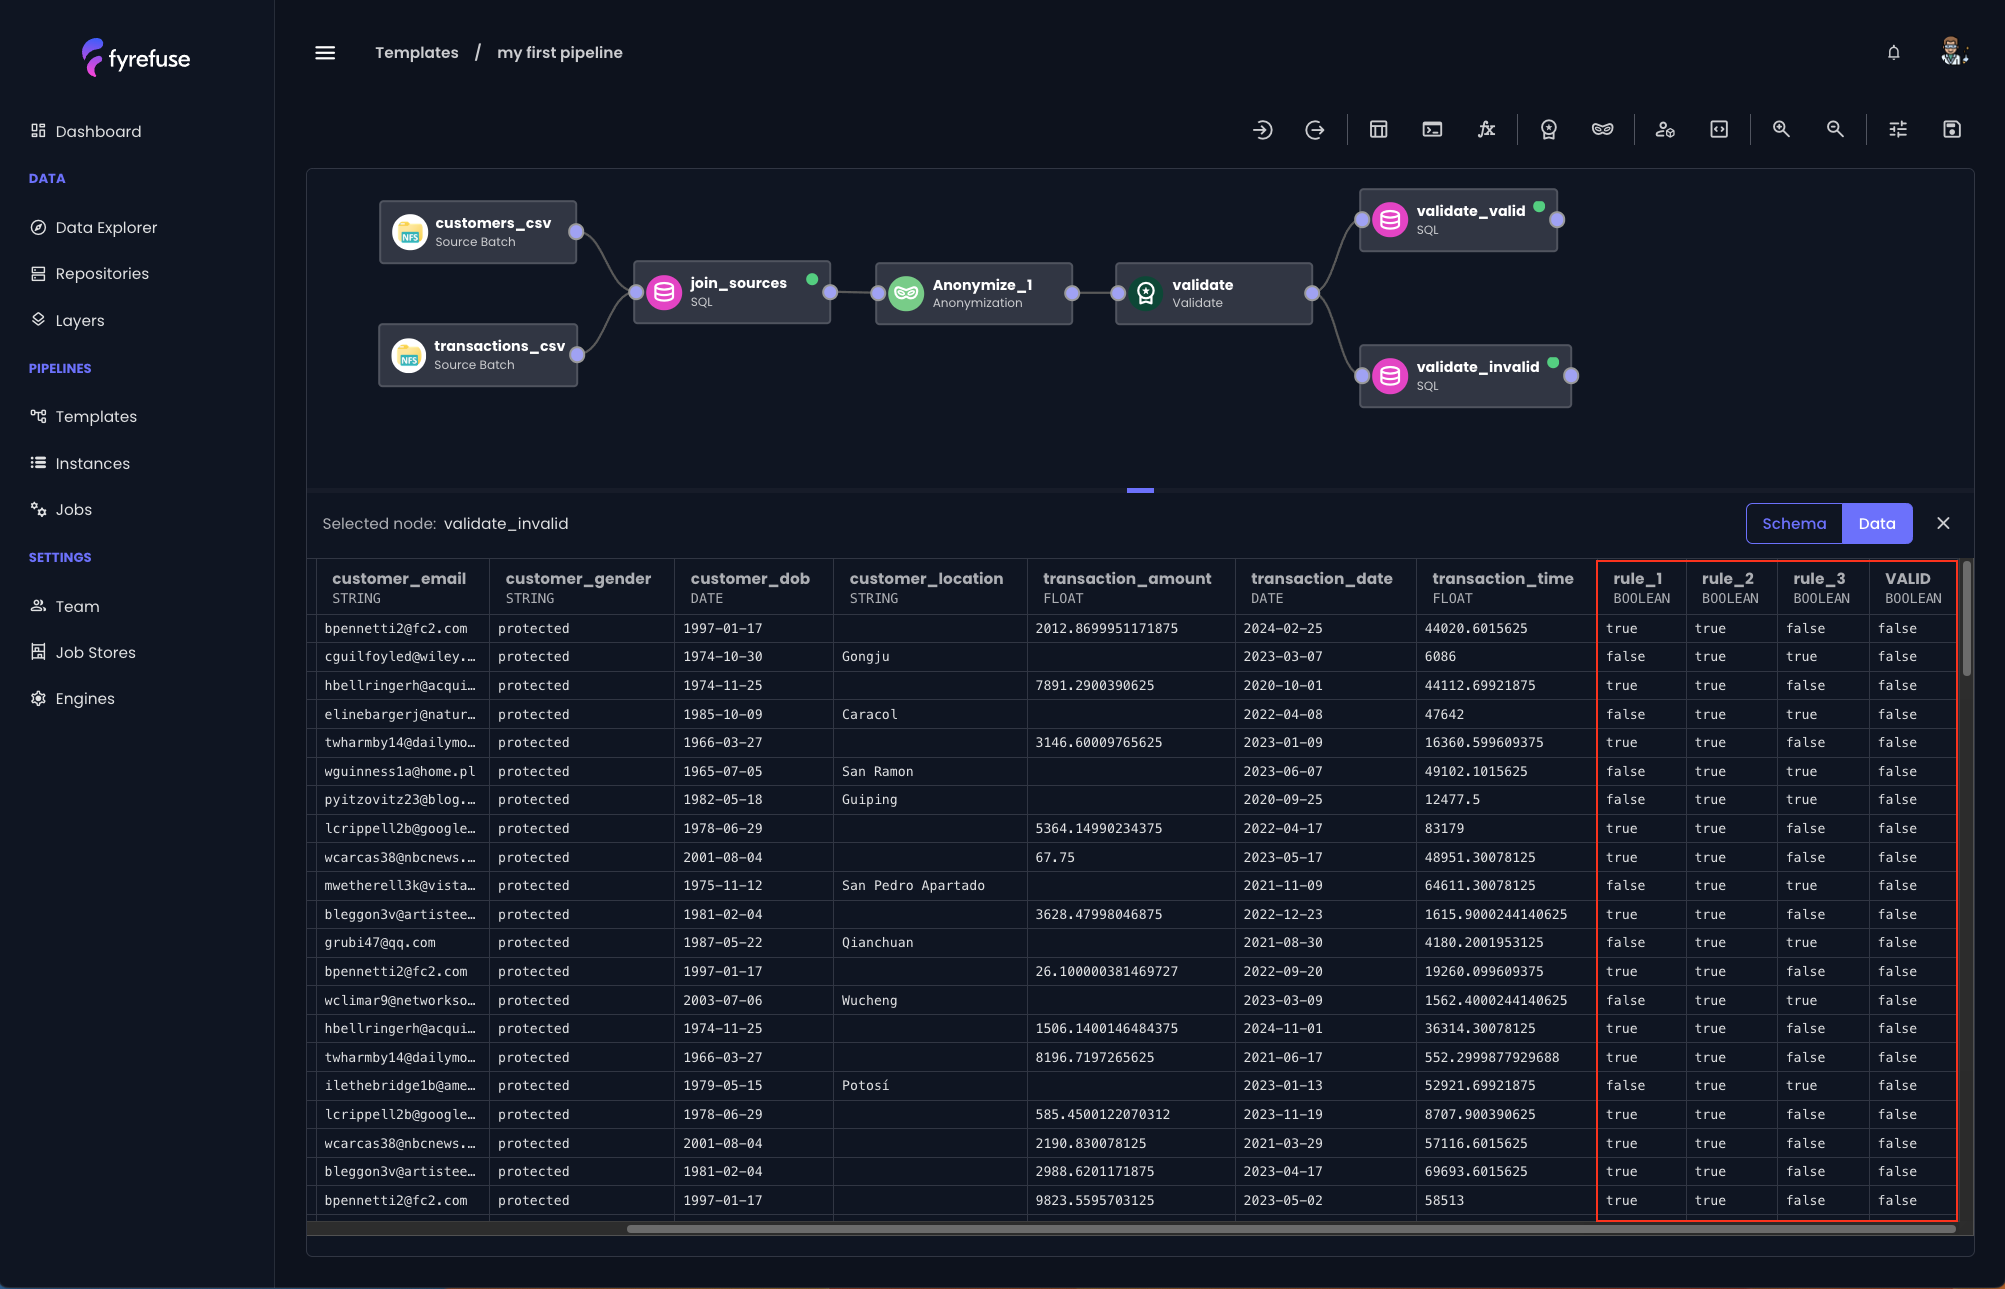
Only records that satisfy all three validation rules will be included in the valid dataset branch. Additionally, for each rule applied, a new boolean column is automatically added to the dataset, following the naming convention rule_{rule_id}, where {rule_id} is a sequential index.
To provide a clear overview, a green badge next to each attribute name indicates the number of validation rules defined for that attribute.
As a result of this processing job, only records that meet the following criteria will be marked as "valid":
- customer_location is not null and contains more than three letters.
- transaction_amount is not null
All other records will be excluded from the valid dataset and will follow the second branch.
Apply the changes with the “Update” button on the bottom right. Even in this case it is a good practice taking a look at the data preview to quickly verify that the validation rules are working as intended.
Create the target jobs
At this point you successfully completed the configuration of the data processing jobs. The last thing it remains to define is the destination of your data.
In Fyrefuse, sources and targets function as dual components, meaning they are defined and managed in exactly the same way. The key difference is that sources represent the starting point of the pipeline, while targets represent the end point.
For the sake of this pipeline, you will need two targets for both storing valid and invalid records.
If you remember at the beginning of this guide we created a new layer my_first_layer containing two tables curated_records and invalid_records. These are exactly the ones that we are going to bind to the target jobs.
Just as you did for the sources, create two target jobs by clicking on the “Target” icon (2) in the toolbar and select “Batch”. Connect them to the respective SQL job, then bind them with the respective table.
Note: The only difference from the sources configuration is that instead of binding to a repository entity, you’ll be binding a table from a layer.
To do so, simply select the “Layers” tab after choosing “Select target”.
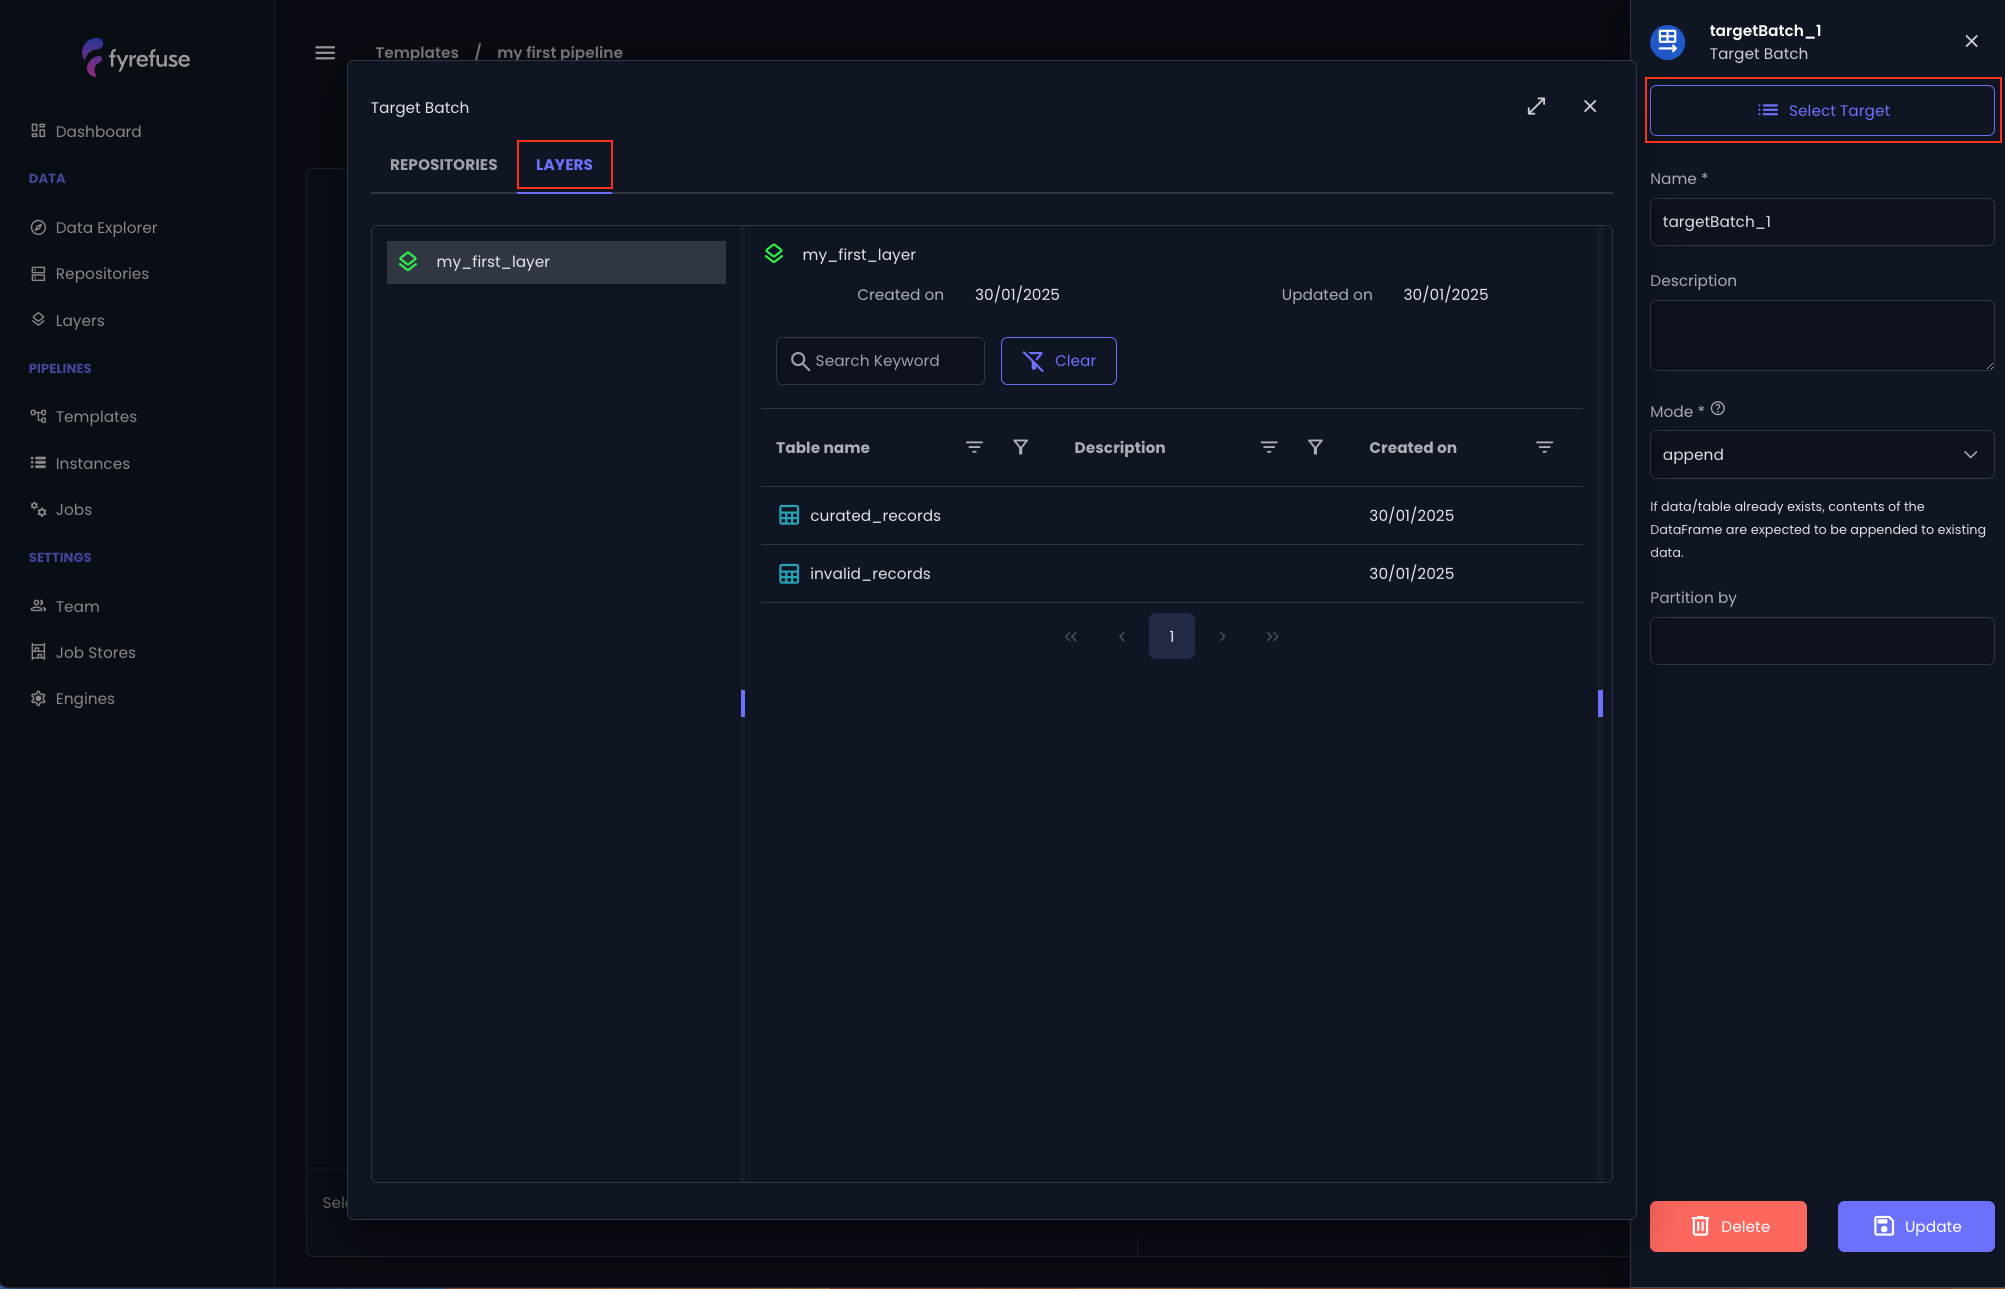
At the end, the final result should look as follows.
Remember to save the pipeline with the top right button!
